OneKey Pro Wallet Security: Review & Comprehensive Guide
It offers a large touchscreen display, robust security measures, a wide array of features, and support for over 5,000 coins.
Overview, Supported Coins & Purpose
Review summary:
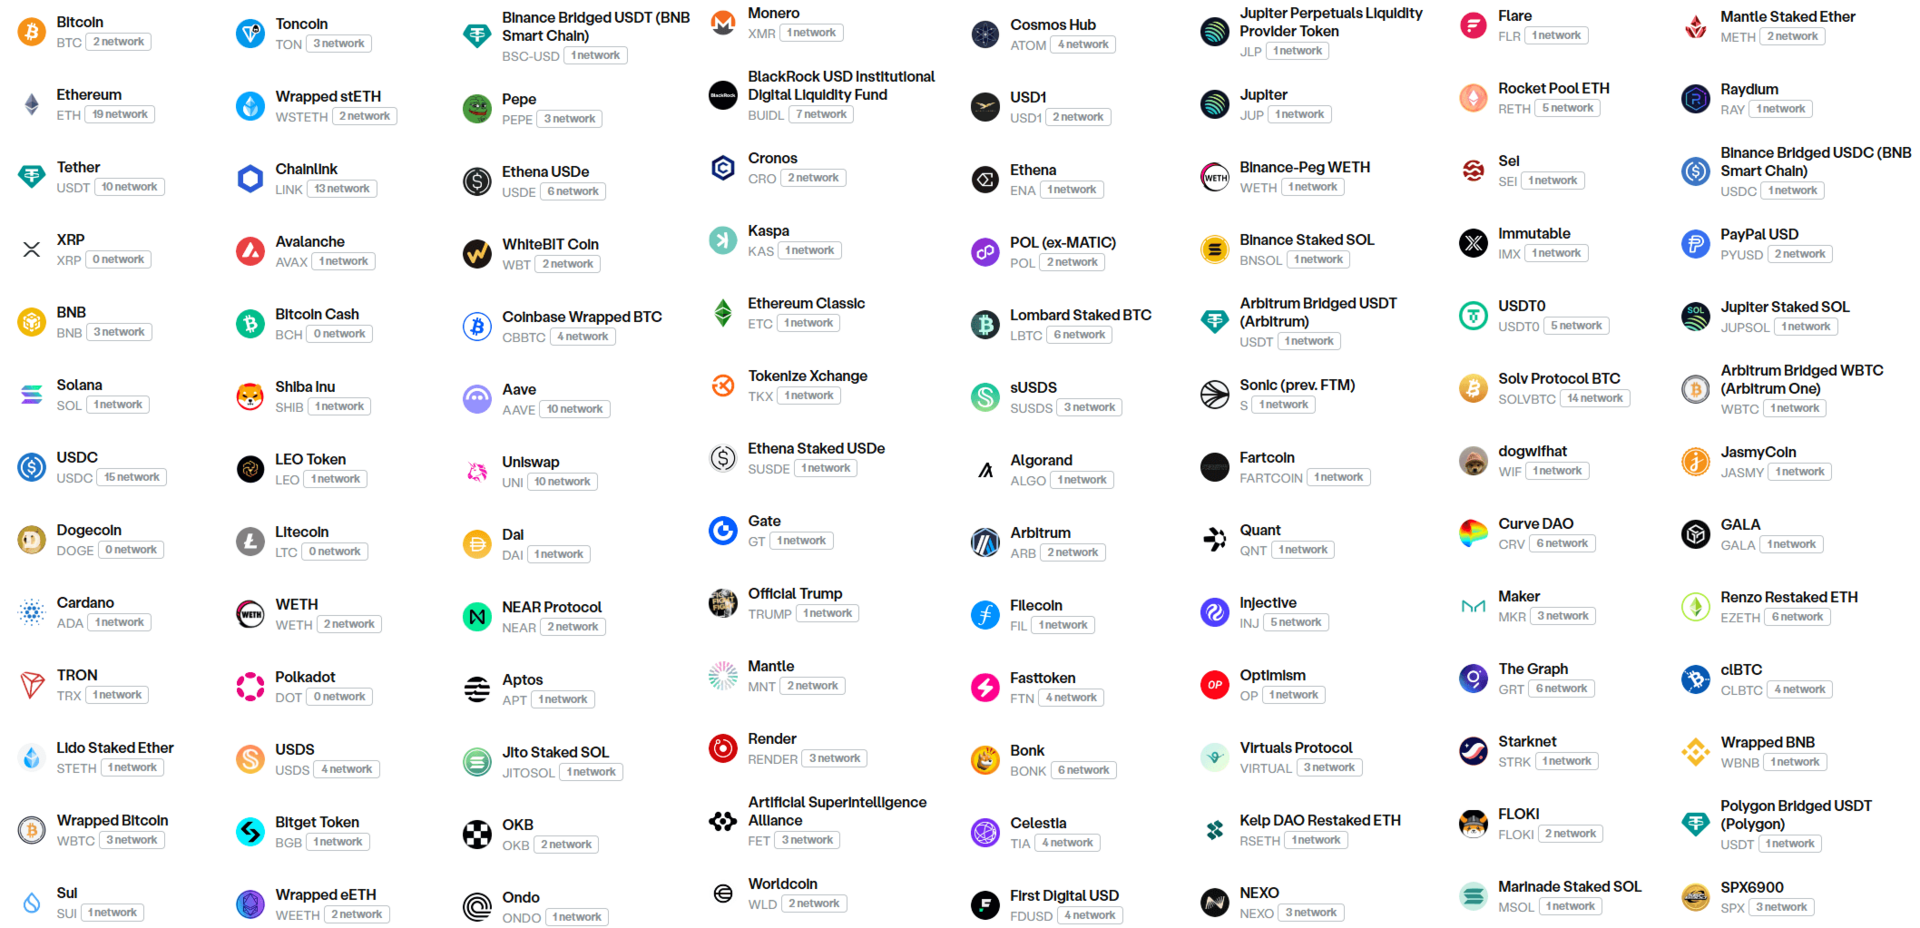
- Support: over 30,000 coins, NFTs, and 100 different blockchains.
- Security: EAL6+ certified chip, offline transaction signing, PIN code, and passphrase for hidden wallets.
- Connectivity: Bluetooth, USB, NFC, or QR codes for transactions.
- Smartphone-like: touchscreen, fingerprint unlock, and wireless charging.
- Features: staking, portfolio management, dApp browser via companion app. Can also be used for website login instead of passwords (FIDO technology).
- Settings: manual fee configuration, integration with mobile app, browser extension, or desktop software.
Let’s dive deeper into the wallet so you can see its pros and cons. Yes, there are some drawbacks too.
OneKey Pro is a cryptocurrency hardware wallet packed with features: a large touchscreen display, fingerprint sensor, Bluetooth, wireless charging, and even a built-in camera.
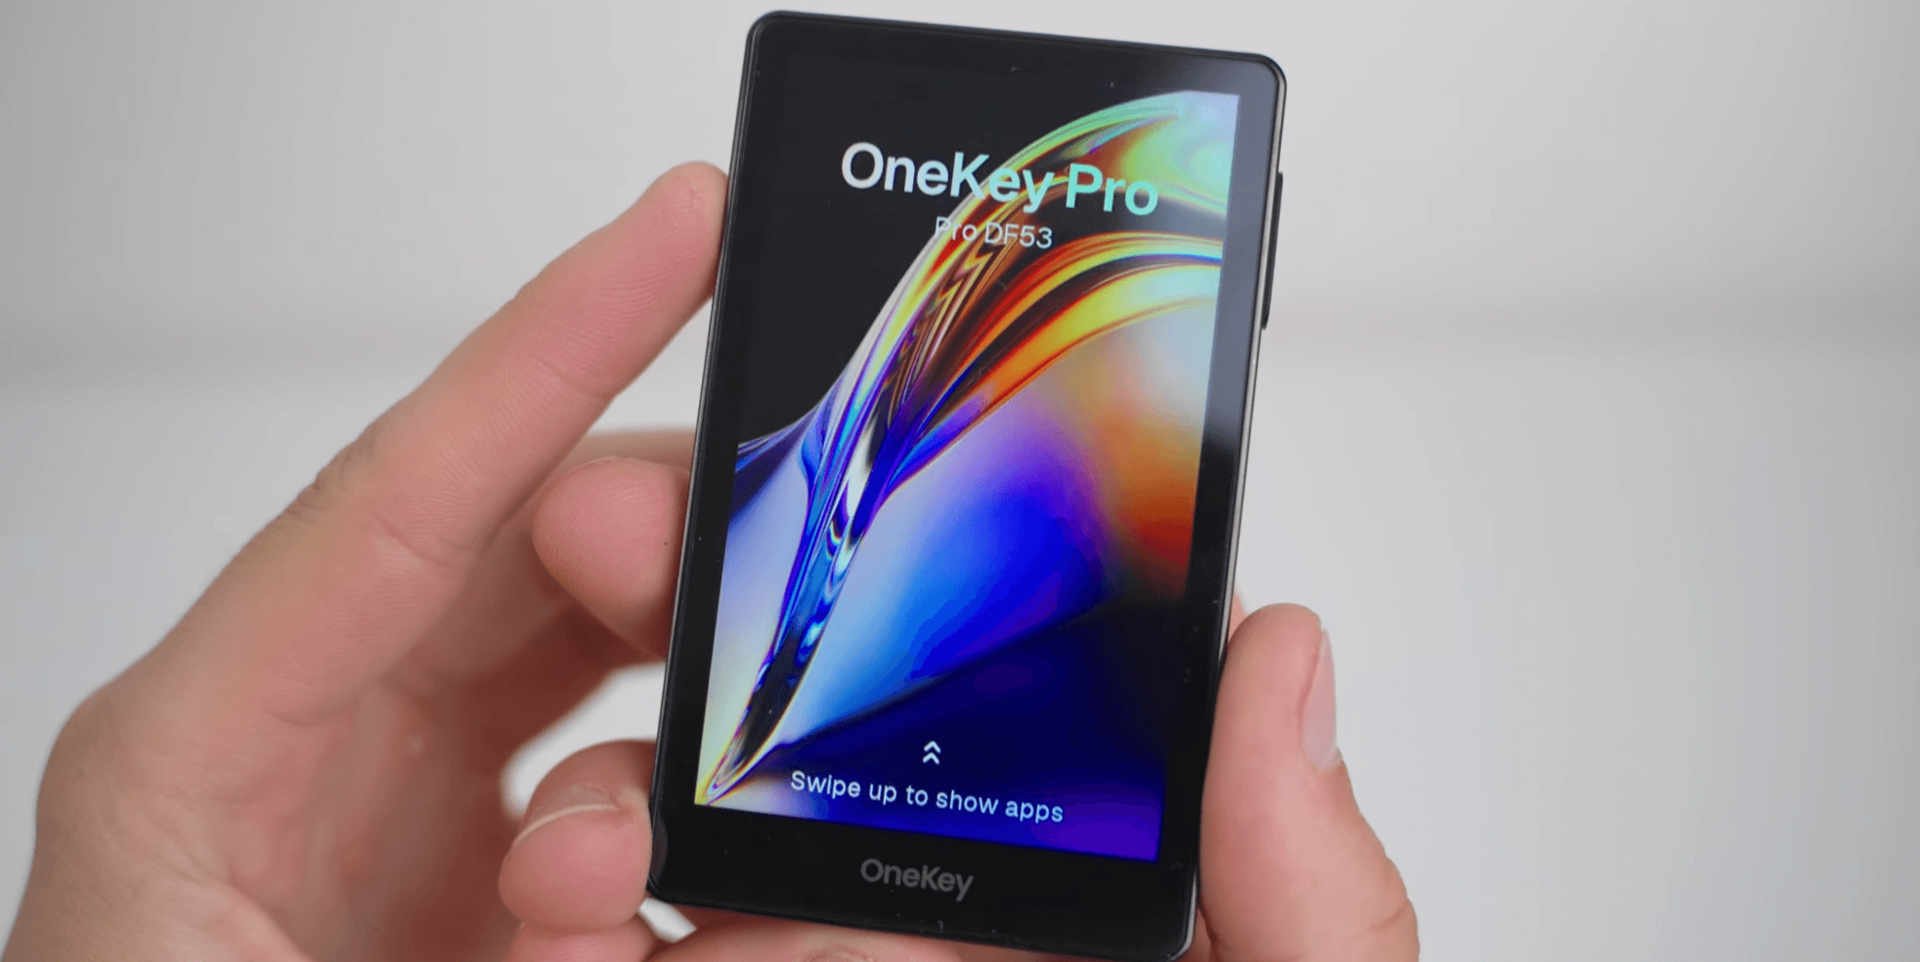
Right off the bat, the device supports over 30,000 assets across 100 blockchains, including all the major ones (Bitcoin, Ethereum, Tether, XRP, BNB, Solana, USDC, Doge, etc.) and every EVM-compatible network.
And here’s the downside – flagship-level support comes at a price. This model costs at least $280. By comparison, you can get a Trezor Model One for just $50, though it won’t support XRP, SOL, ADA, or XMR.
Box contents: the device with tamper-evident seals, a USB-A to USB-C cable, and user manuals. Also included are three seed phrase backup cards with security instructions in multiple languages.
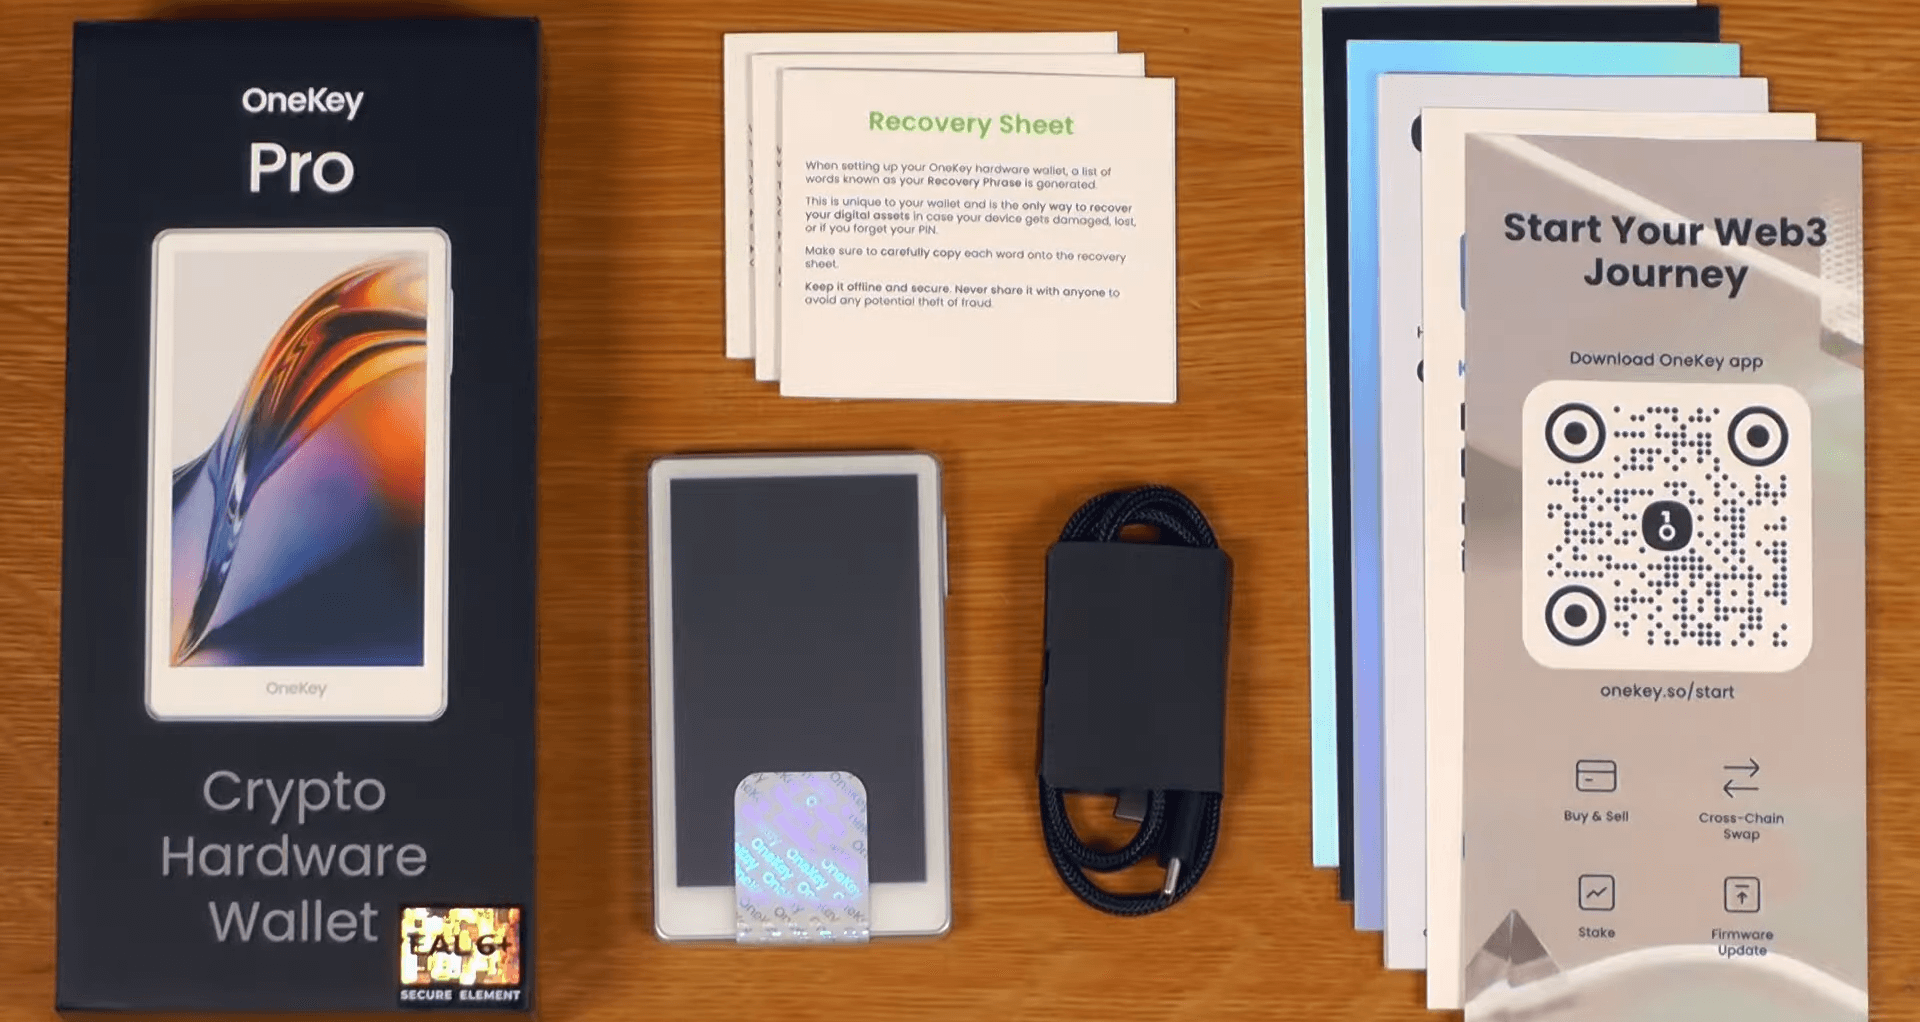
The device itself is wrapped in several tamper-evident seals.
Despite packing so many technologies, the device remains compact: 90 × 54 mm, just 8 mm thick, and weighing only 65 g. Compared to the OneKey Classic (3 mm, 20.5 g), the PRO version is less pocketable.
Compared to the OneKey Classic 1S, the PRO is 3 mm thicker but gains a host of new capabilities.
Security & Capabilities
The first aspect to examine is security.
Core security features:
- Offline transaction signing – data is transmitted only via QR code scans, eliminating remote attack vectors (USB and Bluetooth can be disabled). This is configurable in settings.
- EAL6+ certified secure chip – private keys stay inside a tamper-resistant secure element.
- PIN code with auto-reset – after 9 failed attempts, the device wipes itself to factory settings.
Security often comes at the expense of convenience—think SafePal’s slow confirmations or Ledger’s tiny PIN buttons. Let’s see if OneKey Pro strikes a better balance.
Everyday convenience features:
- Fingerprint sensor – confirm transactions with your fingerprint instead of entering a PIN. Faster and keeps your PIN hidden.
- On-screen address verification – the large display lets you review the full transaction details (addresses, amounts, etc.) at a glance.
Beyond the basics, there’s an advanced layer of protection.
Advanced security:
- 25th word (passphrase) – add an extra passphrase to your 12/24-word seed, so even if someone gets your seed, they can’t access your funds without the passphrase.
- Firmware authenticity check – every connection verifies the wallet’s firmware signature to ensure it’s genuine.
- Open source – community auditing eliminates hidden vulnerabilities.
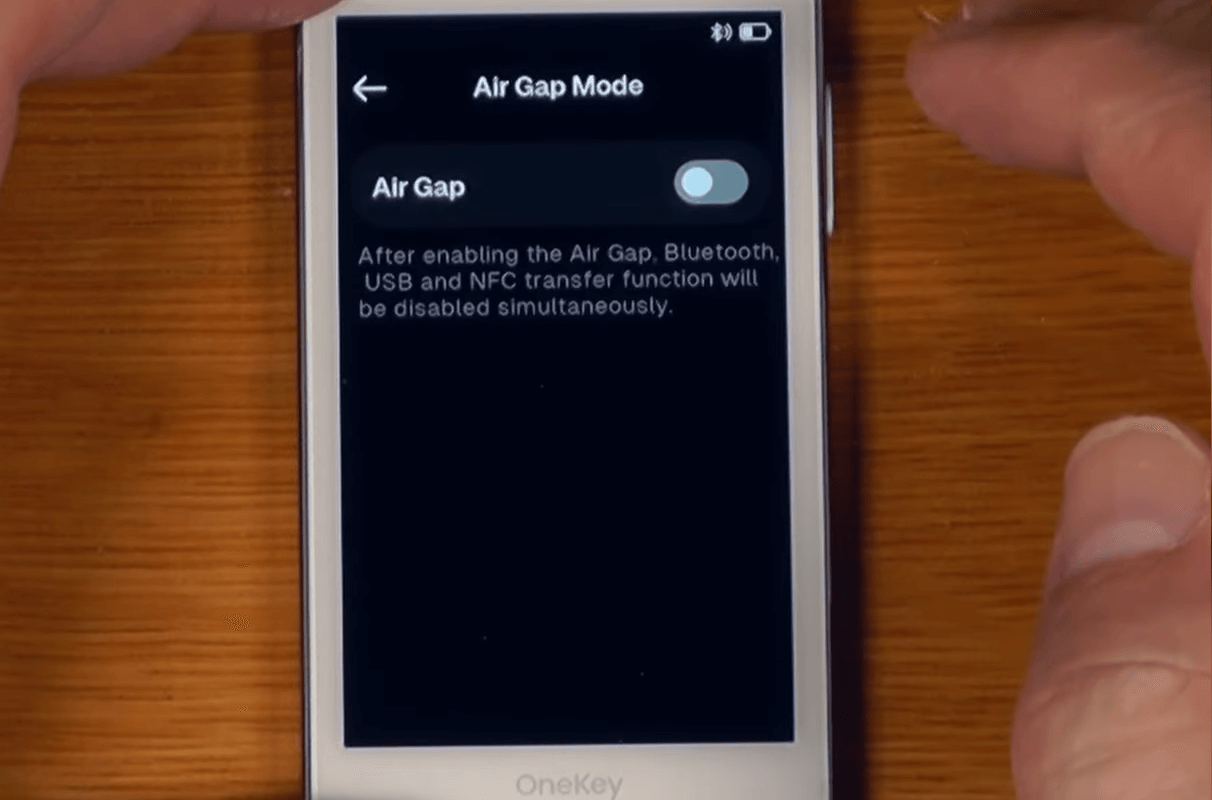
By disabling USB/Bluetooth, the device enters full air-gap mode, completely isolating it from networks and external devices, effectively nullifying remote attacks.
The wallet pairs with the OneKey Mobile App or the PC version.
When used with the app, you unlock these additional features:
Economic functions:
- Built‑in staking, portfolio management & dApp browser – all in one interface. No need to juggle exchanges.
- Integrated swap – exchange tokens directly in-app without third parties.
- Multi‑chain support – switch between networks seamlessly without extra apps or delays.
- Customizable fees – choose
Low/Normal/Highor set your own priority to save or speed up transactions. - Fast and inexpensive transactions via Lightning Network.
Read our separate review of the OneKey Mobile App.
Next, let’s test the wallet in practice by setting it up safely and connecting it to the mobile or desktop app.
Setup & Wallet Creation
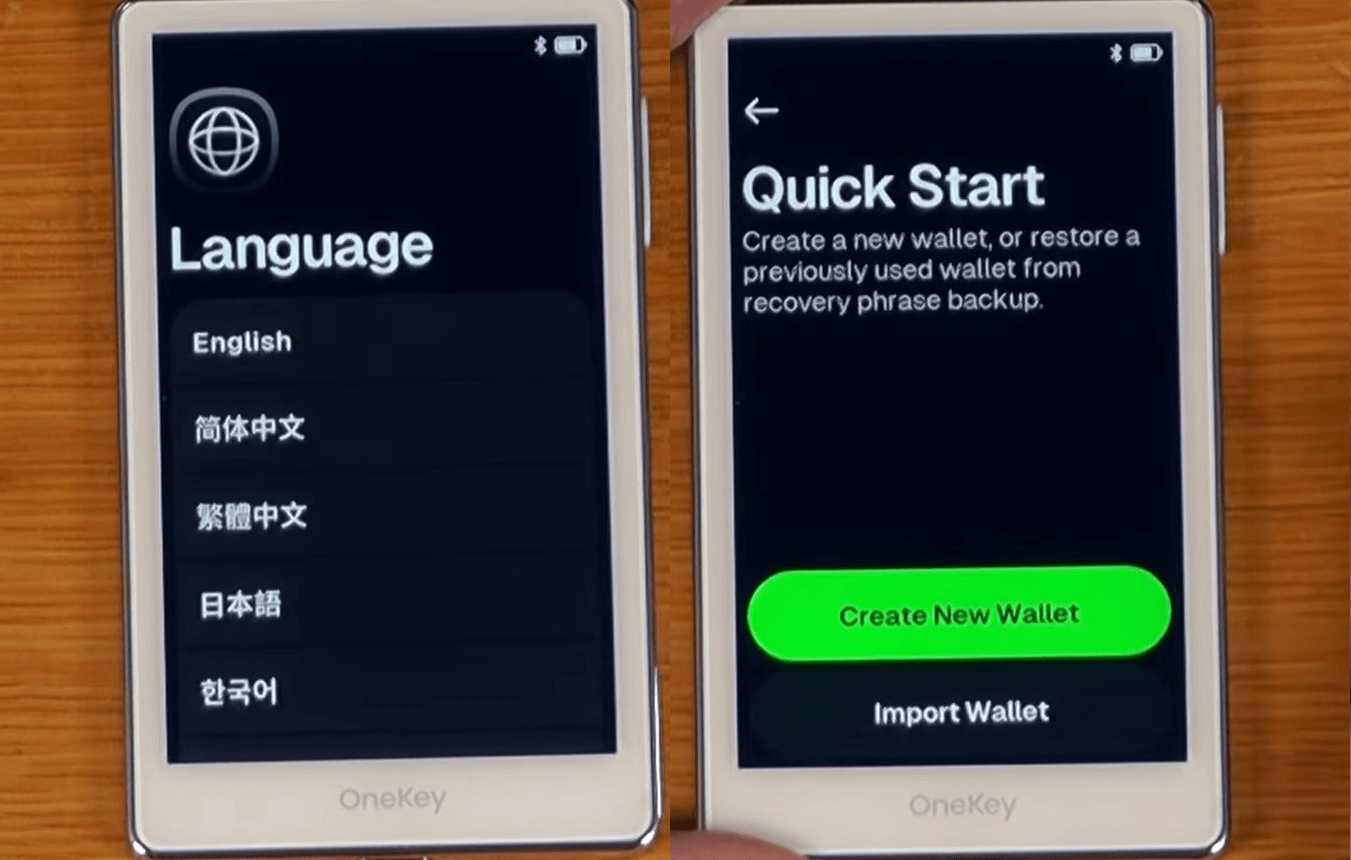
Setup boils down to choosing a language, generating your seed phrase, setting a PIN, and registering your fingerprint. Finally, you’ll pair with the companion app.
First, select your preferred language, then tap Create New Wallet.
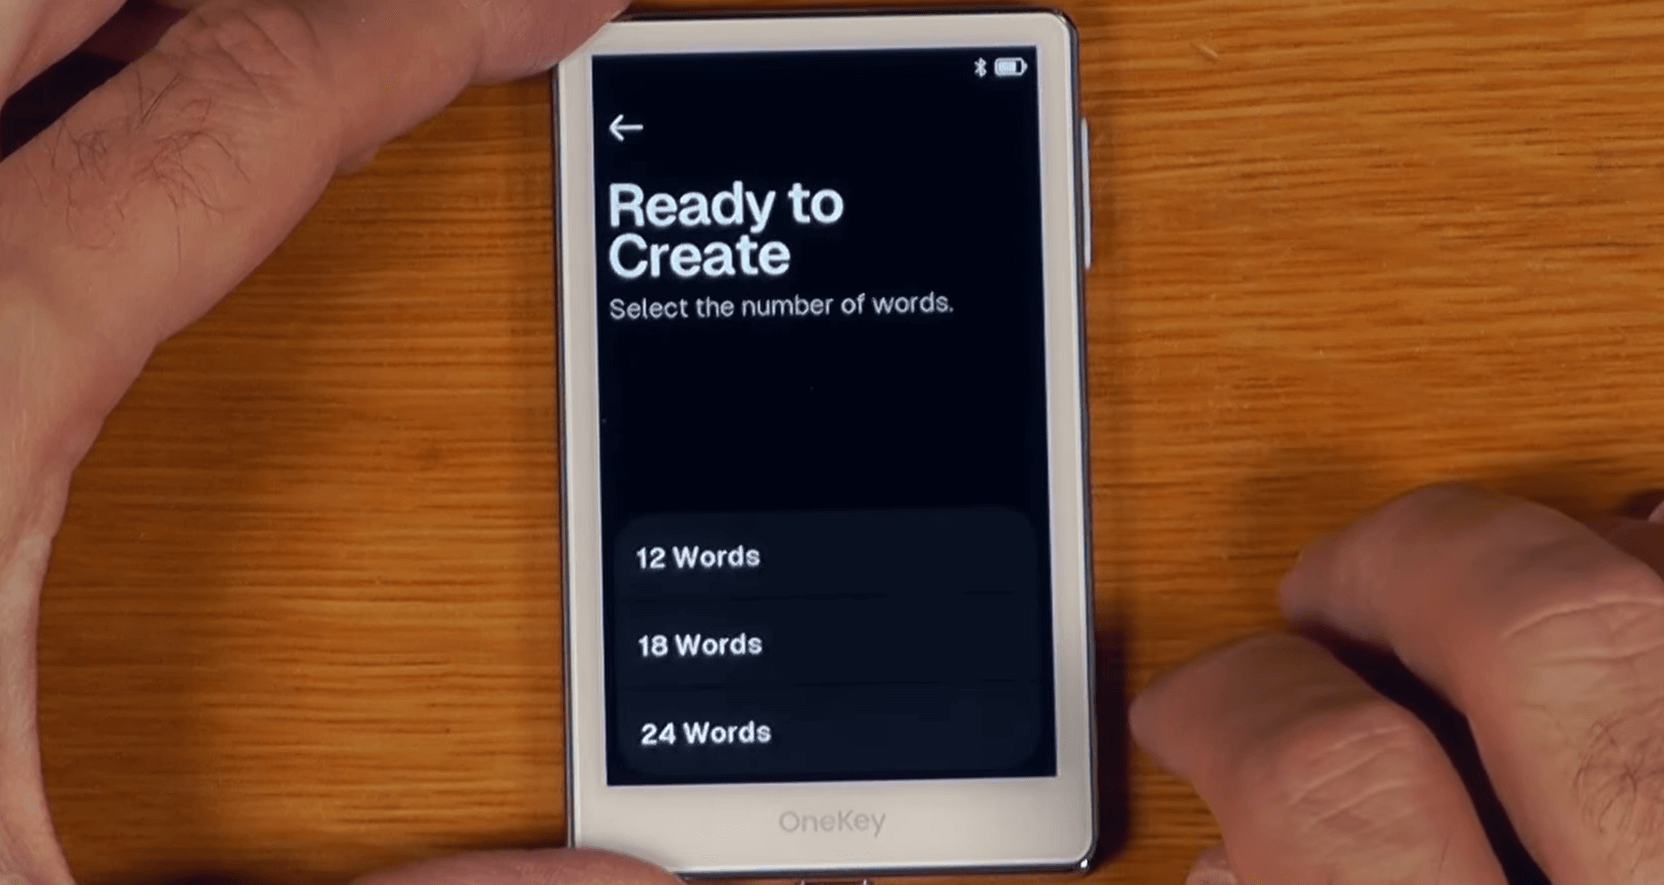
The device generates a random private key too long to memorize, converting it into a human‑readable list of words—your seed phrase.
We recommend choosing a 24‑word seed for stronger backup security.
Then press Continue.
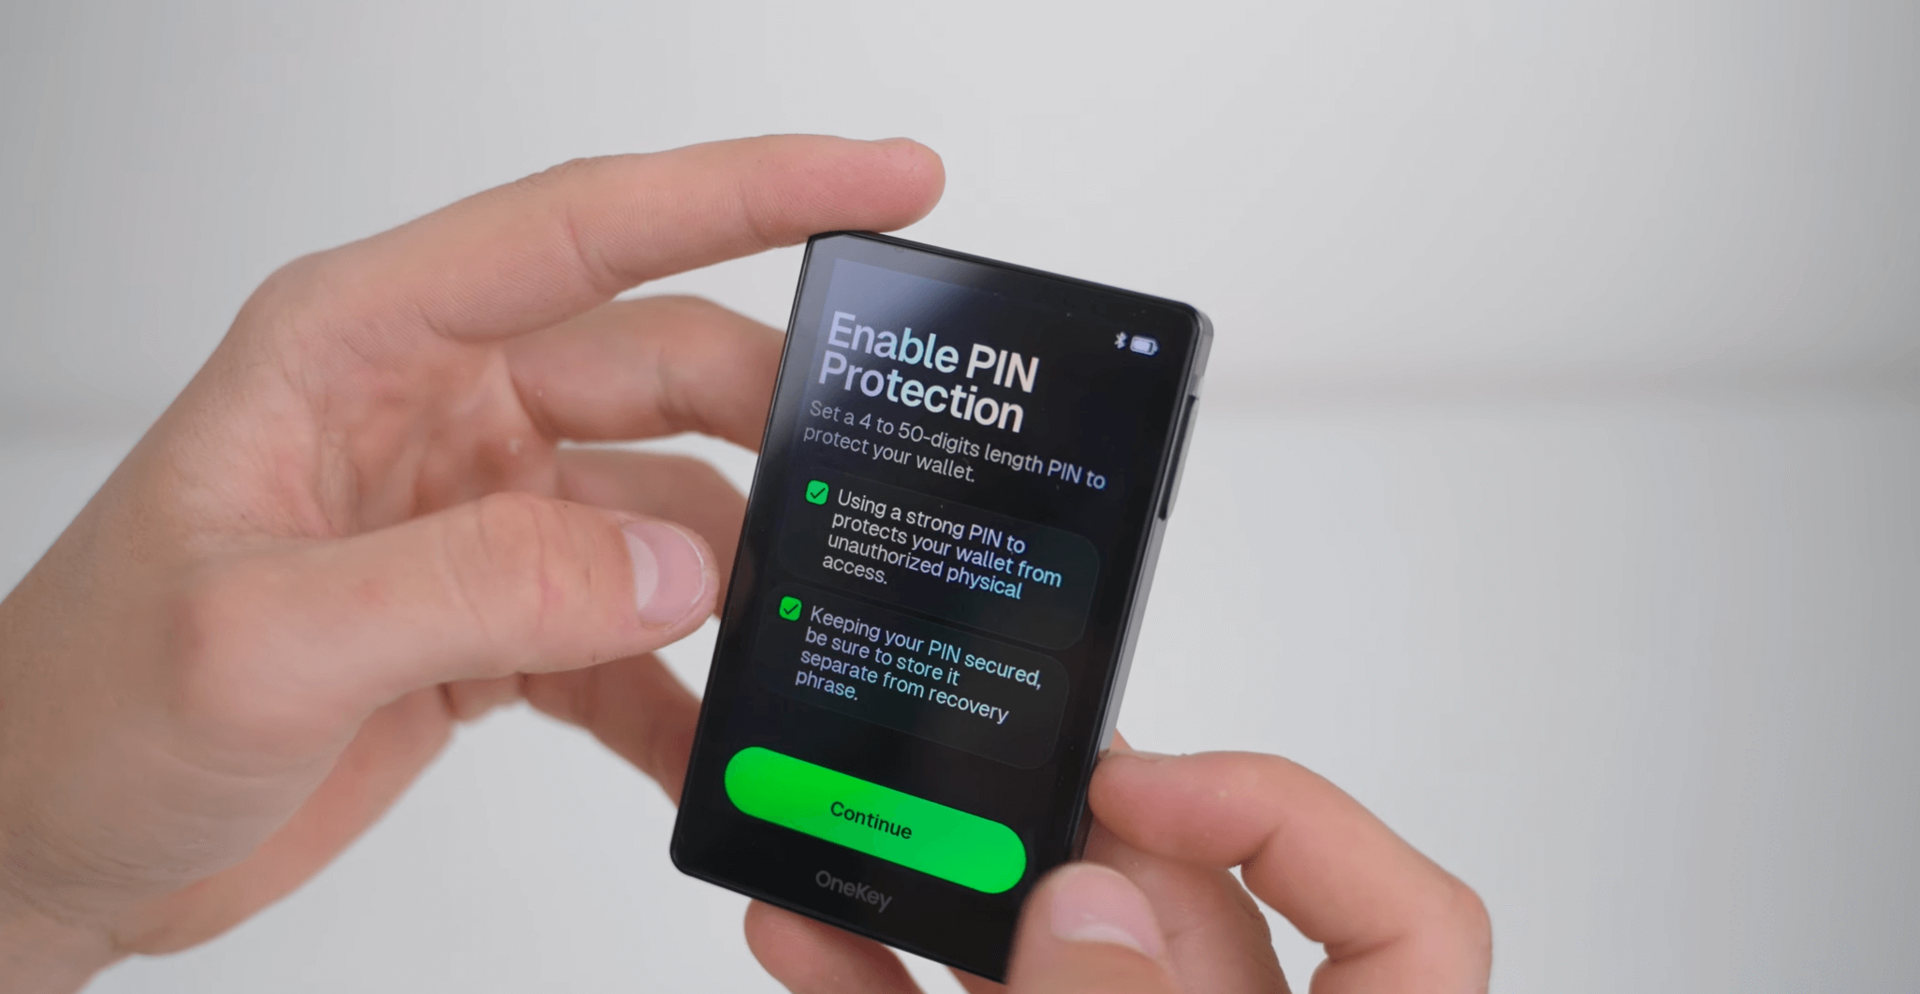
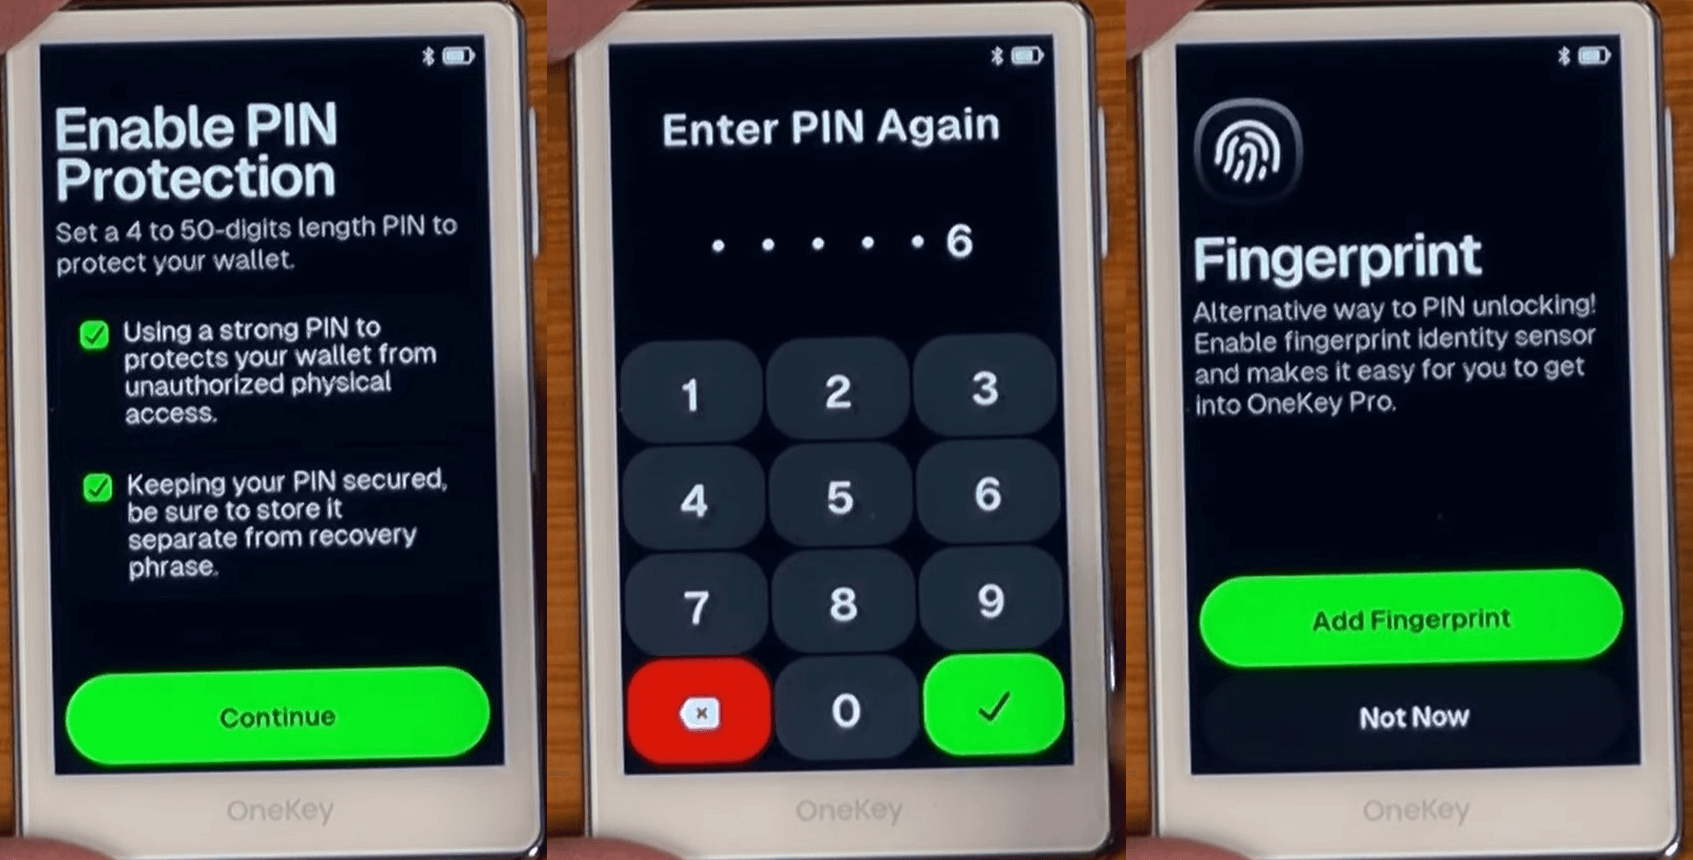
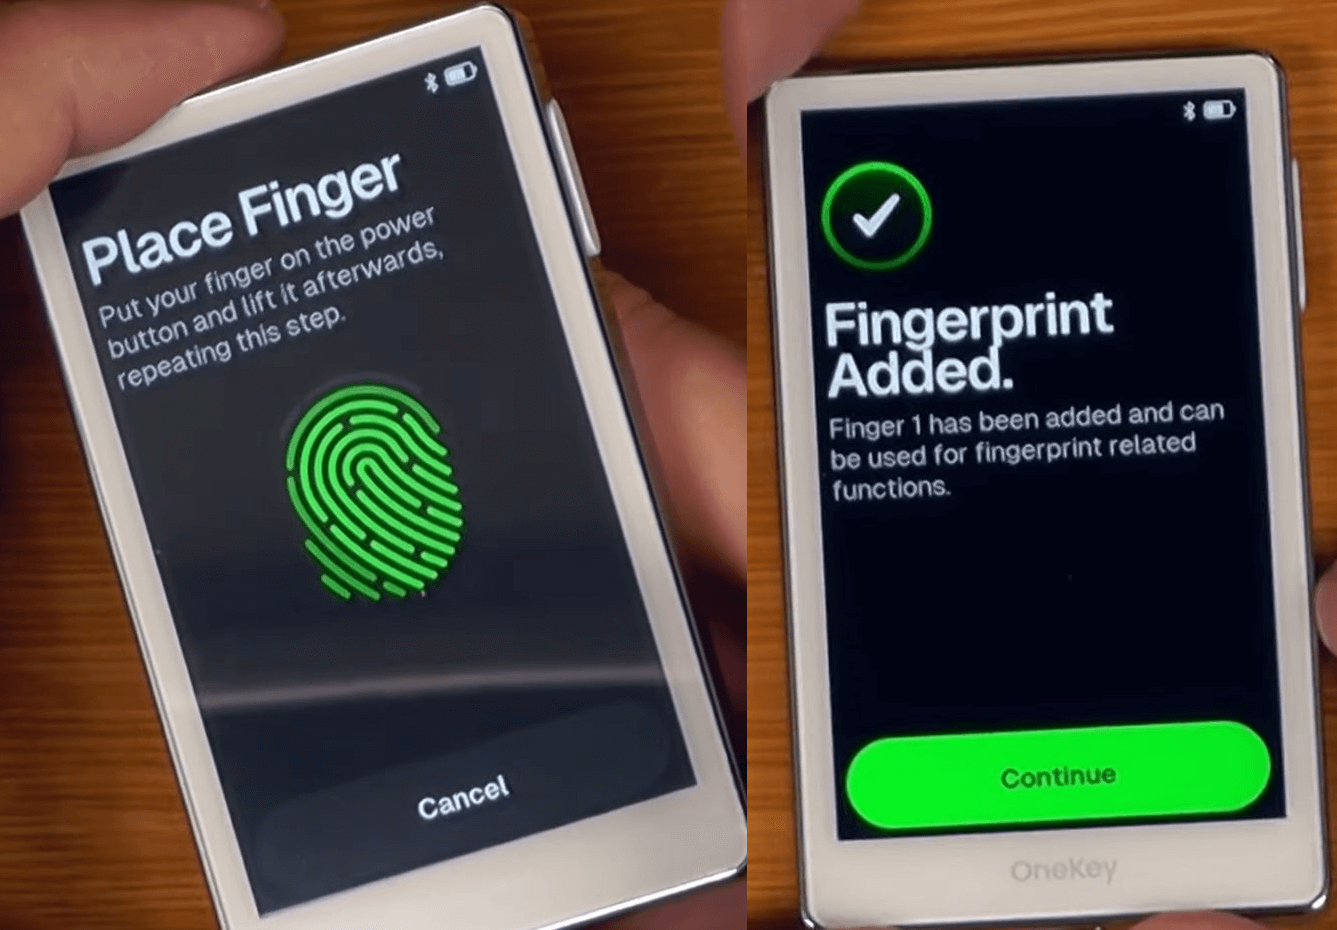
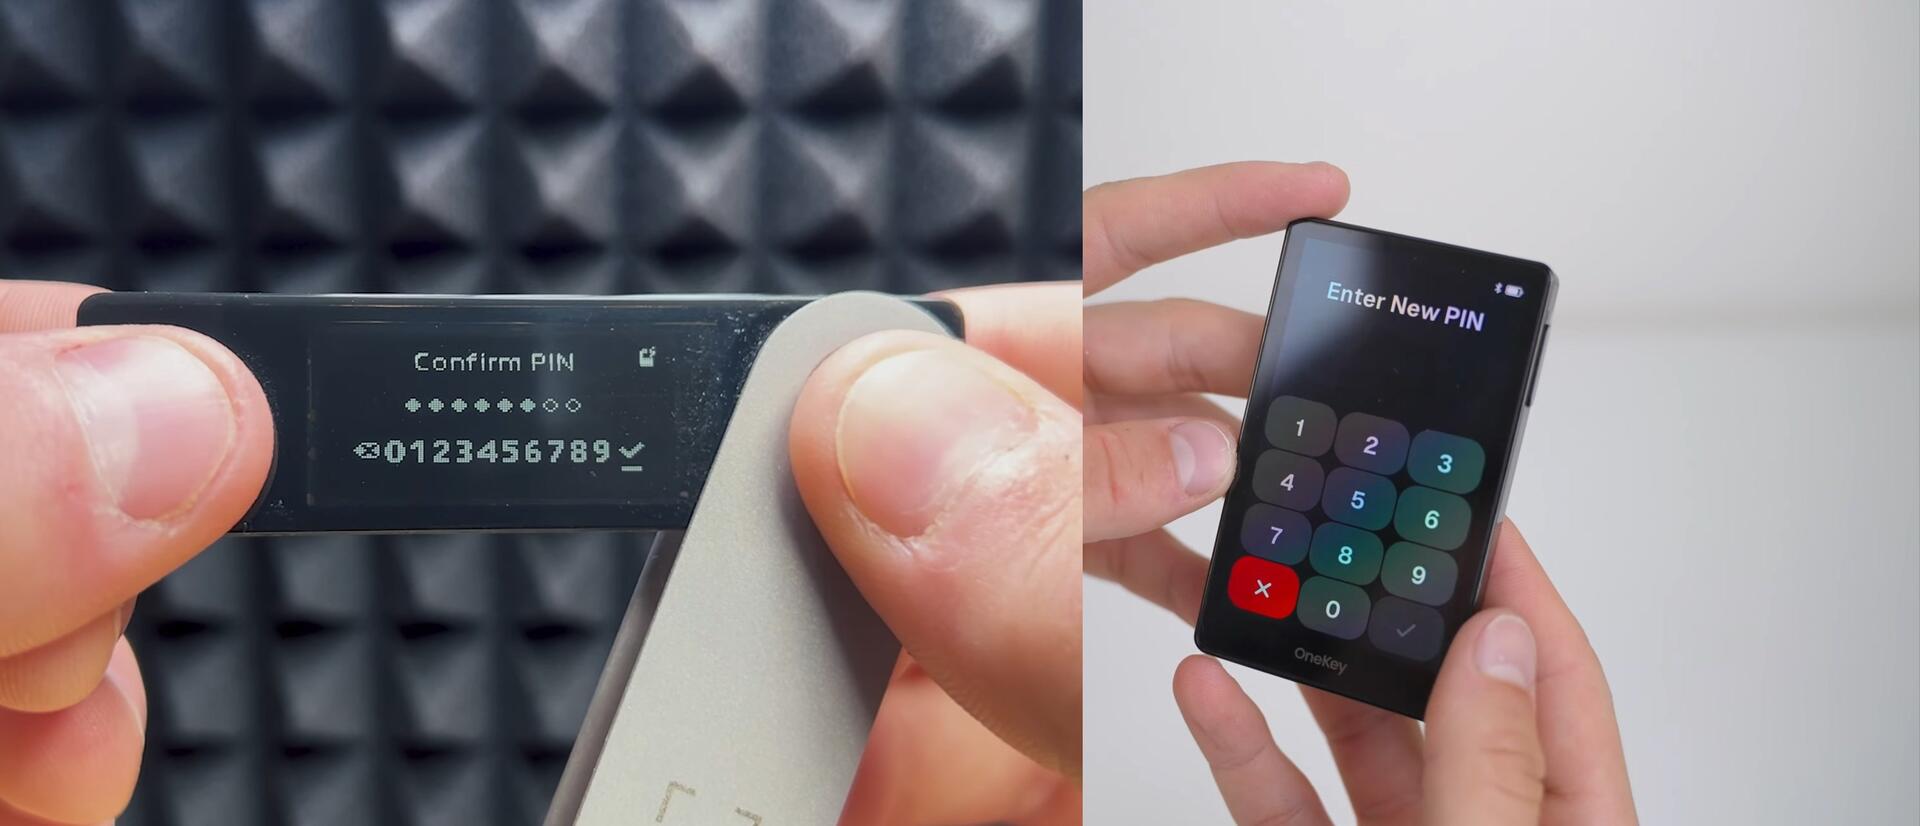
Next, set your PIN. Optionally, add your fingerprint via the power‑button scanner for faster access.
The fingerprint sensor proved more temperamental than any smartphone sensor we’ve tried.
After several attempts, it finally registered the print.
Before proceeding, the device will prompt you to back up your seed phrase.
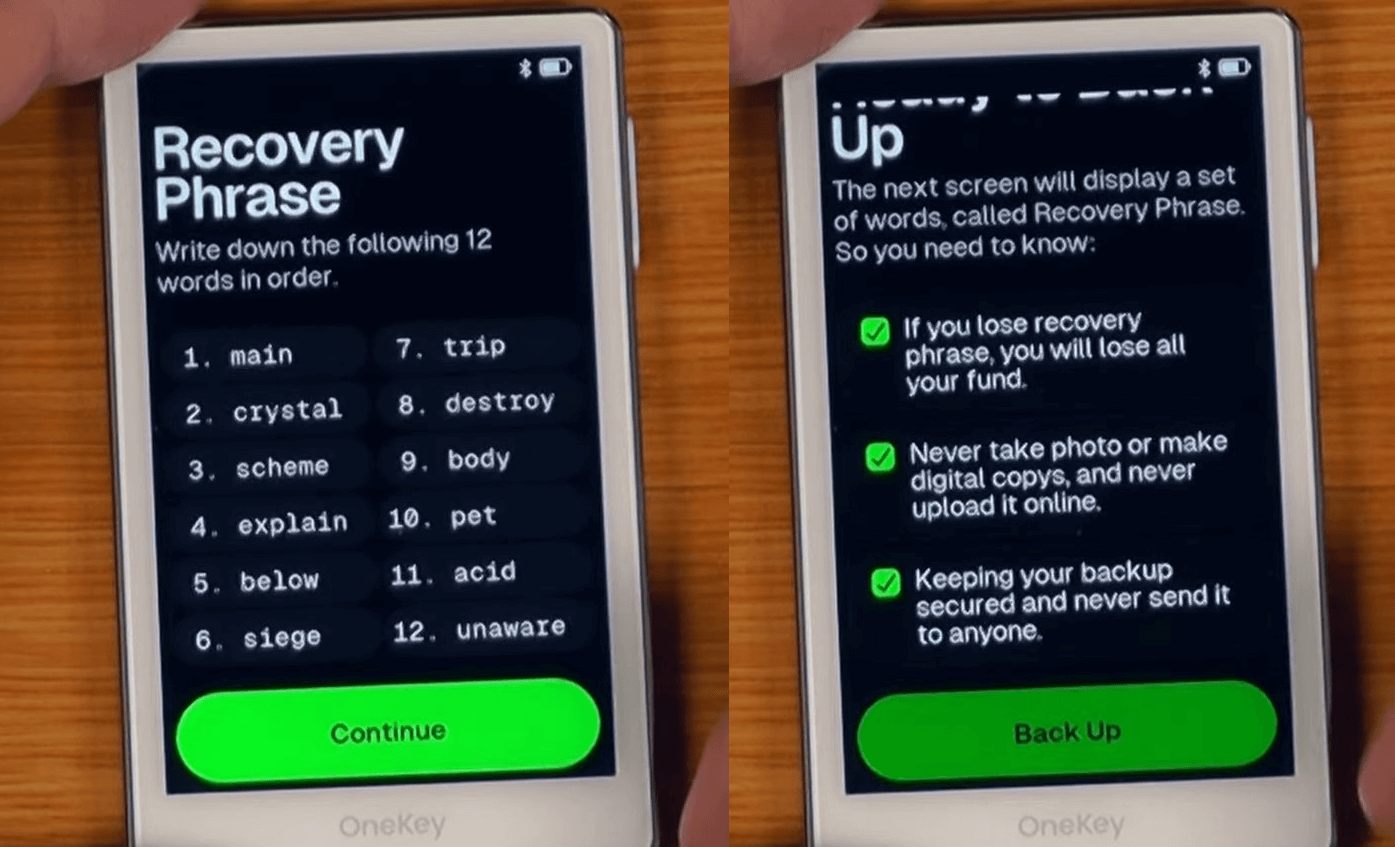
Backup
Write down all words on one of the provided backup cards, then confirm each word on the device to ensure accuracy.
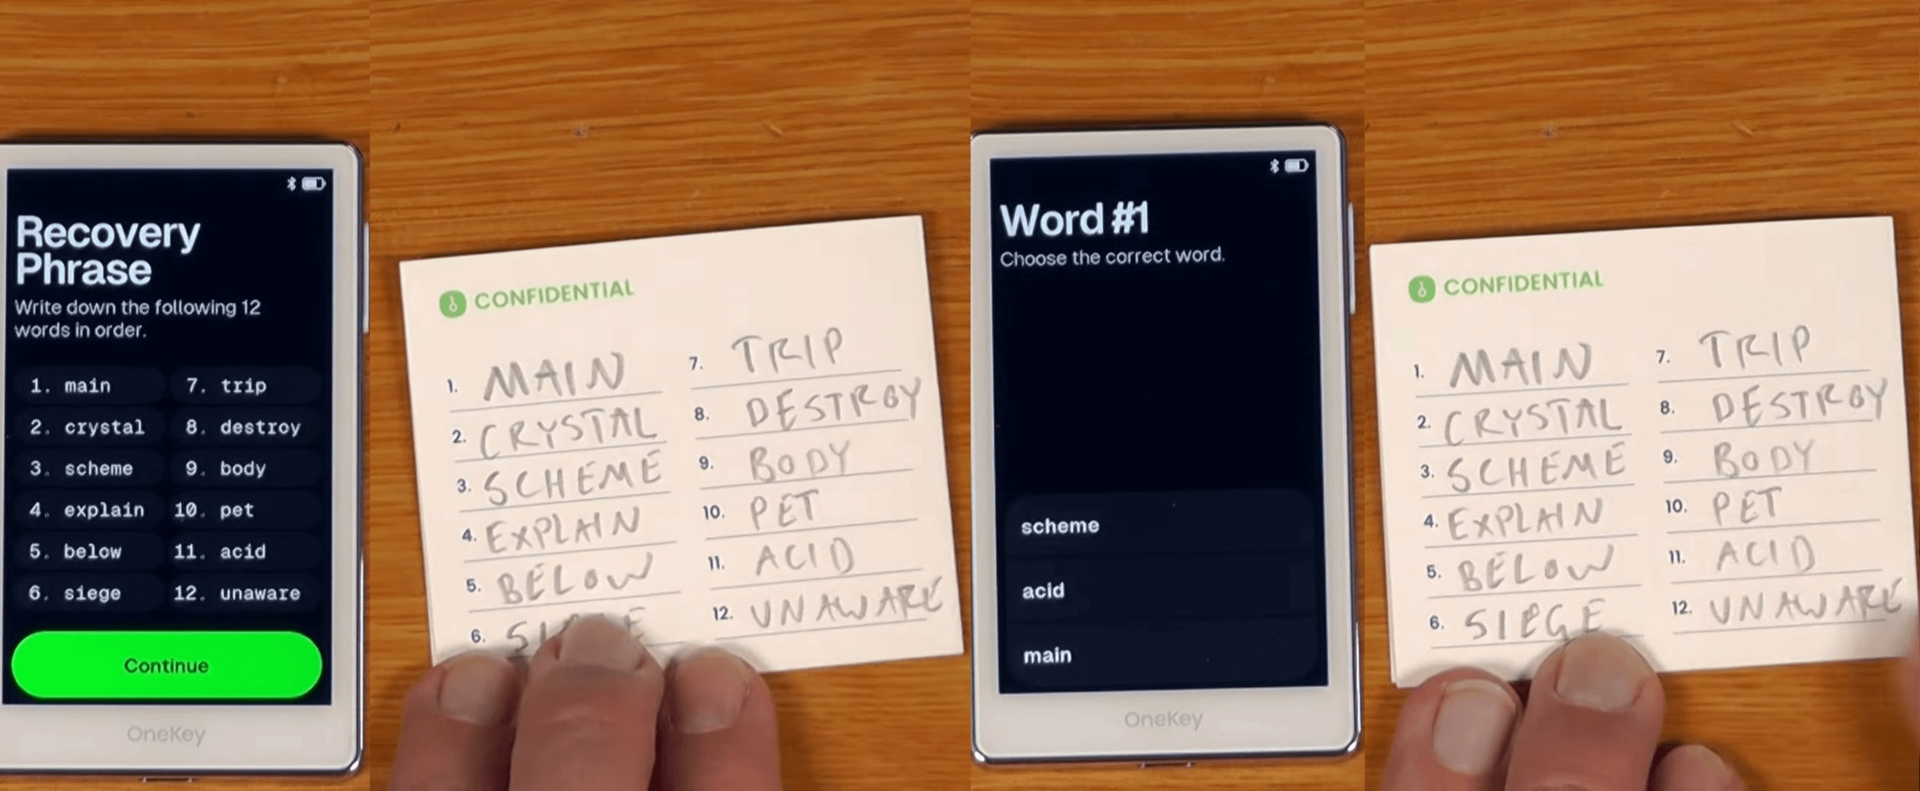
Once confirmed, store the backup card in a secure location.
The wallet then shows a QR code to download the OneKey app.
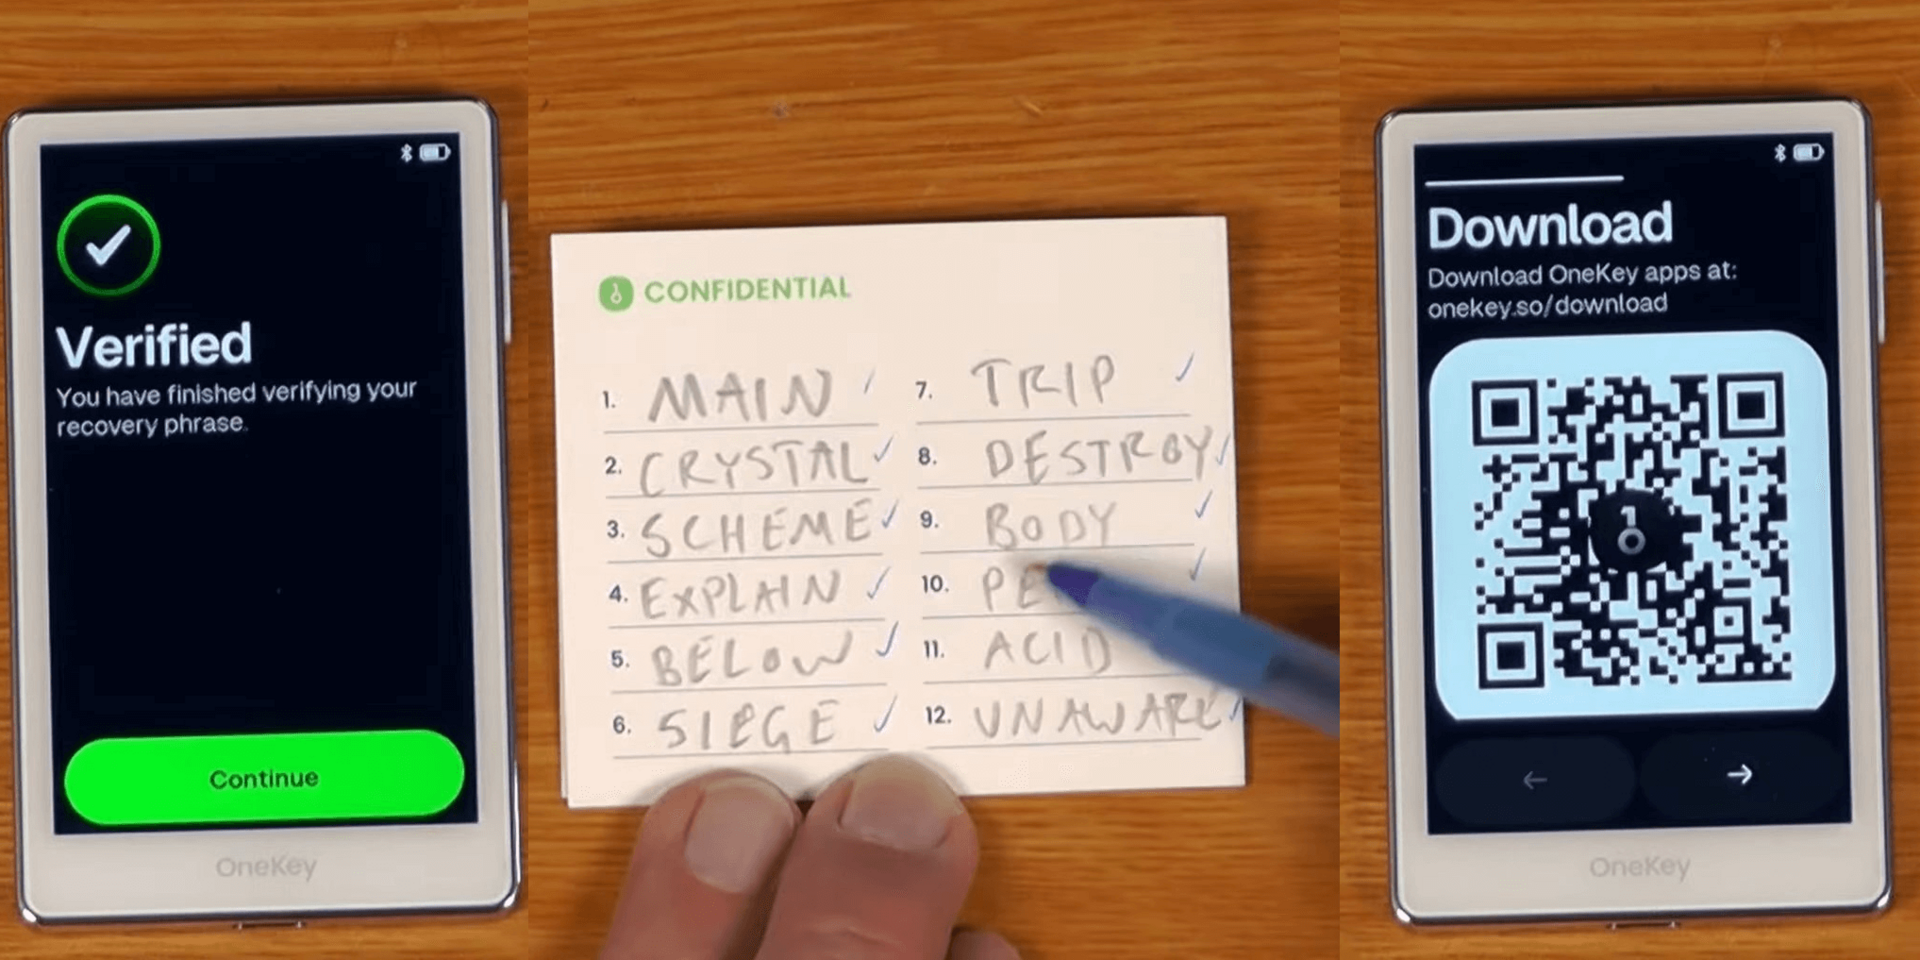
Pairing with the App
The QR code directs you to the download page—choose Android or iOS and tap Install.
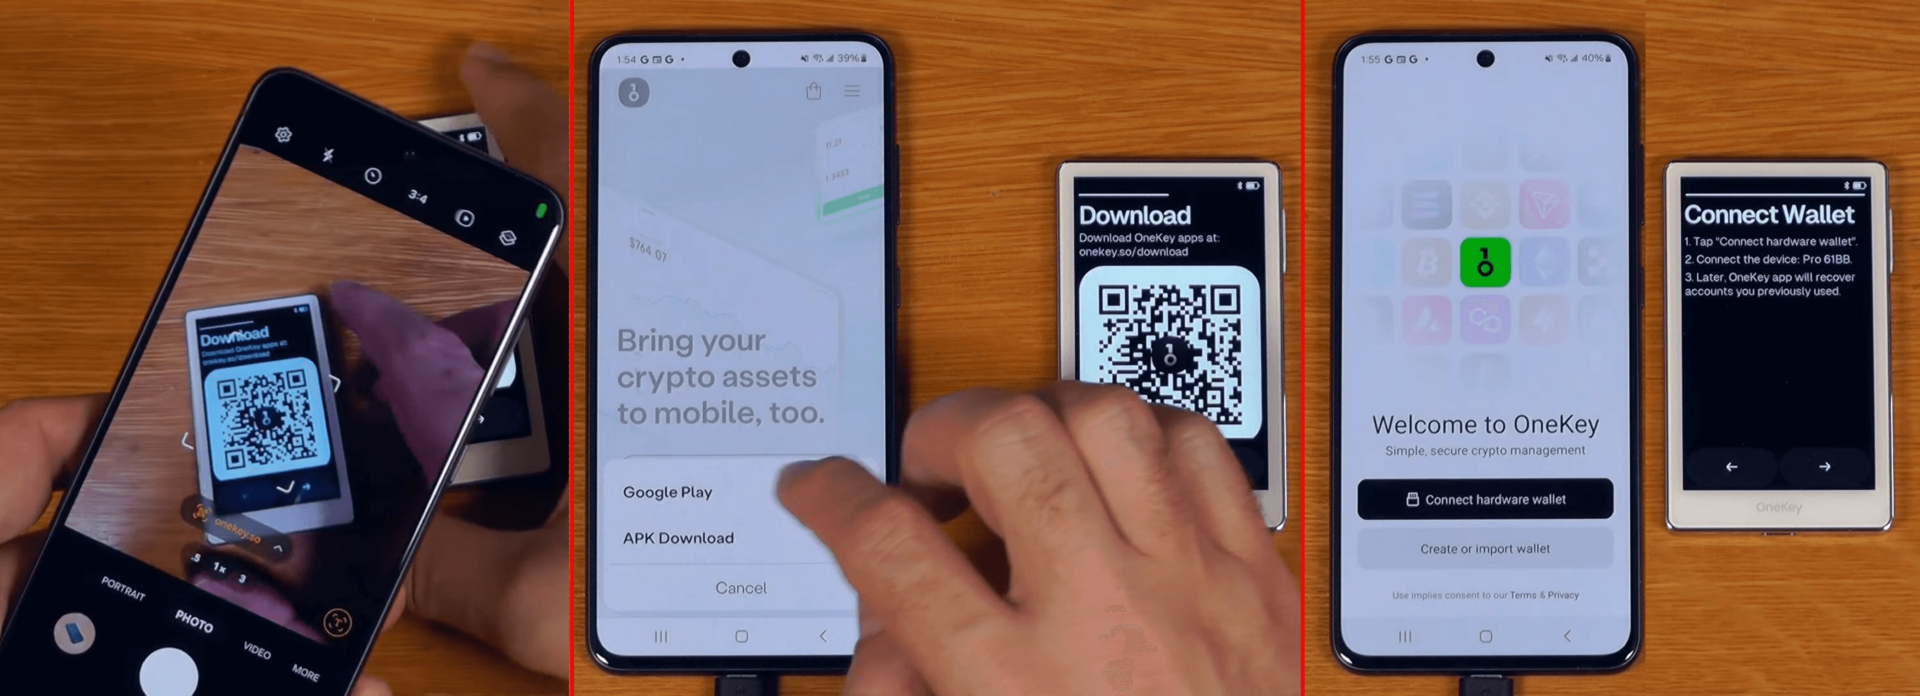
Next, initiate pairing: tap Start connection → Allow → Next.
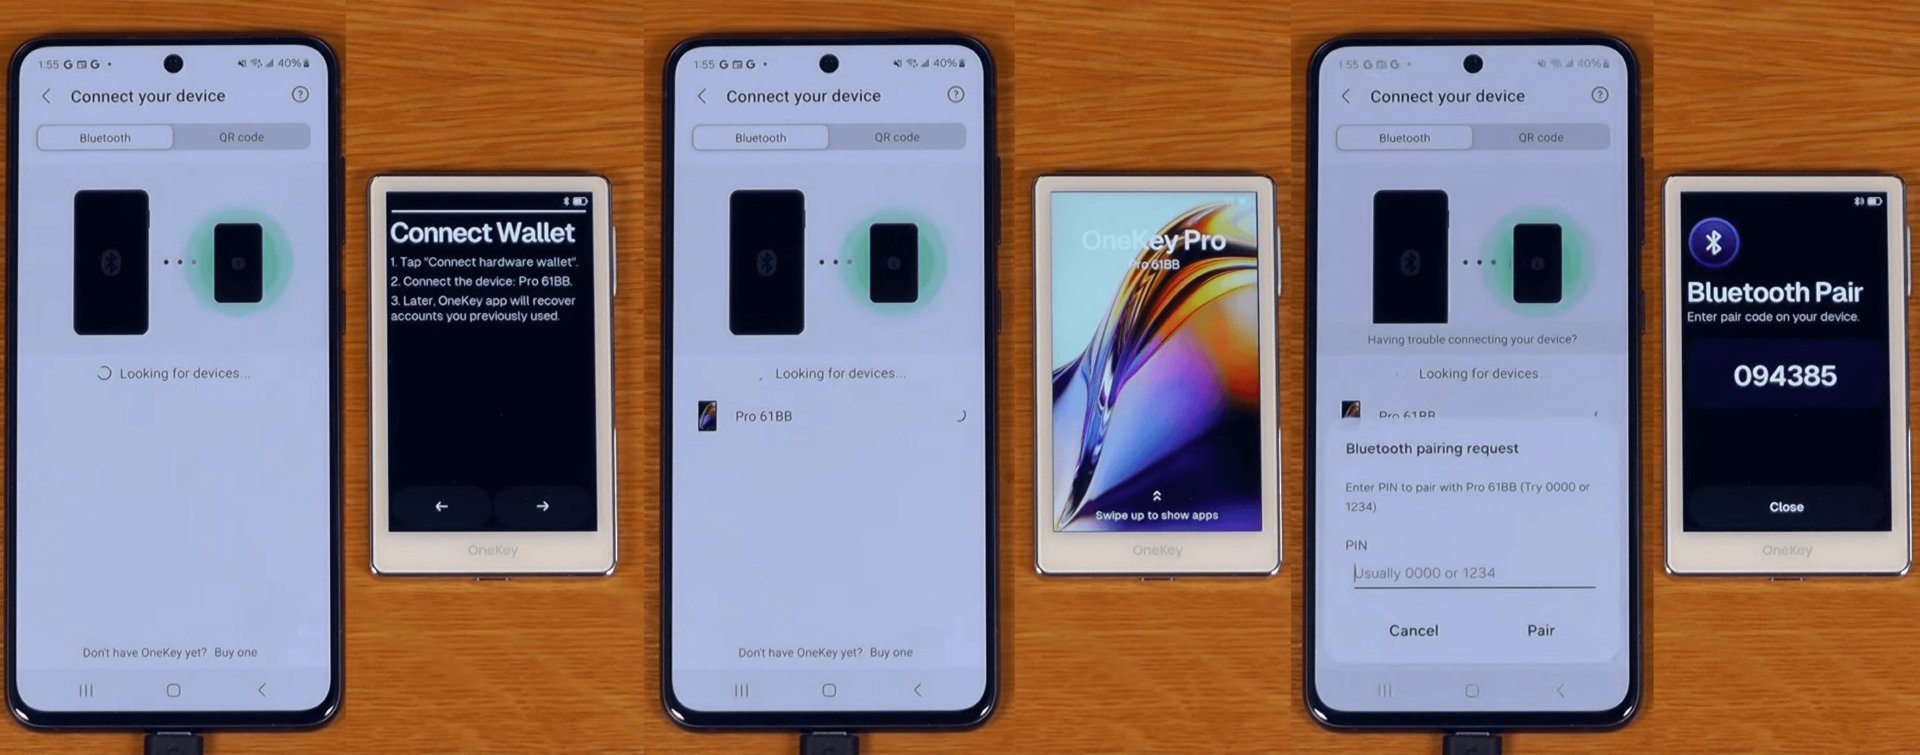
Select your OneKey Pro from the list and tap Pair. Enter the confirmation code displayed on the device.
Then the firmware authenticity check runs. Once verified, your wallet is ready.
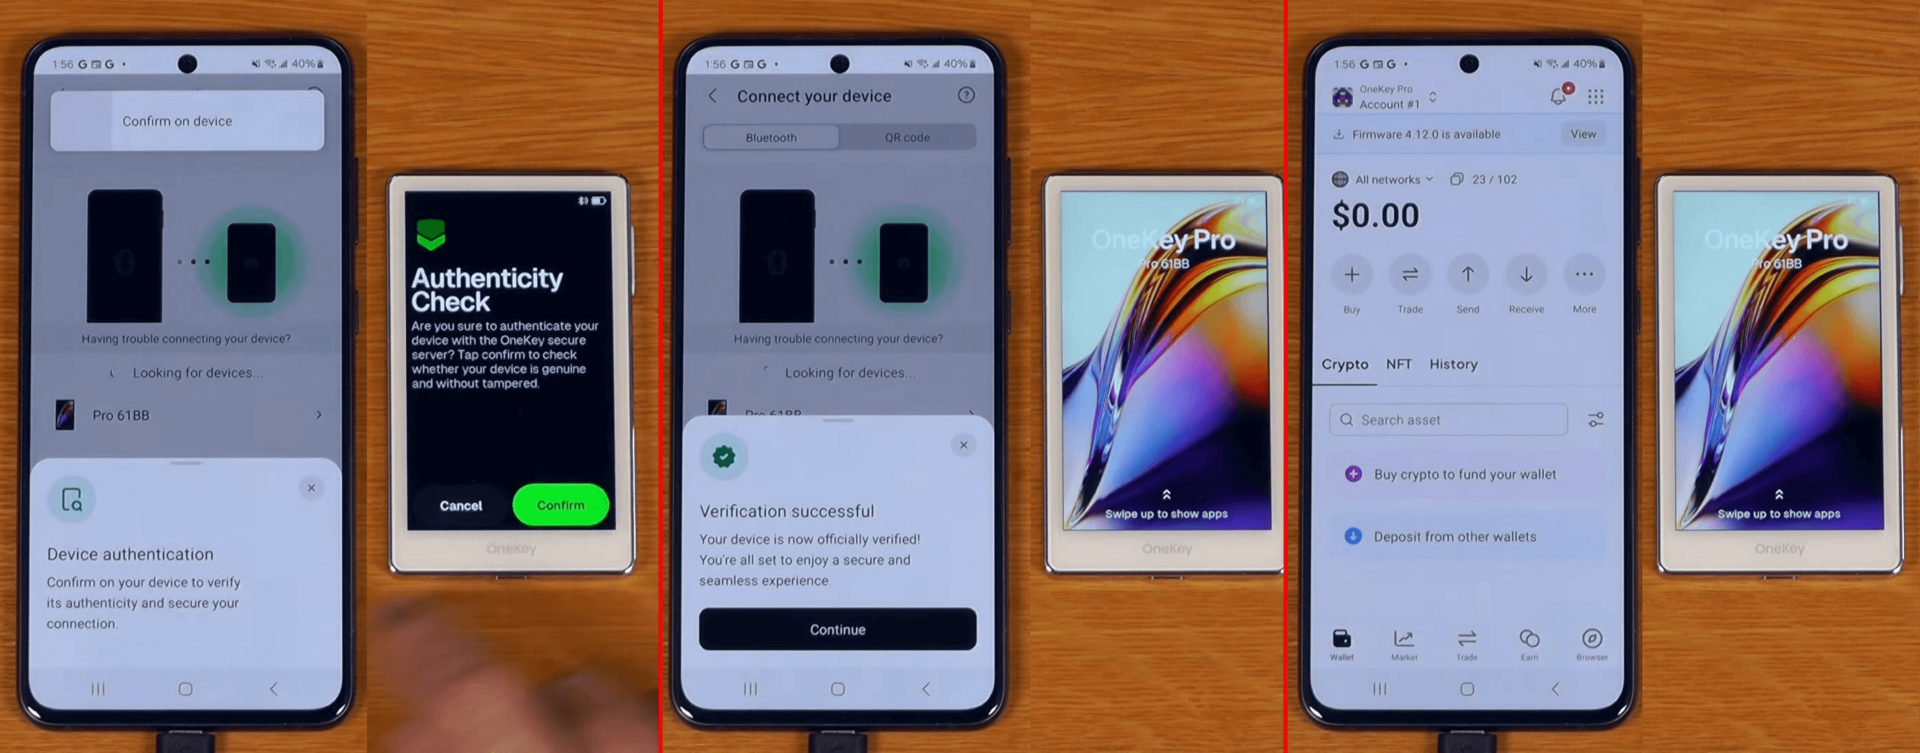
Congratulations! You’ve successfully created your OneKey Pro wallet and paired it with the mobile app.
The app may prompt you to update the firmware next.
Firmware Update
Before receiving funds, apply any recommended firmware updates. Confirm on-device by tapping Continue.
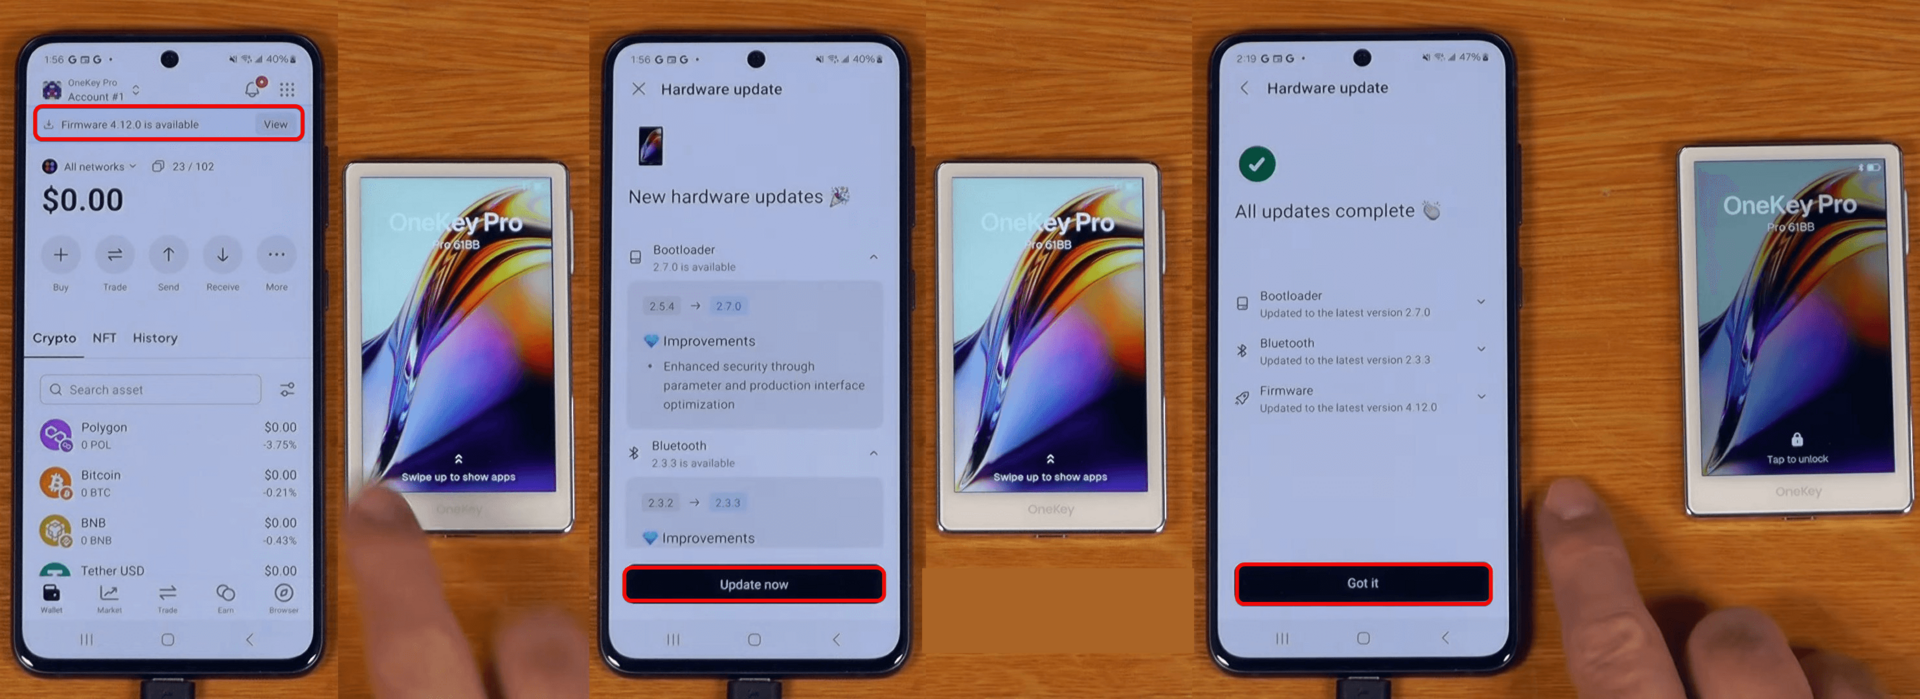
Updates can take some time as all device software components are refreshed.
Now you’re ready to use your wallet!
How to Use
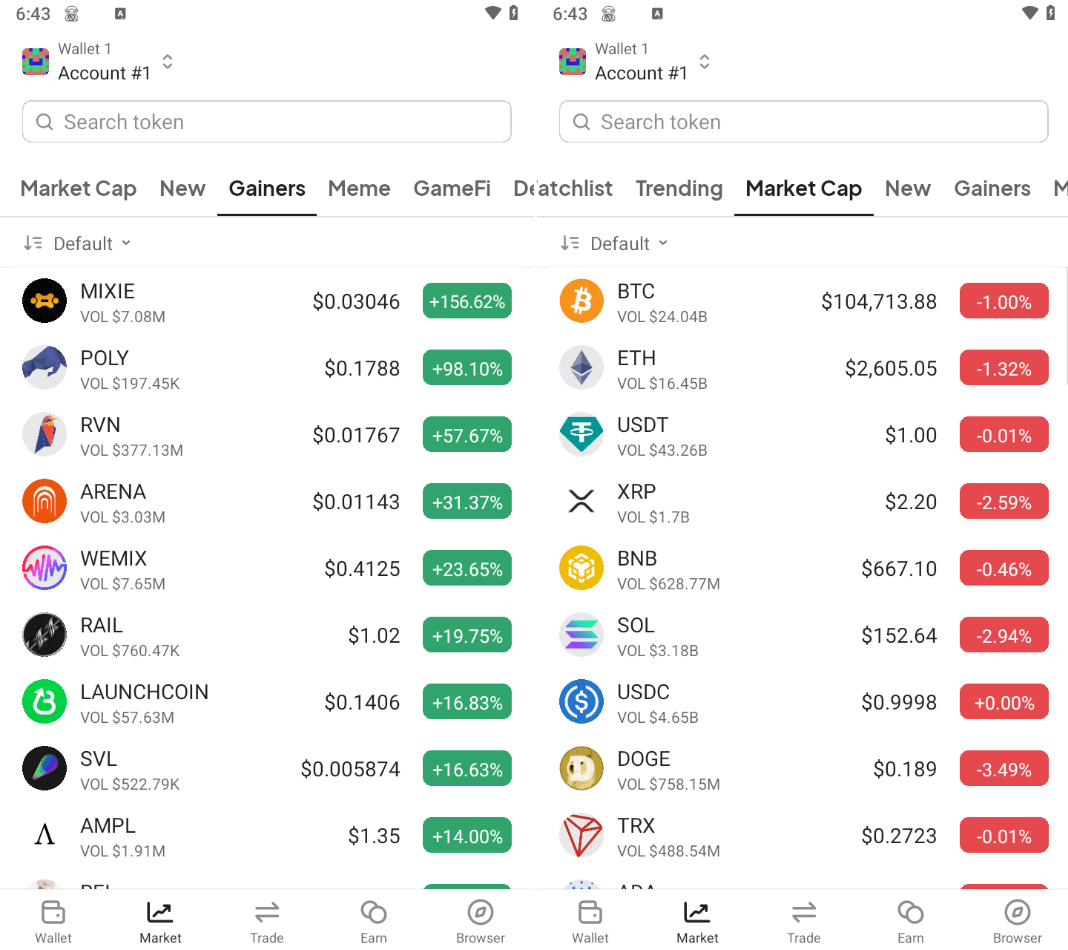
With OneKey, you can stake, swap, manage NFTs, build portfolios, explore dApps, and more.
All this functionality comes from pairing your hardware wallet with the mobile app.

Let’s start by funding your wallet and getting an address.
Generating an Address
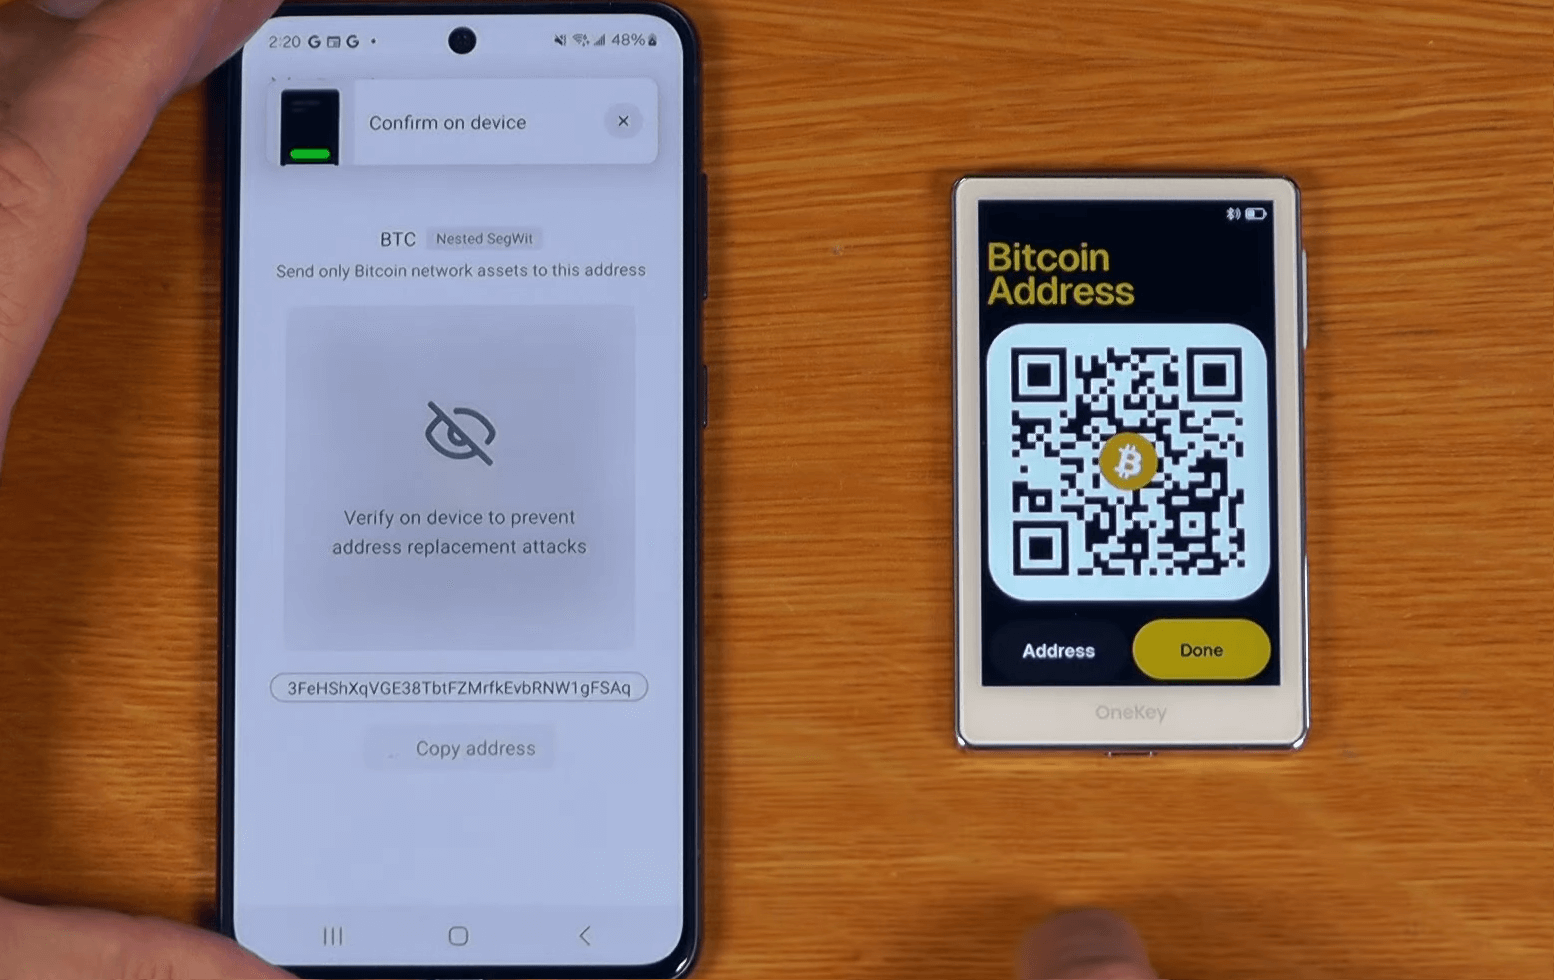
To receive Bitcoin, tap Receive in the app, choose Verify on device, and unlock the hardware wallet with your PIN. Ensure the address on the device matches the app.
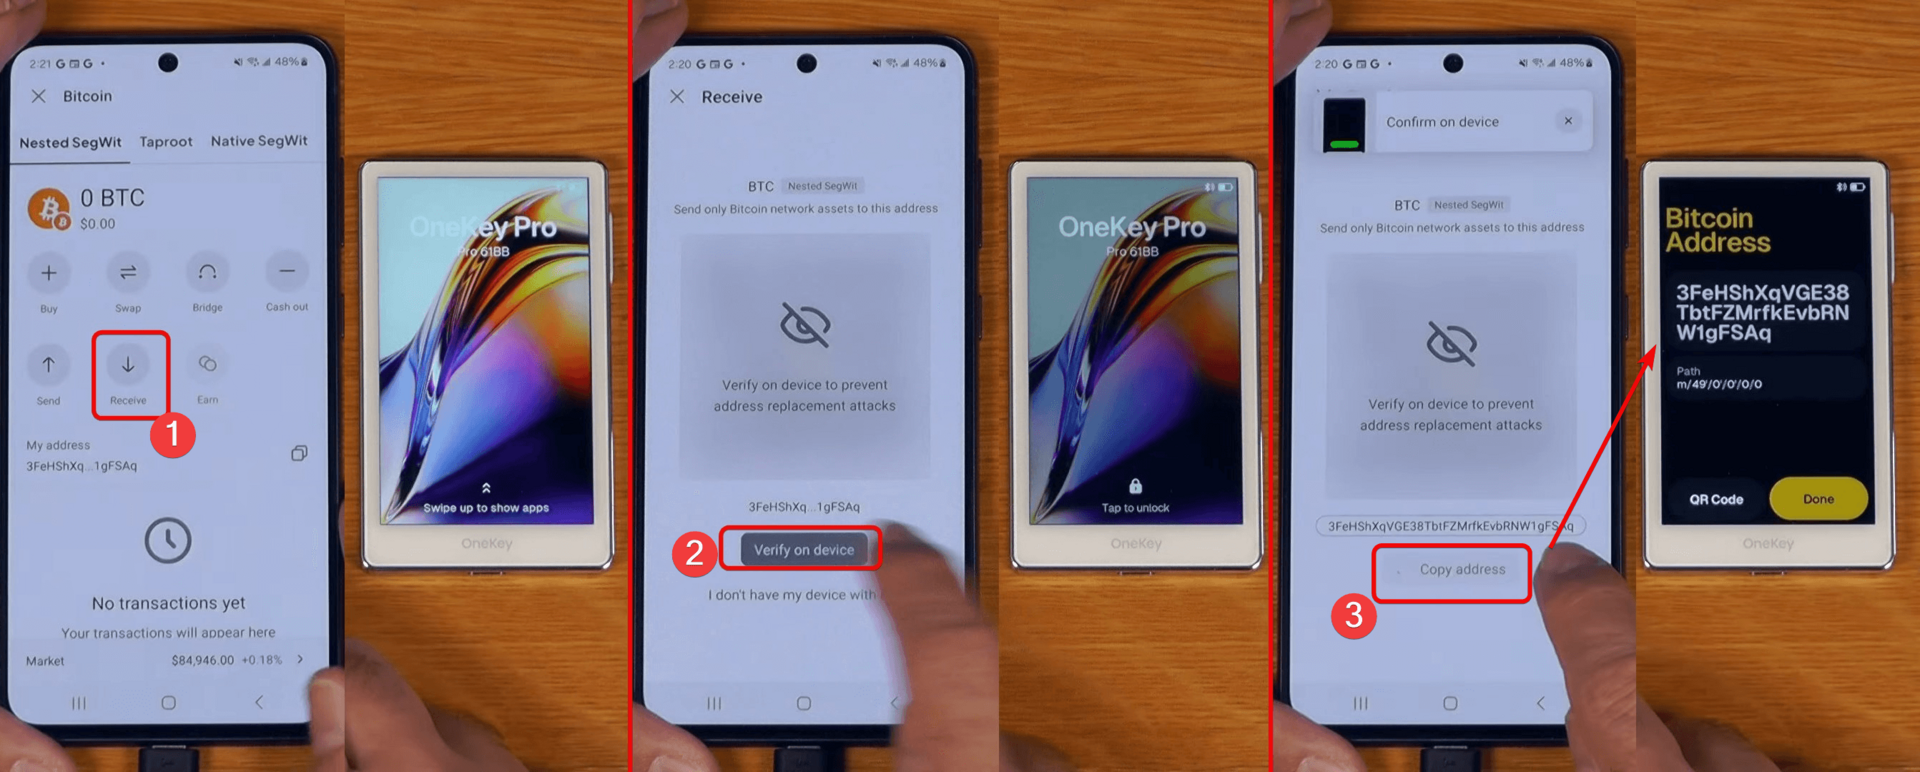
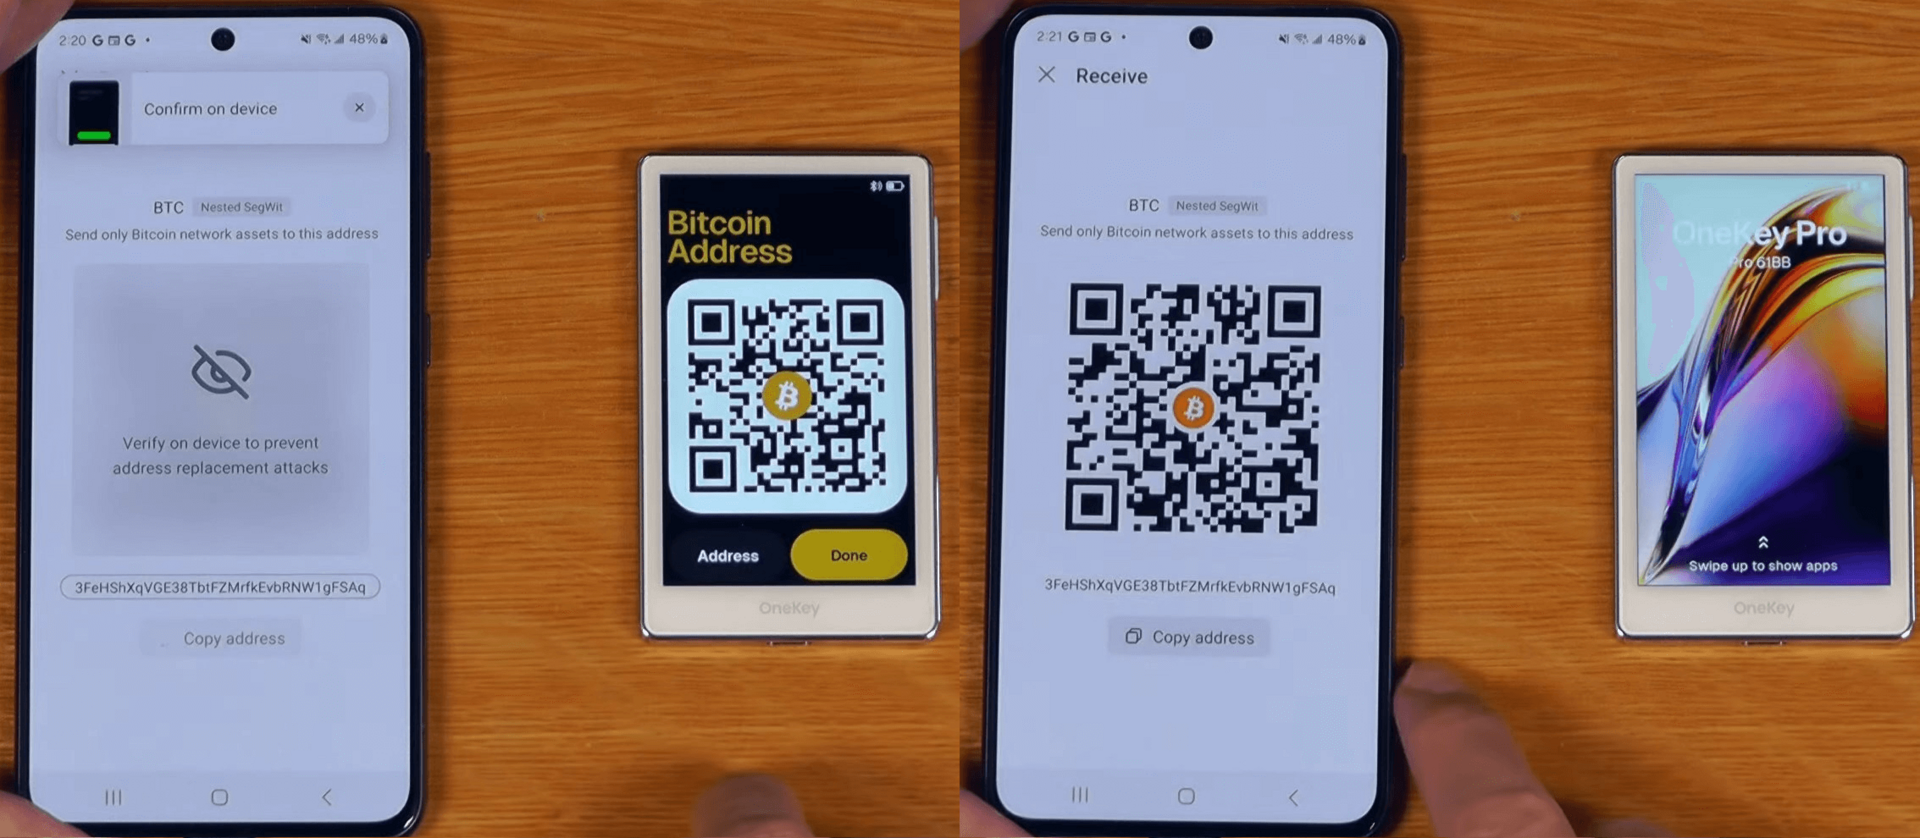
You can then copy the address or QR code.
Funding the Wallet
Scan your QR code with another wallet or send funds from exchanges, swap services, or P2P platforms.
After sending a small amount, the pending transaction appears in your balance.
Advanced users: OneKey supports multiple Bitcoin address formats—switch in the top menu.
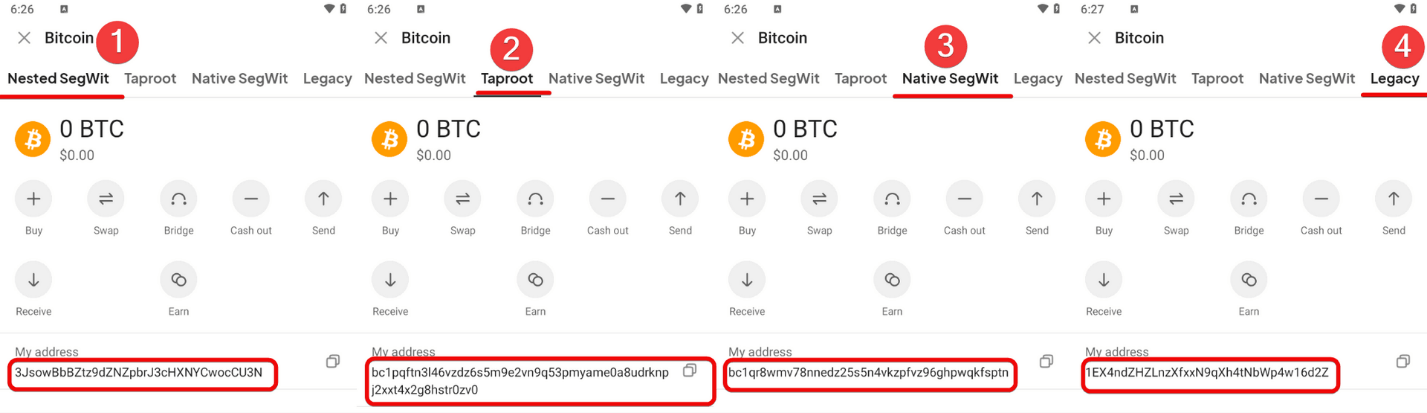
Different formats trade off fees and compatibility. Taproot offers the lowest fees but less compatibility, while Legacy is most compatible but costs more.
|
Address Type (Prefix) |
Fee Savings (%) |
|
Legacy |
0 % |
|
Nested SegWit |
≈ 27 % |
|
Native SegWit |
≈ 54 % |
|
Taproot |
≈ 61 % |
Sending Funds
To test sending, tap Send, scan the recipient’s QR code (remove the bitcoin: prefix if needed), or enter the address manually. Enter the amount and tap Preview to review.
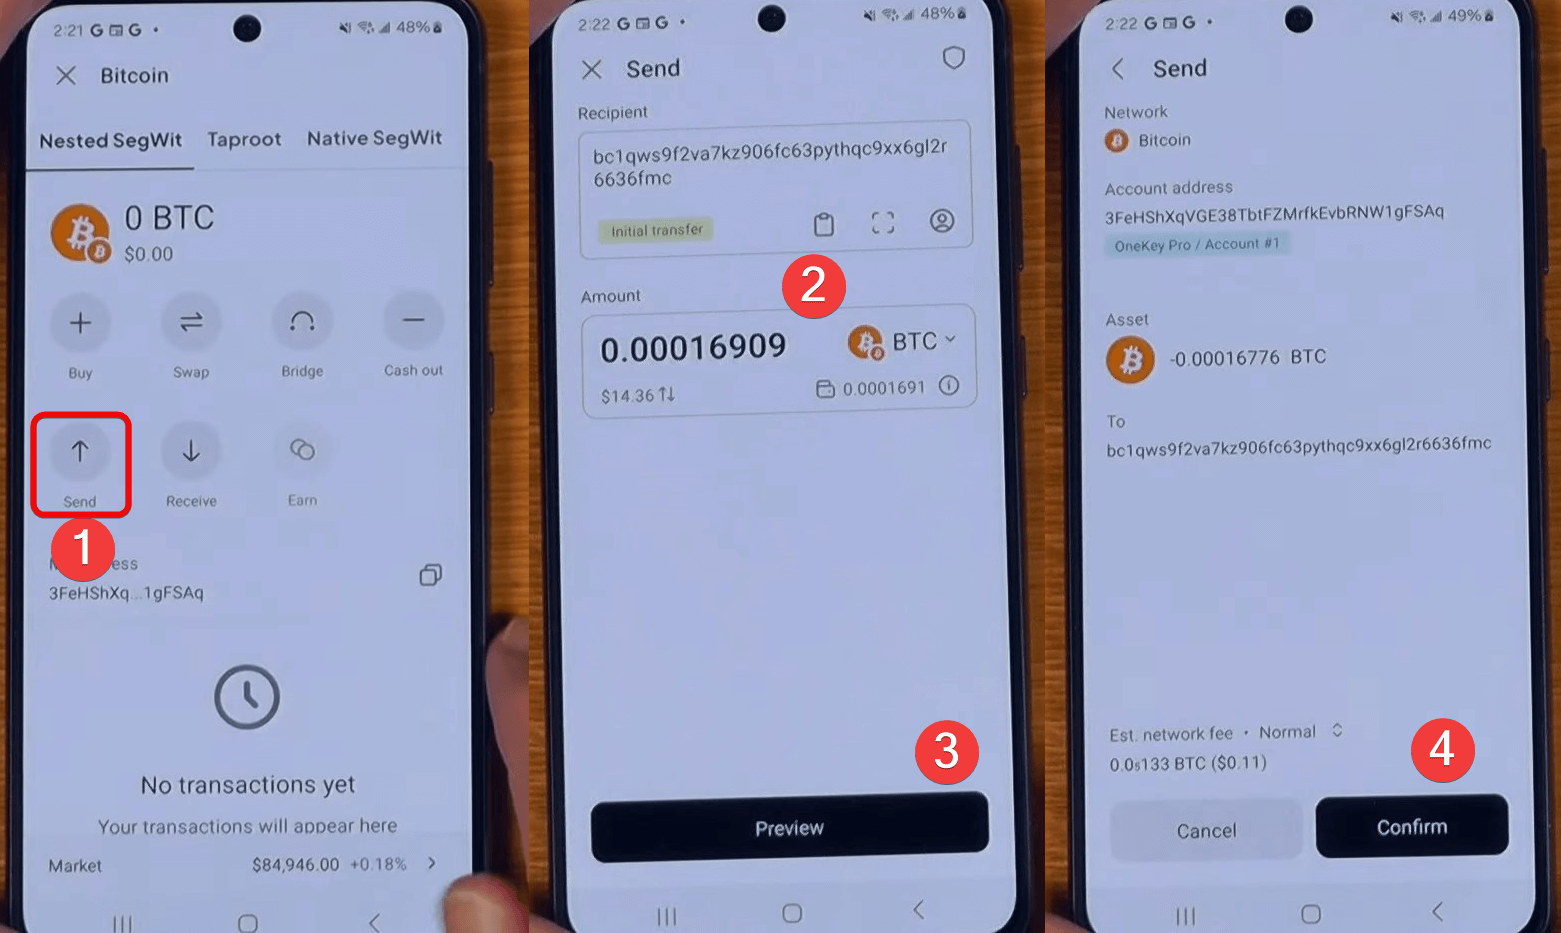
Confirm details on-device, check fees, then tap Continue. Slide to sign with Slide to sign.
Once you see “Transaction signed,” your coins are on their way.

Adding Custom Tokens
OneKey Pro supports a vast token list—see the full asset list on their site. To add unsupported tokens, follow the guide in the mobile app manual.
That guide also covers staking, NFTs, and in-app swaps. Now, let’s return to the hardware device’s settings.
Device Settings
The Settings menu offers security parameters, wallet management, Trezor compatibility toggle, Air Gap mode, and screen adjustments.
You can also view device info and run an authenticity check.
Let’s explore what each setting does.
Connect App Wallet
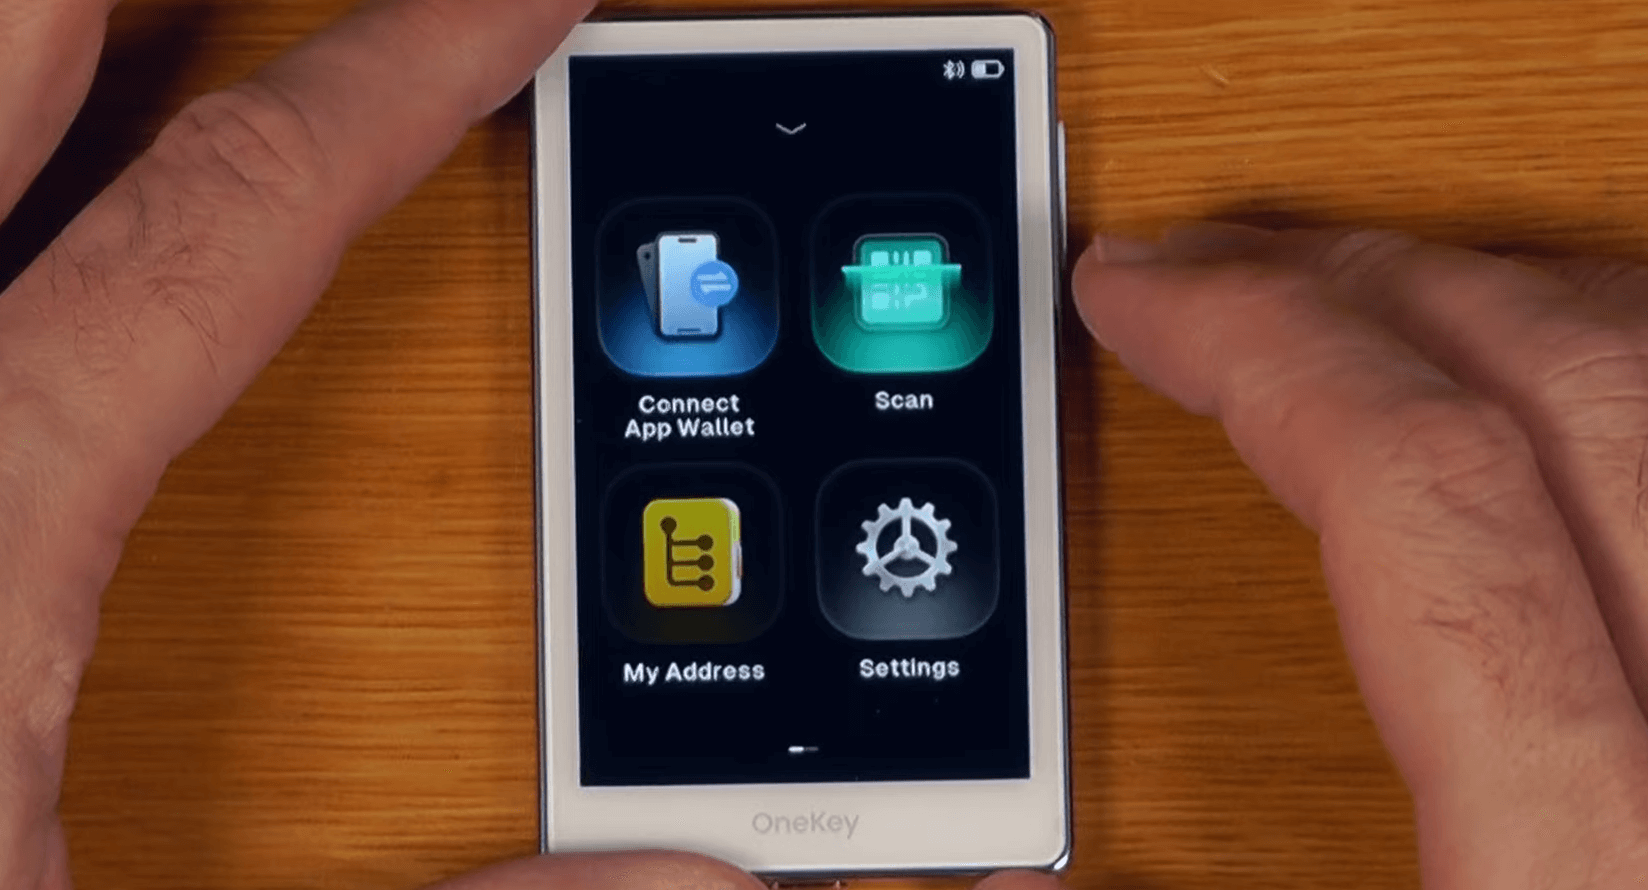
To manage assets, sign transactions, and integrate with MetaMask or OKX Wallet, connect OneKey Pro via Bluetooth (mobile) or USB (desktop) under Connect App Wallet.
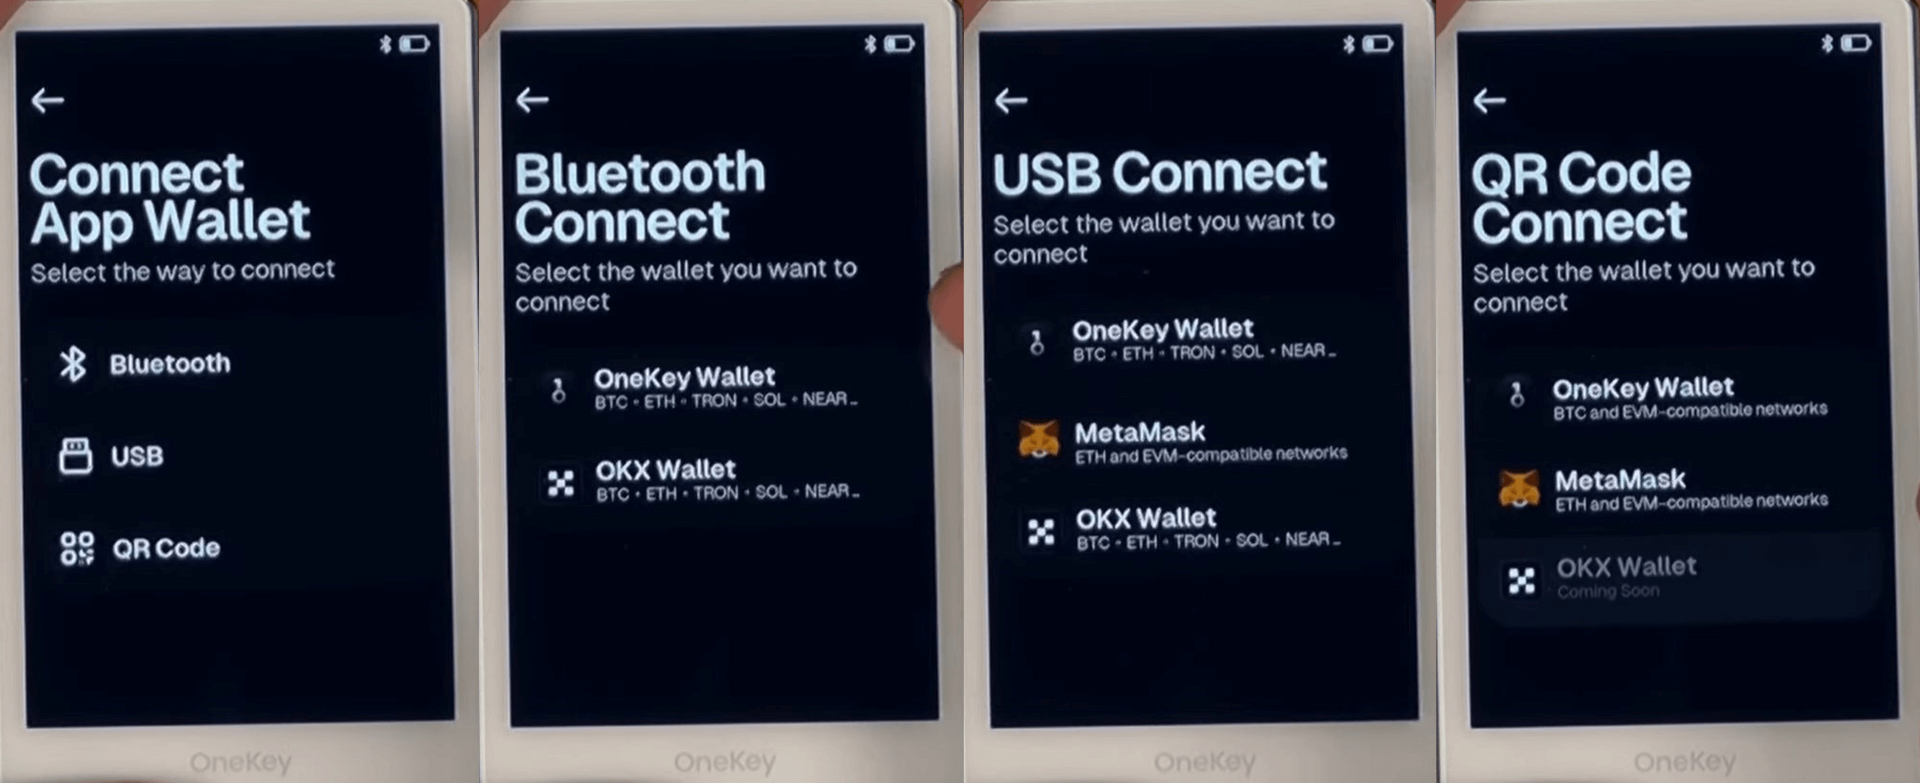
Scan
You can also pair via QR code using the built‑in camera under Scan, enabling transactions without a direct internet link.
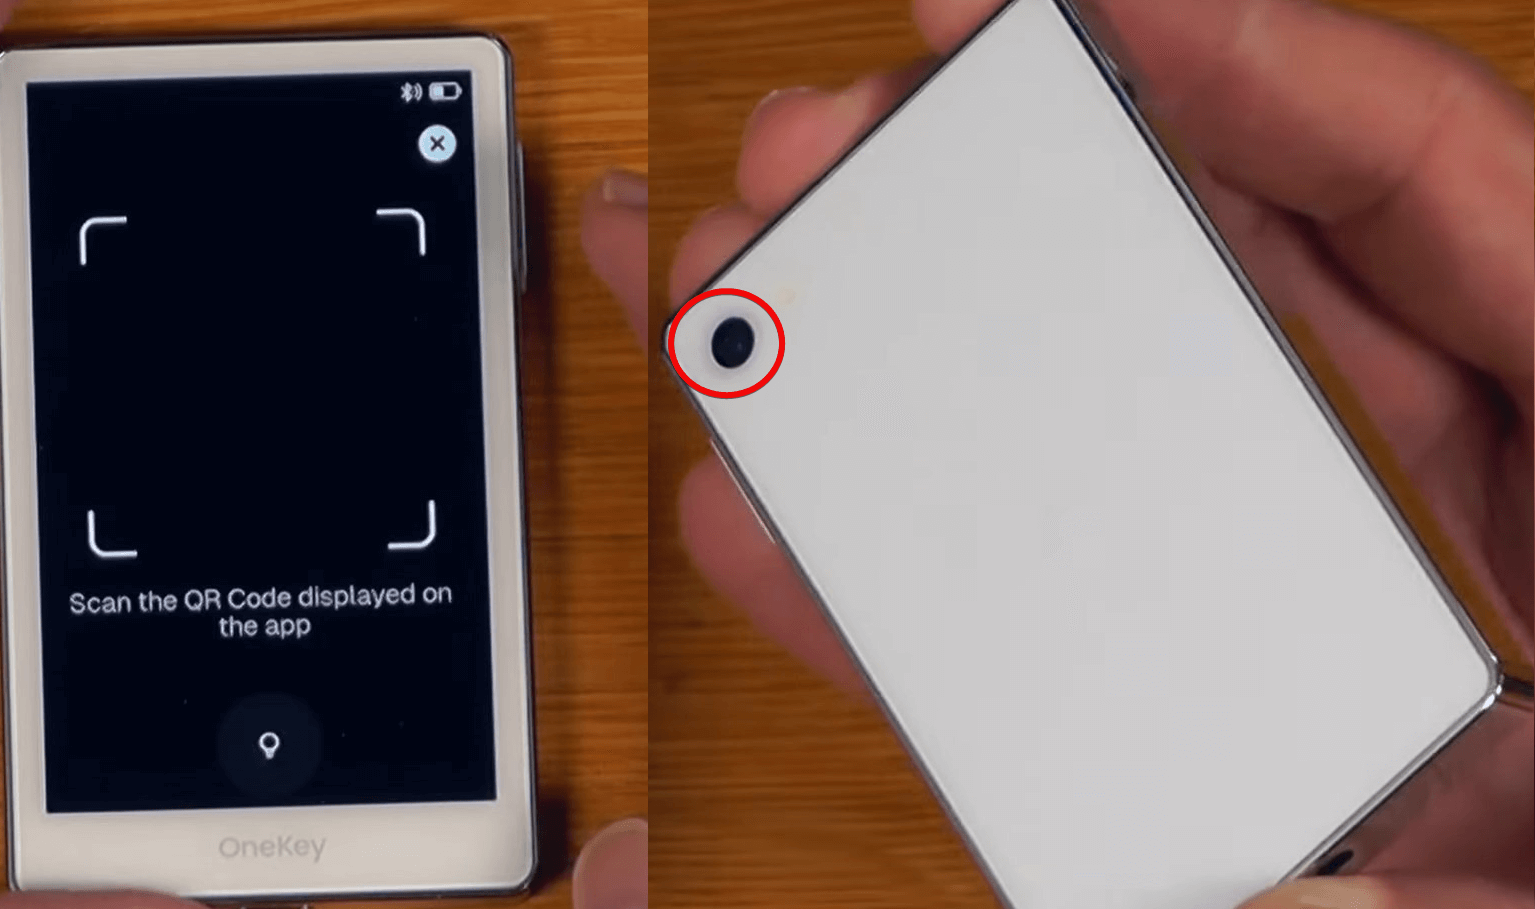
QR scanning fully isolates the wallet, enhancing security.
My Address
The address book lets you view addresses for different assets.
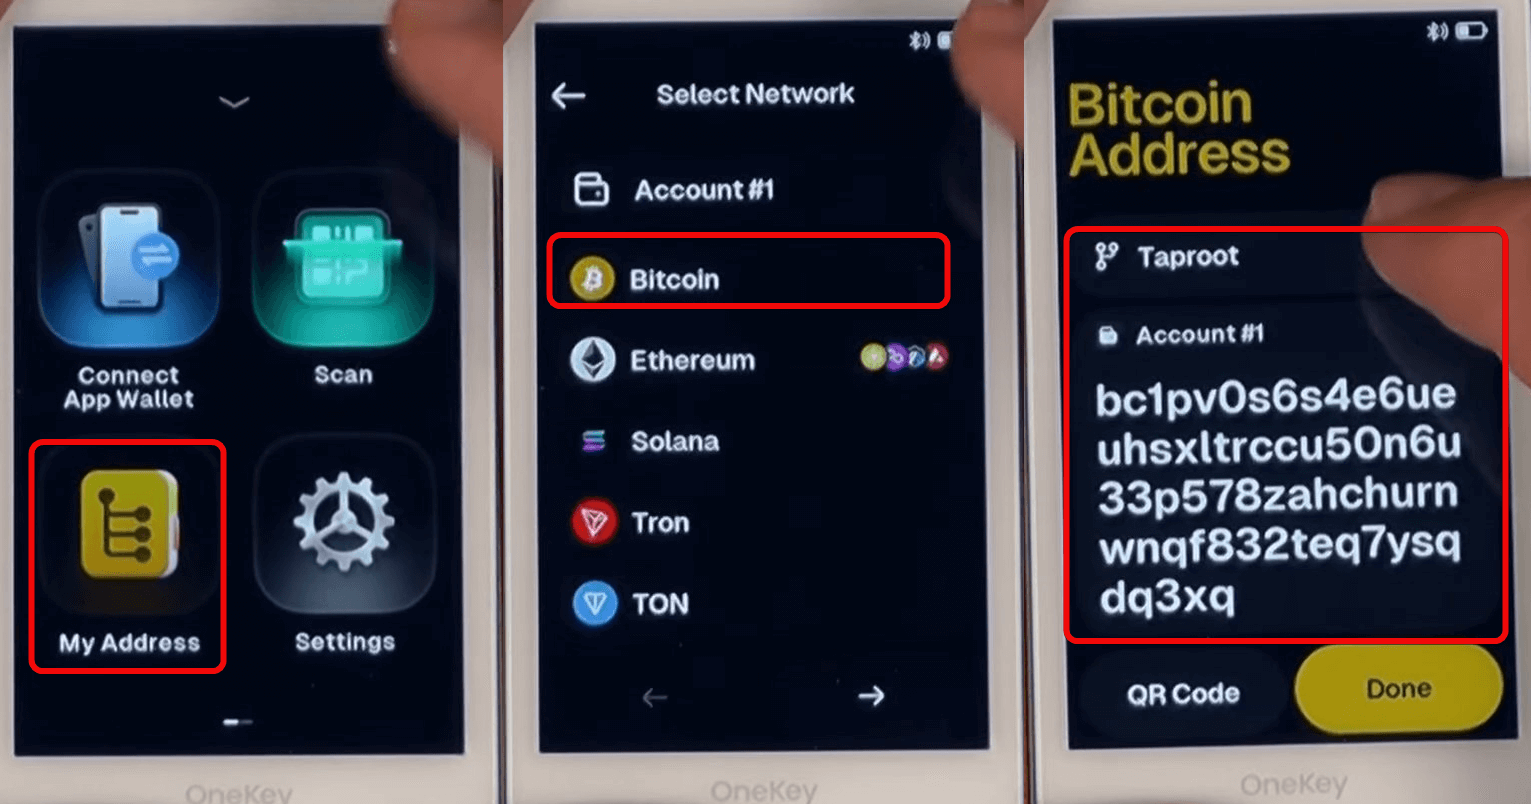
A limitation: you get only one BTC address, which isn’t ideal for privacy since address reuse is easily tracked.
The next menu section contains advanced settings, which we’ll cover separately.
Settings Menu
The Settings section includes multiple subsections:
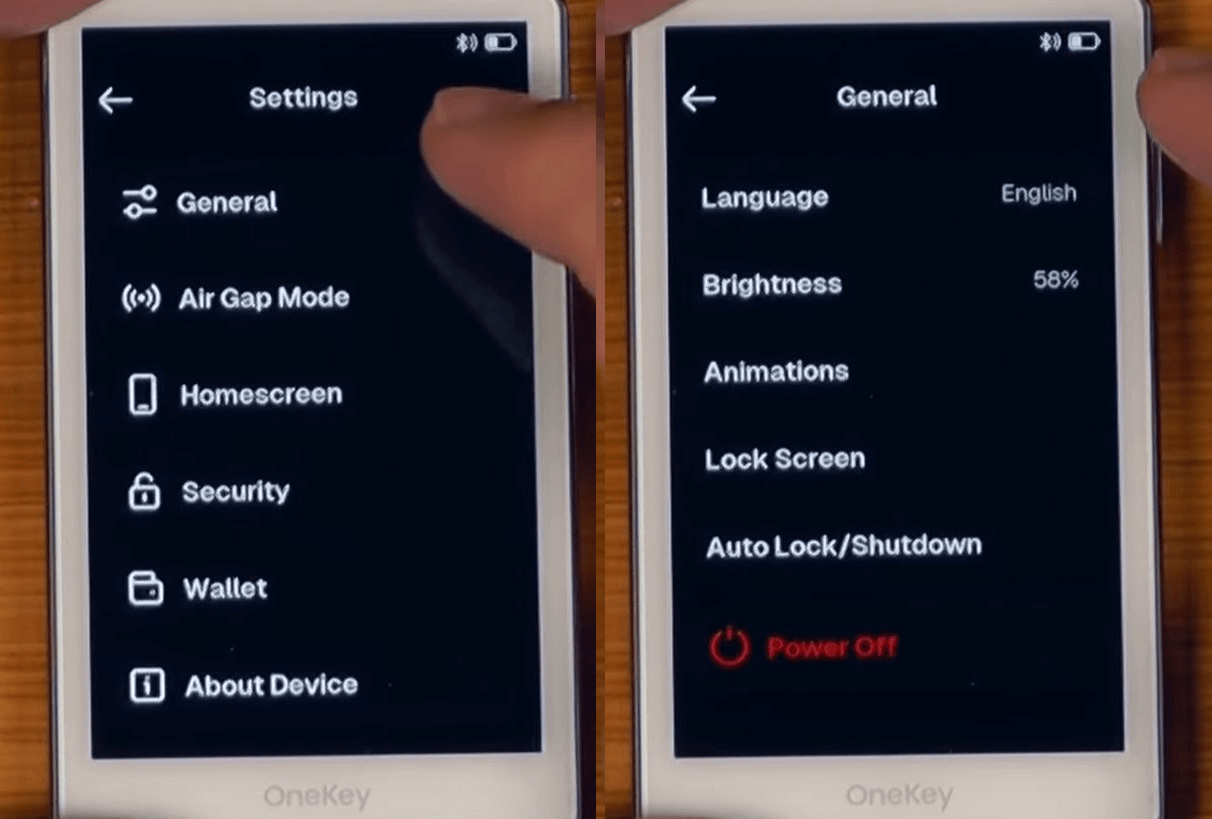
General
Basic interface and power-saving settings:
Language– choose the UI language (e.g., English, Russian, Spanish).Brightness– adjust screen brightness; higher brightness drains battery faster.Animations– enable or disable UI animations.Lock Screen– auto‑lock the display for security and power saving; tap the screen to wake.Auto Lock/Shutdown– set inactivity timeout for auto‑lock.
Next, we’ll look at other settings.
Air Gap Mode
Air Gap mode disables all connections—Bluetooth, USB, NFC—leaving QR codes for fully isolated transactions.
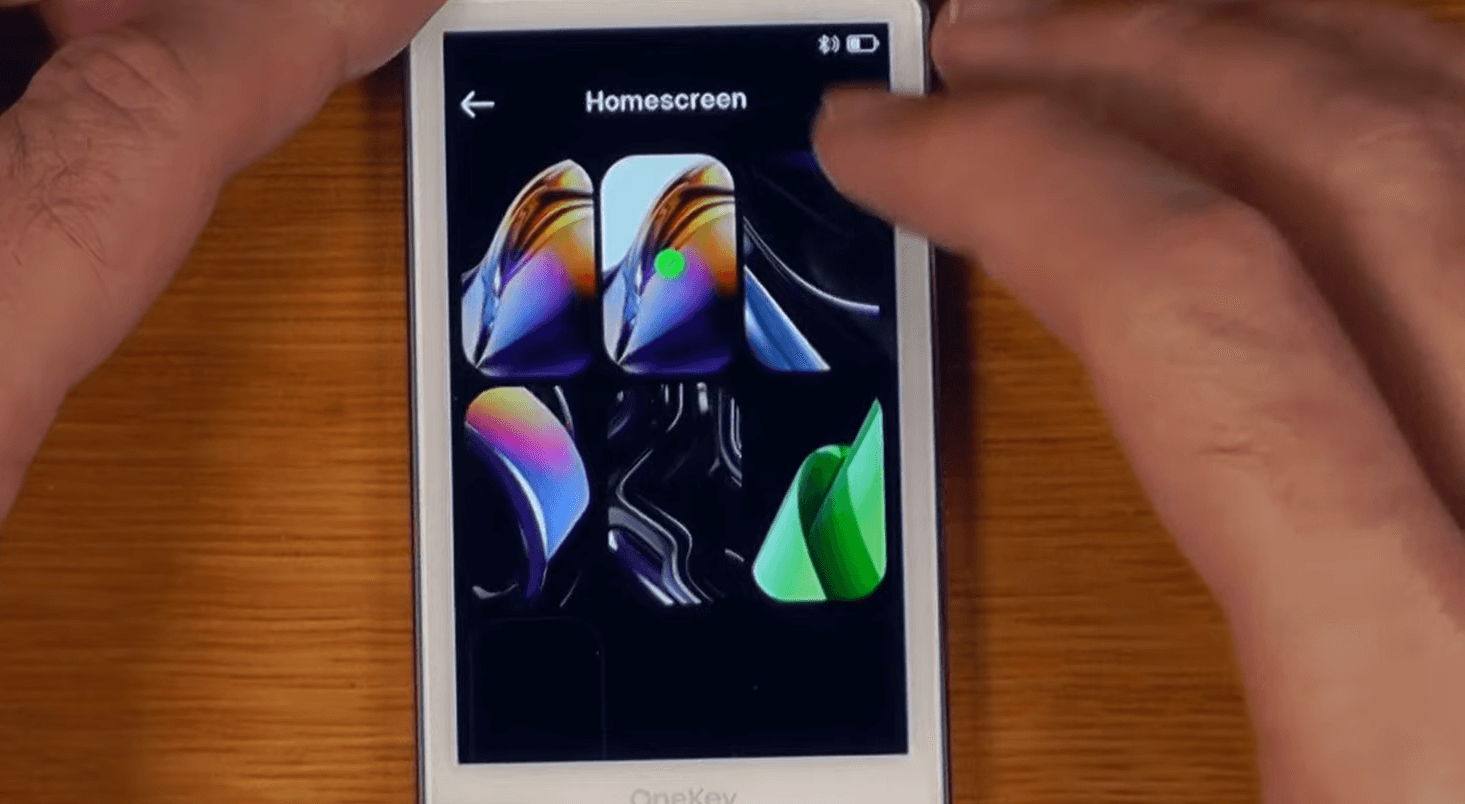
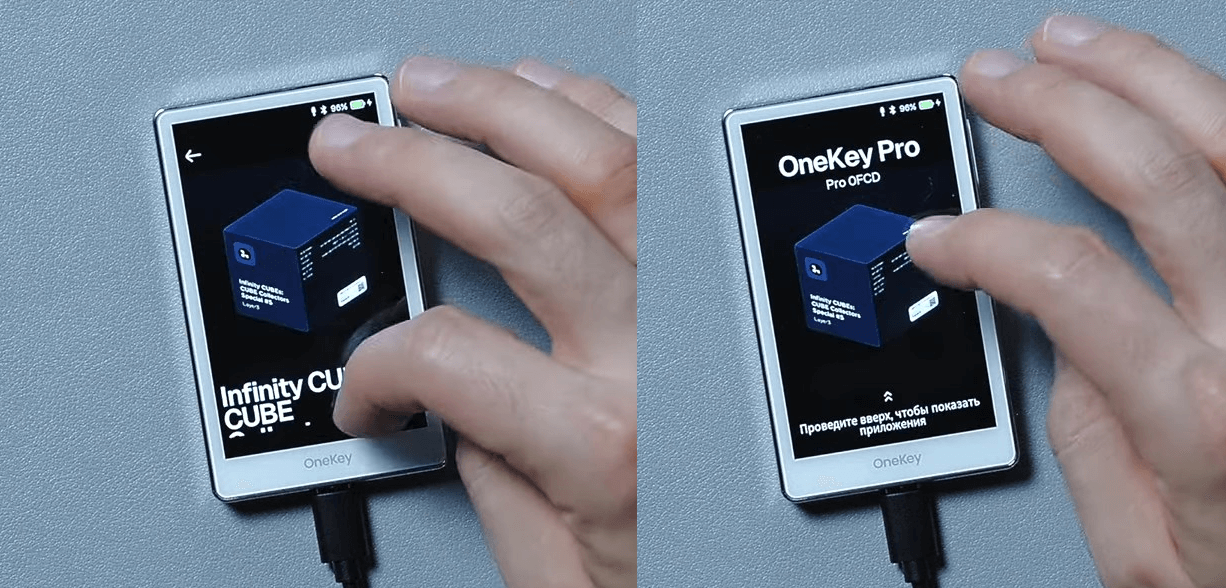
Homescreen
Customize the device’s splash screen and wallpaper.
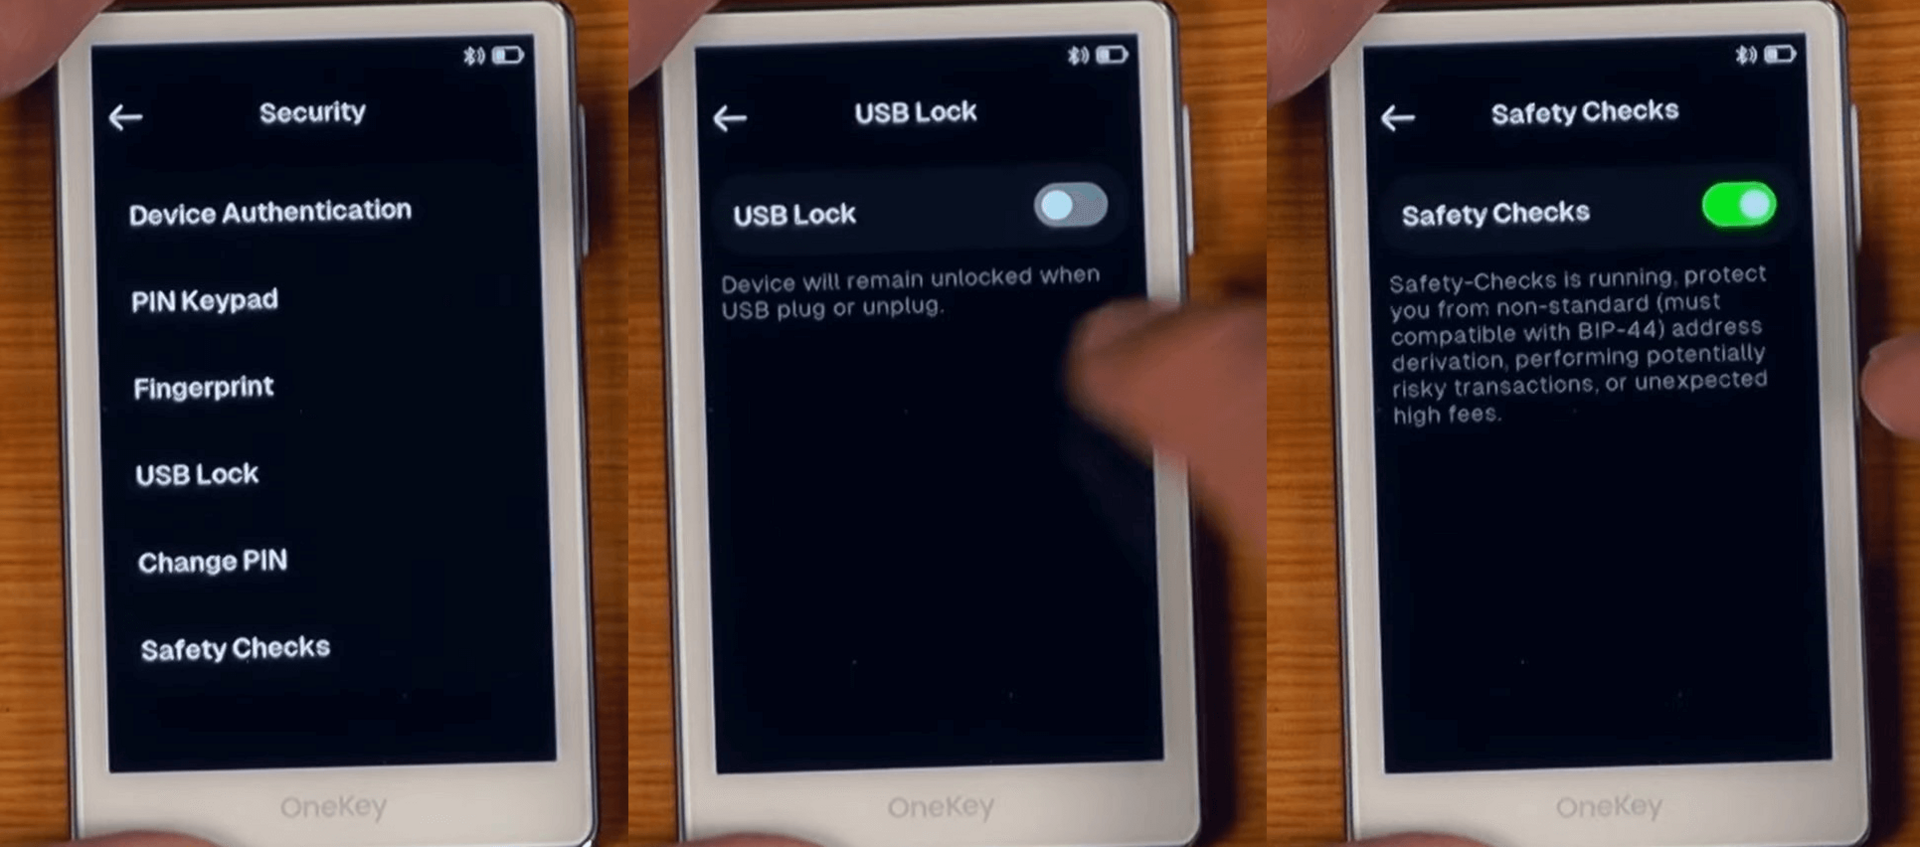
Security
All security-related options:
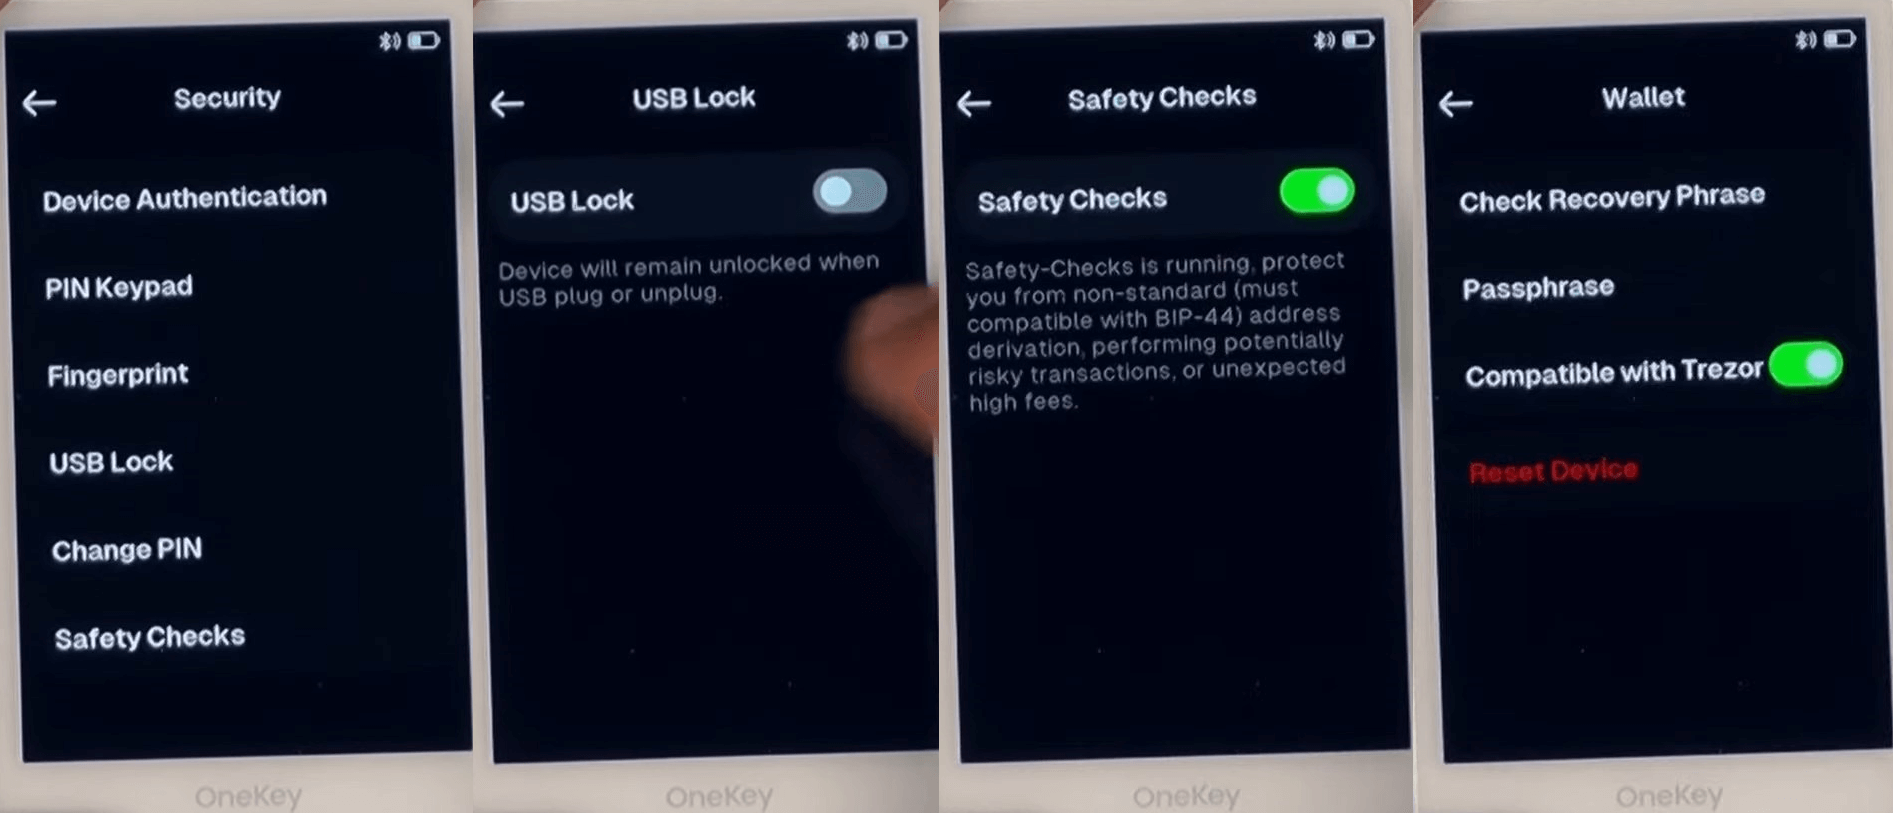
Device Authentication– select authentication method.PIN Keyboard– choose fixed or randomized keypad to thwart shoulder-surfing.Fingerprint– add/replace your fingerprint.USB Lock– block/unblock USB when connected.Change PIN– update your PIN code.Safety Checks– extra checks (e.g., BIP32 derivation path verification).
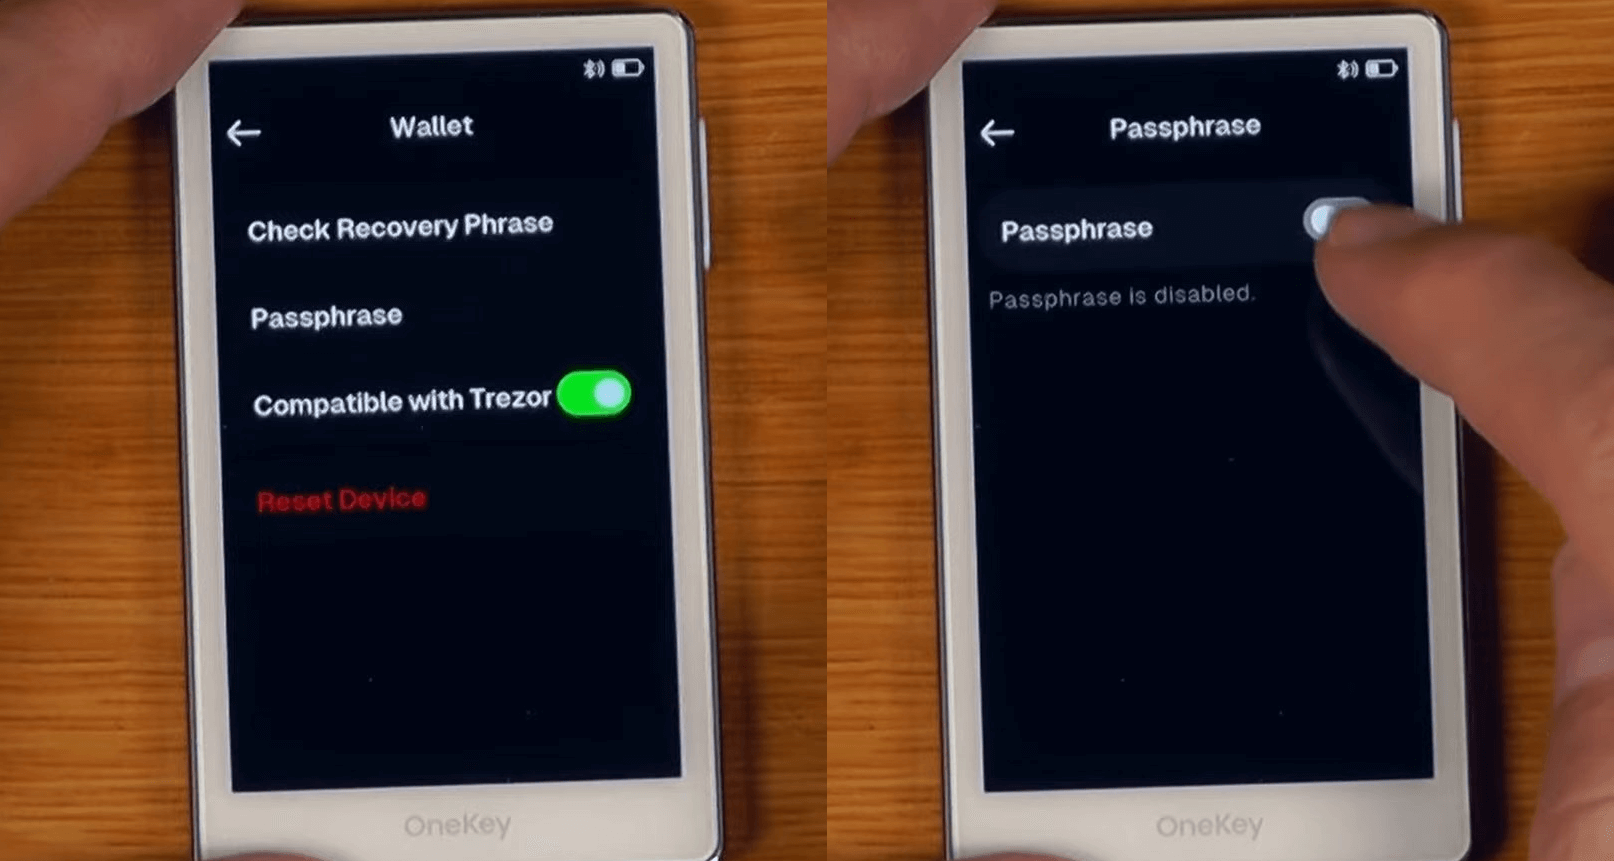
Wallet
Wallet-specific settings:
Recovery Check– verify your seed phrase to ensure it was recorded correctly.Passphrase– toggle BIP39 passphrase support for hidden wallets.Trezor Compatibility– enable Trezor T emulation mode.Reset Device– factory reset; confirm you have your seed backed up.
The final menu item, About Device, shows device details like serial number and firmware version. Tap the arrow to reveal additional options:
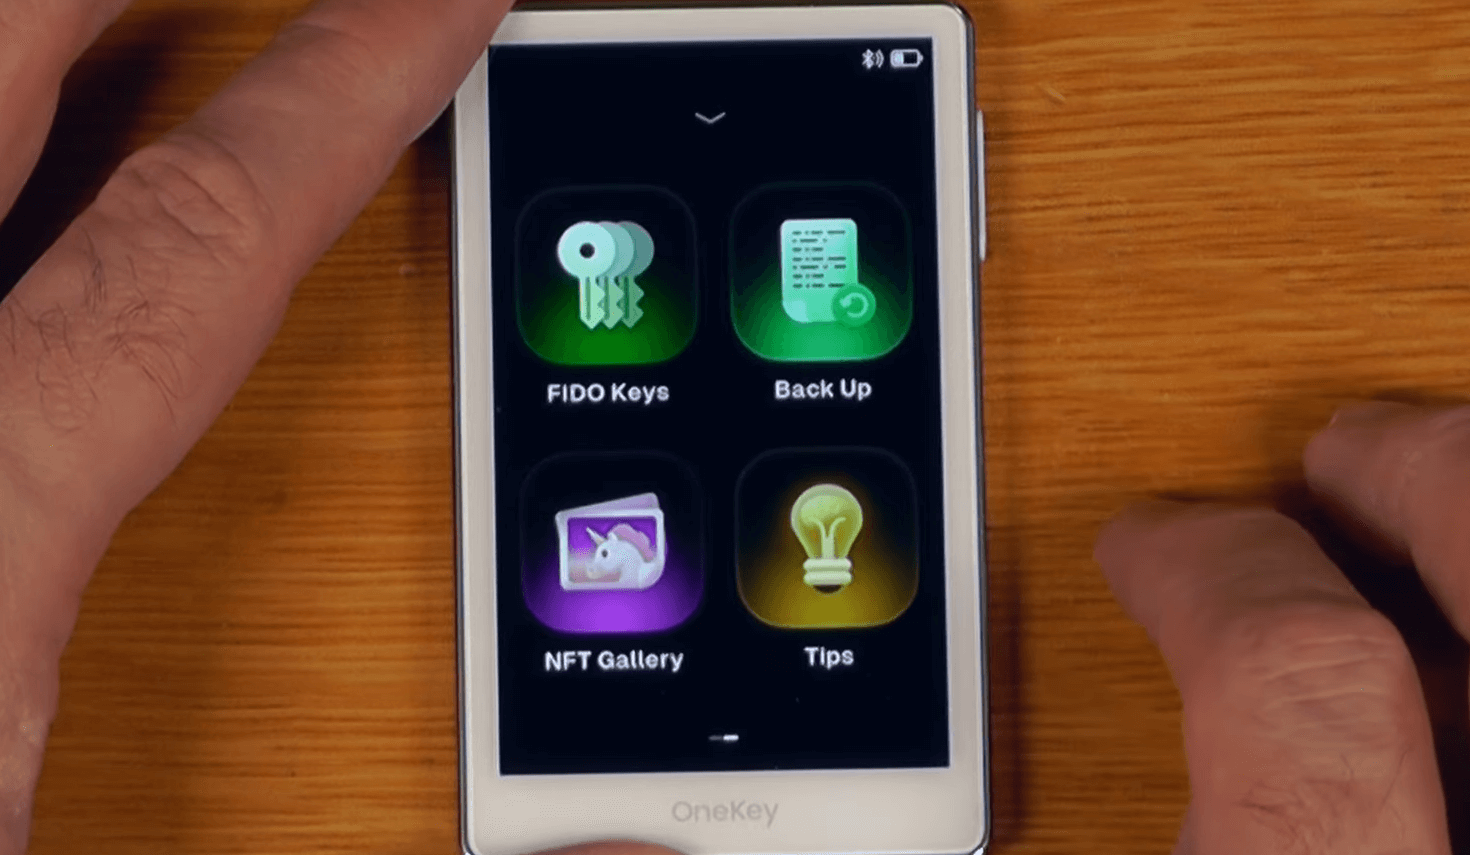
FIDO Keys
FIDO keys replace passwords for online accounts, offering phishing‑resistant, hardware‑backed authentication.
You can use your OneKey Pro as a security key for services like Google, Binance, and more.
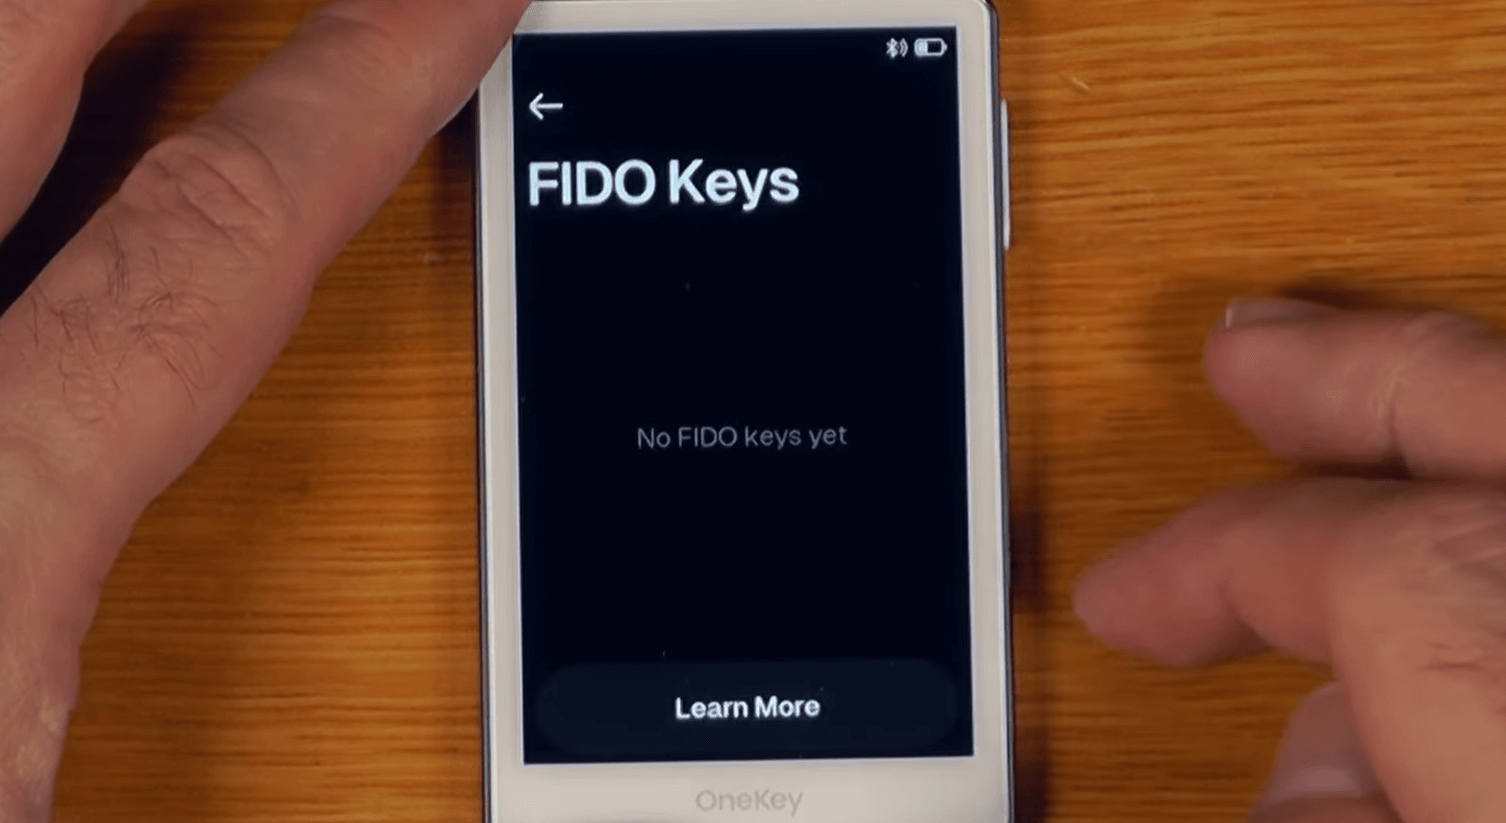
Major companies like IBM, Google, Apple, Telegram, and Binance already support FIDO keys.
To set up, go to your Google account’s Security → Passkeys & Security Keys → Create Key, then connect your OneKey Pro and confirm the prompt on-device.

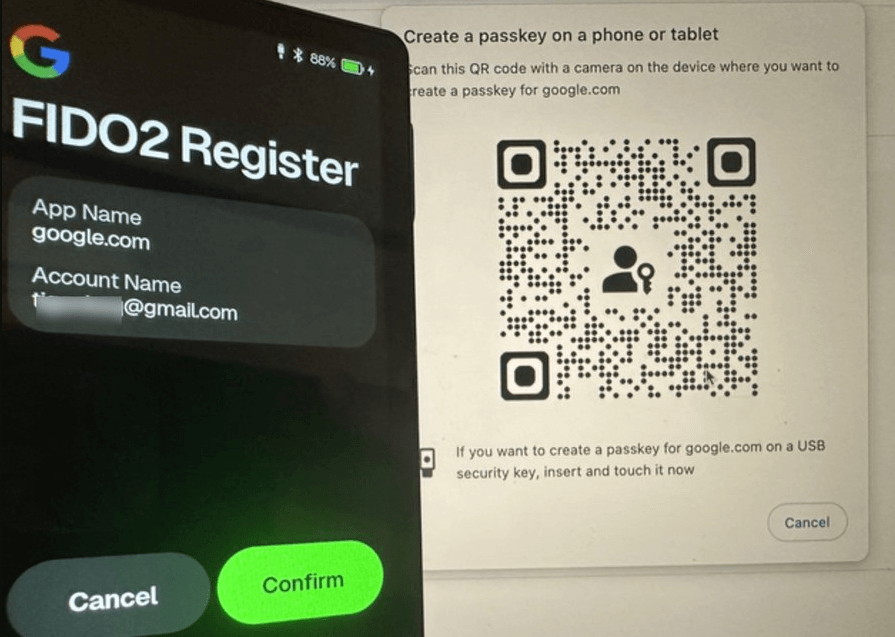
Next time you log in, choose authentication via OneKey!
NFT Gallery
The device includes an NFT Gallery where you can browse your owned NFTs and even set one as your homescreen wallpaper.
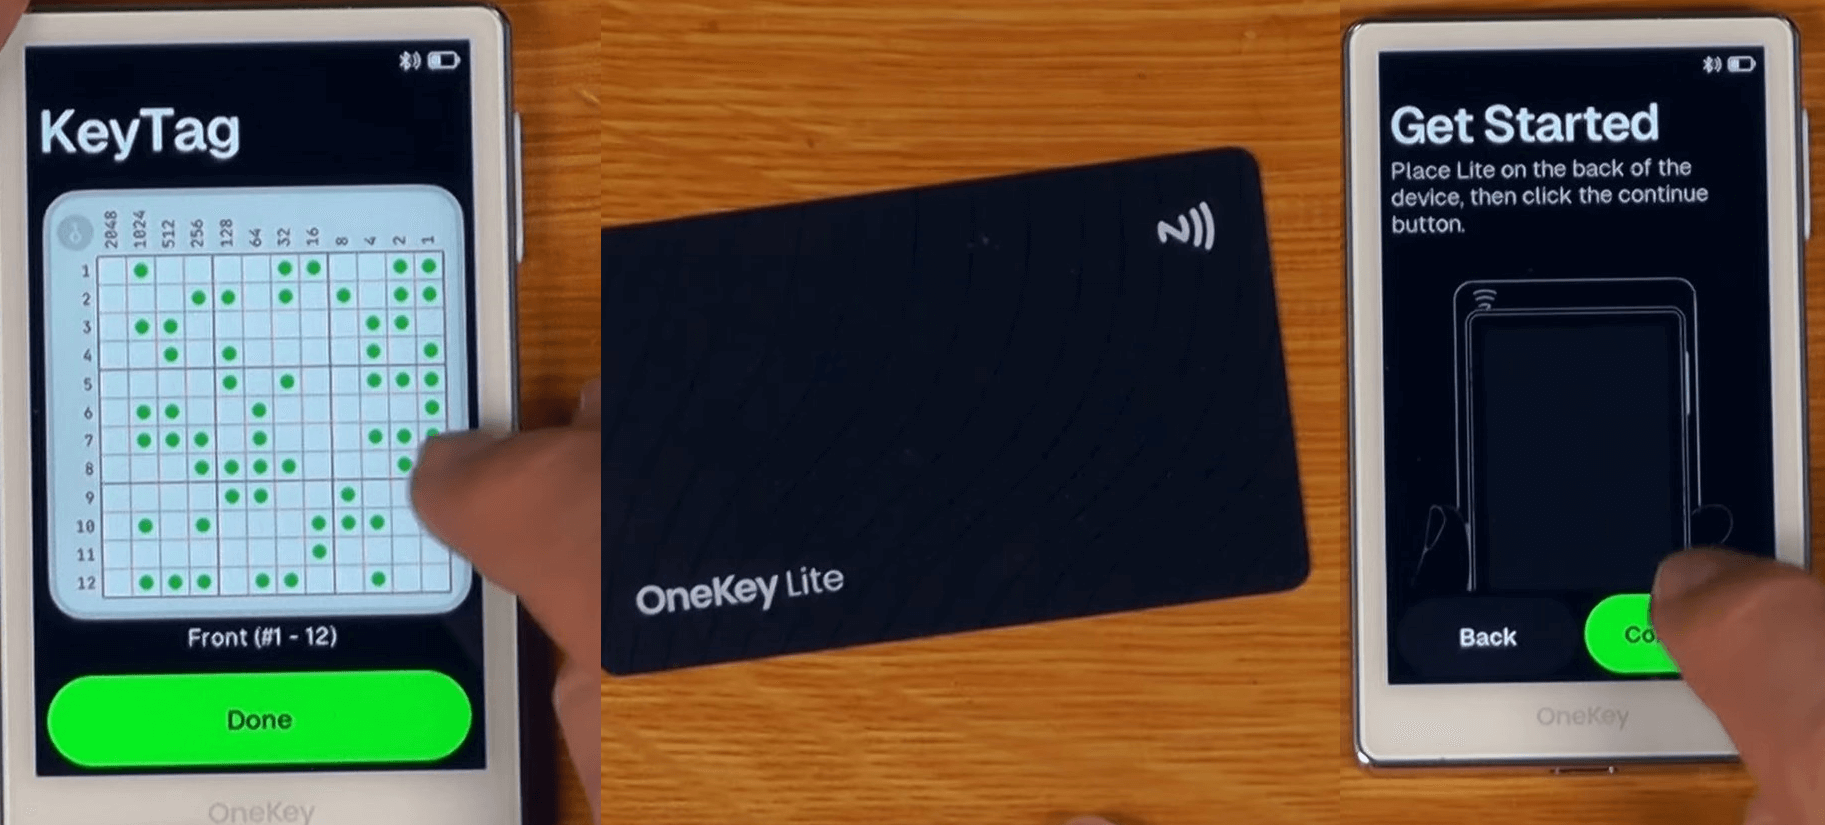
Back Up (Physical Backups)
Make physical backups on:
OneKey Lite– a plastic backup card.OneKey KeyTag– a metal plate where seed words are punched in.
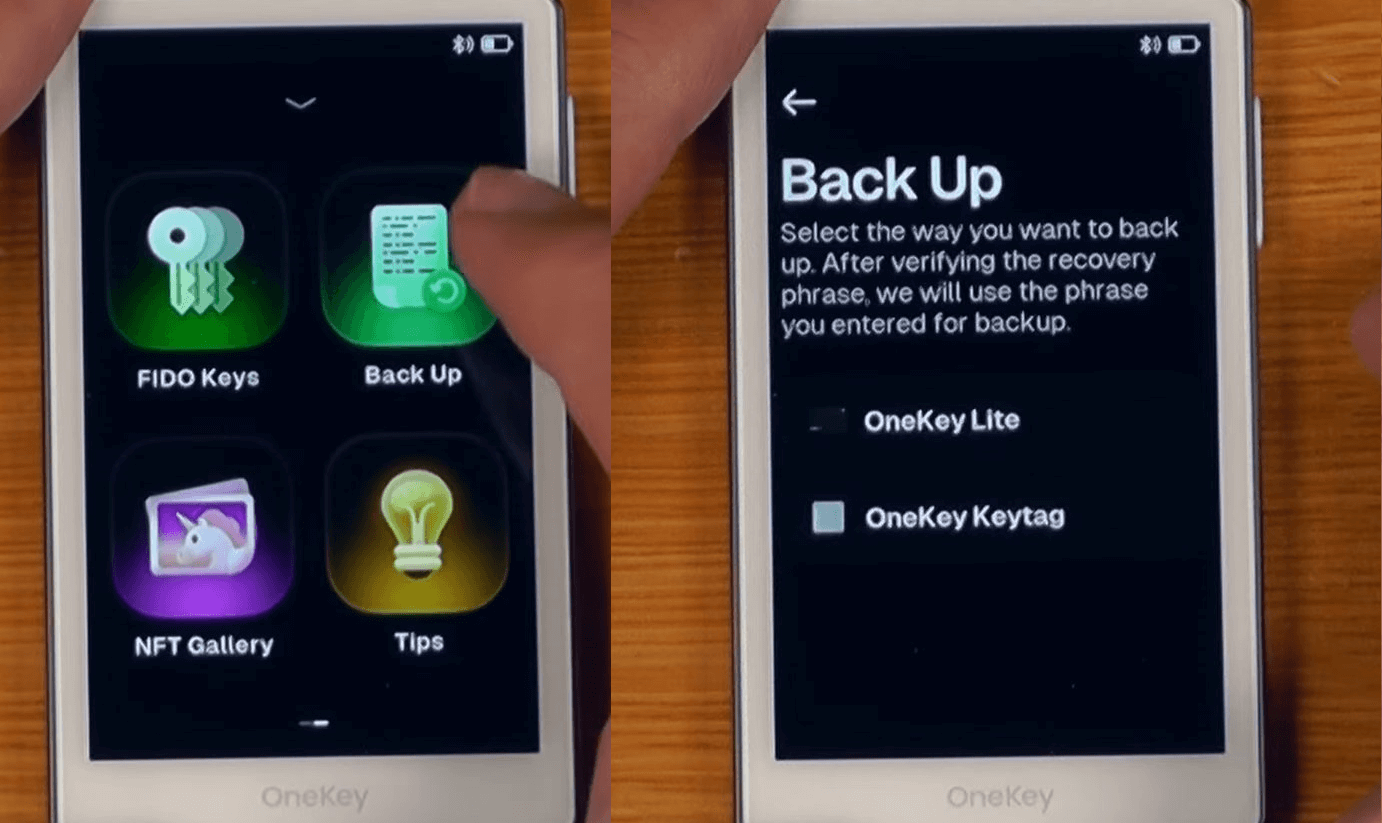
Both methods are more durable than paper: KeyTag resists fire, water, and corrosion; the card resists corrosion and never needs power. Transactions occur by tapping it to your phone.
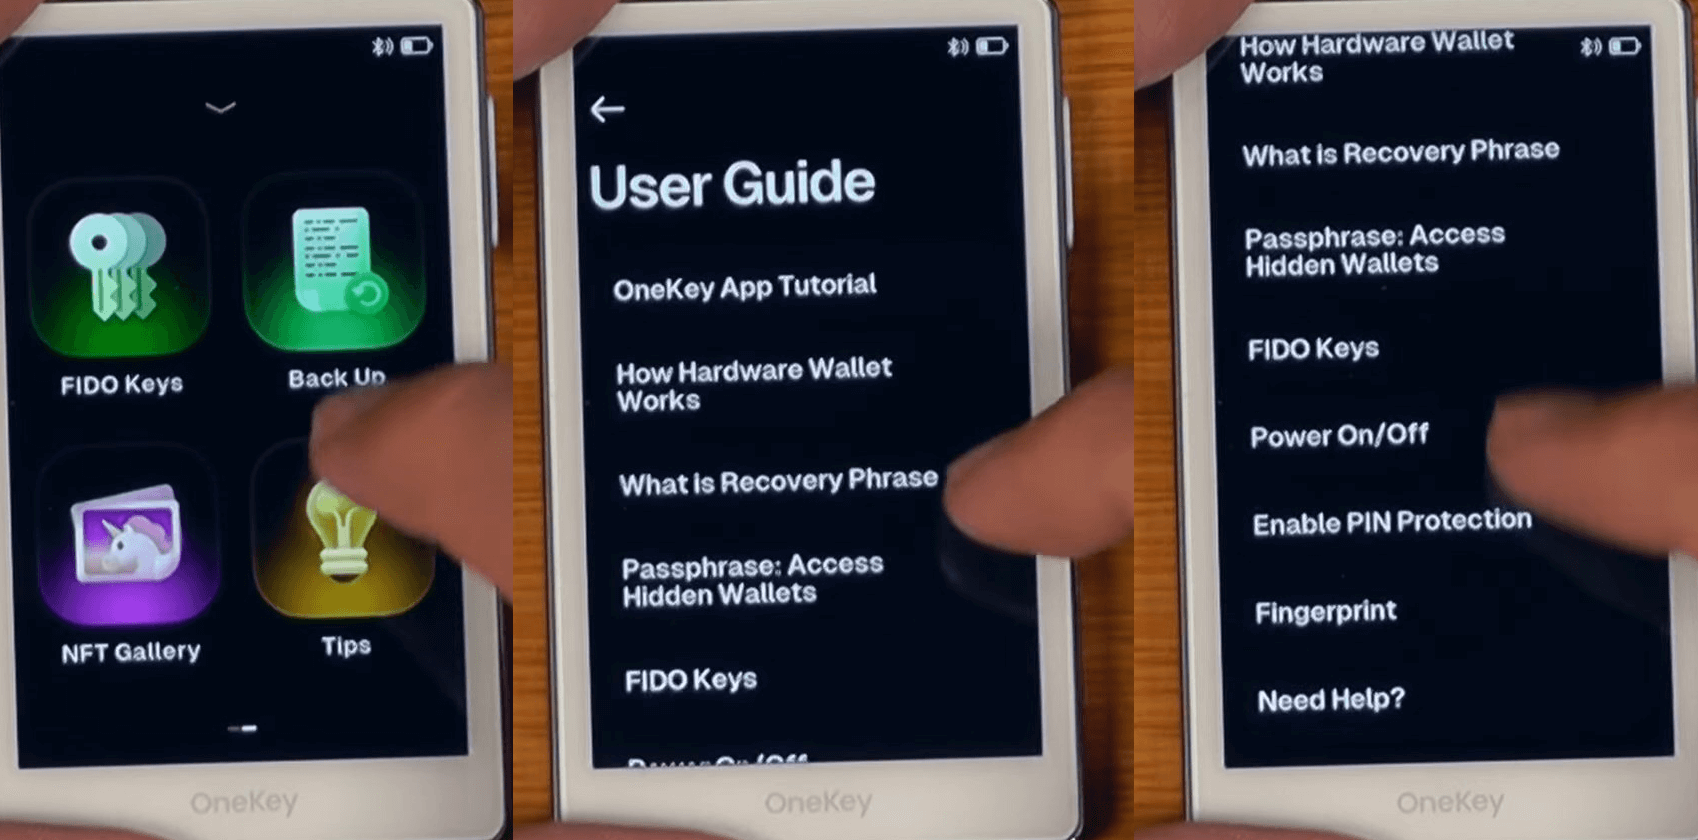
Tips (Knowledge Base)
This section contains an integrated knowledge base.
Remember: security is only as strong as its user. OneKey Pro is just a key store; your practices are the real defense.
Passphrase (Hidden Wallets)
Enable hidden wallets via Settings → Wallet → Passphrase, set your password, then in the app choose Add Hidden Wallet during import or creation.
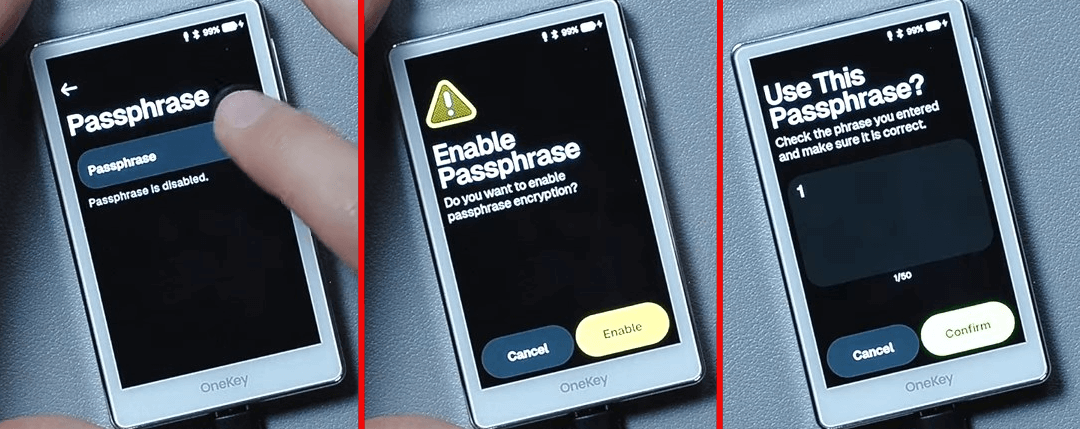
This lets you create unlimited hidden wallets derived from your seed, each unlocked only with the correct passphrase, hiding funds from prying eyes.
Import & Recovery
To reset, go to Security → Reset Device (or enter the wrong PIN 10 times). Ensure your seed is safely backed up first.
After reset, the device returns to the language selection screen and prompts to create a new wallet or recover an existing one.

Tap Import Wallet, enter your seed words in order, and your wallet will be restored.
Trezor Integration
You can enable Trezor Suite compatibility and connect via USB, but you may see a firmware revision error because OneKey uses a different firmware ID.
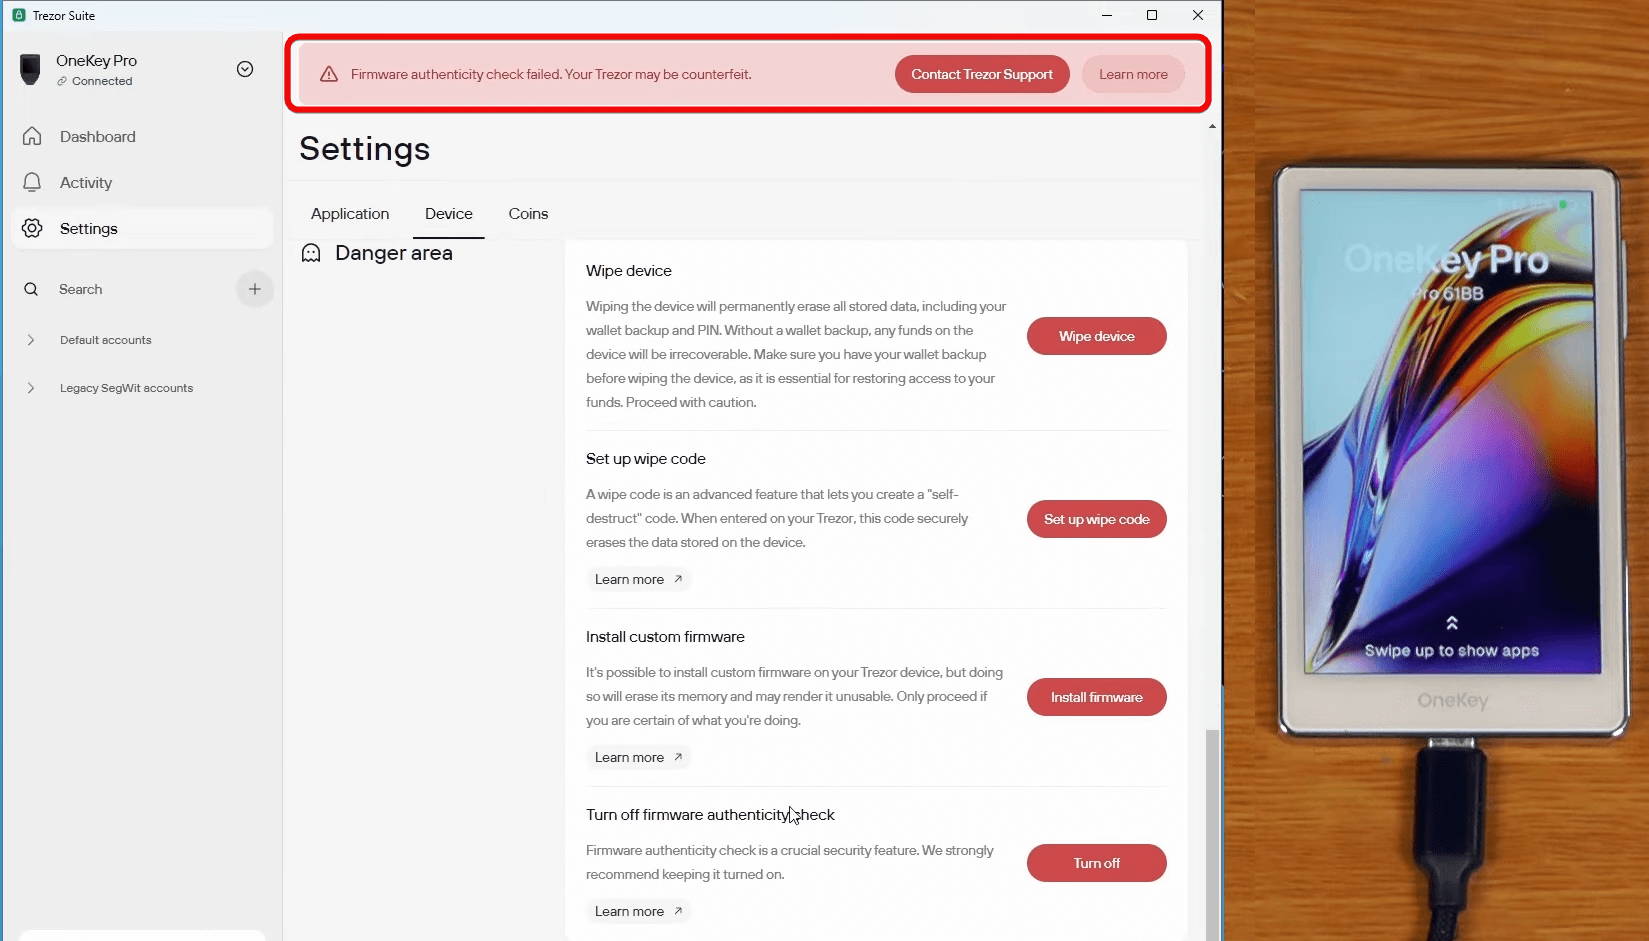
To bypass this, disable the firmware authenticity check in settings. Then OneKey appears as Trezor T without errors.
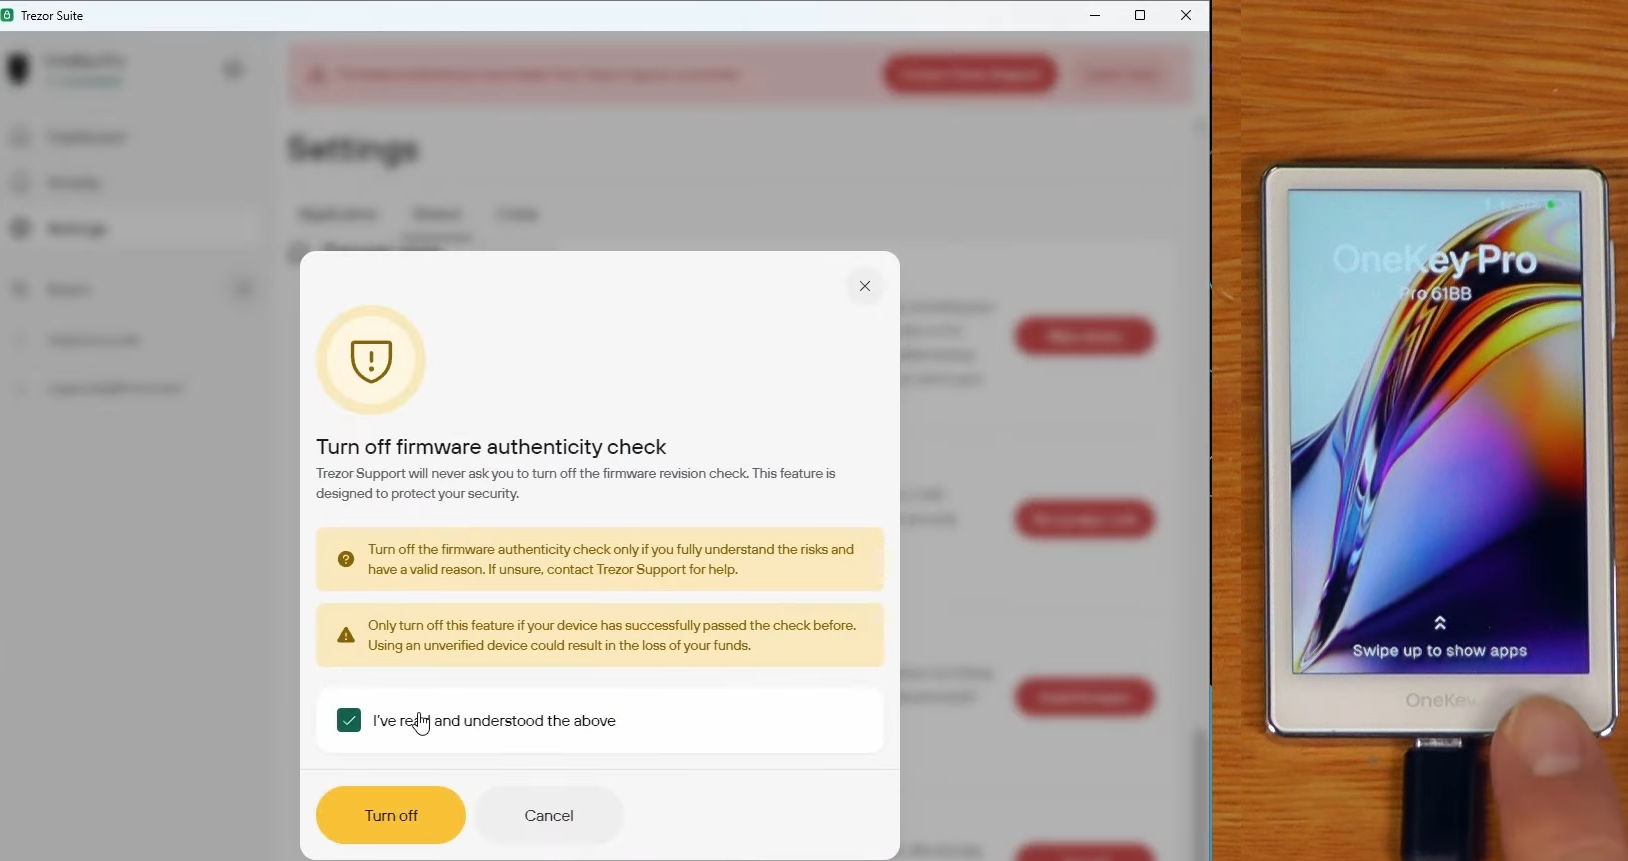
In Trezor Suite’s Dashboard you’ll see your accounts, including legacy SegWit transactions. OneKey also integrates with wallets like Sparrow and MetaMask.
Conclusion: Comparisons & Is It Worth It?
OneKey Pro feels premium—like a mini smartphone. But the price is steep. Here’s how it stacks up against peers:
|
Wallet |
Price |
Highlights (security, screen, coin support) |
|
OneKey Pro |
$278 |
3.5″ color IPS touchscreen, EAL 6+ (4 chips), air‑gap via QR, 30,000+ cryptos supported |
|
Ledger Stax |
$279–400 |
3.7″ curved E‑Ink touchscreen, EAL 6+ (1 chip), limited app space (10), 5,000+ coins via Ledger Live and third‑party UIs |
|
~ $398 |
4″ color LCD touchscreen, EAL 7 secure element, fully air‑gapped, supports ~ 1,500–3,500 coins |
|
|
GoldShell Wallet |
$249 |
3.5″ color touchscreen, fully isolated, 3 independent chips + fingerprint unlock, tamper‑evident wipe, 1,000+ coins supported |
At $278, OneKey Pro sits mid‑range among premium wallets. It’s cheaper than Ledger Stax and Ngrave Zero but slightly pricier than GoldShell and Ledger Flex.
Thanks to its large smartphone‑like touchscreen, OneKey Pro offers a more intuitive transaction review and data entry experience than Ledger.
With all core hardware wallet features, it earns its spot alongside GoldShell. Though not the cheapest, it balances cost and functionality excellently.
The wallet works seamlessly across desktop, browser extensions, and mobile.
Bottom line: if you rely on your phone rather than a PC, pairing OneKey Pro with your mobile device is a safe and convenient way to store crypto.
Choose this wallet or explore alternatives in our wallet comparison ranking—the final decision is yours.
Support:


