How to use OKX Web3 extension: deposit, withdrawal, seed phrase
OKX Wallet is a crypto wallet of one of the leading cryptocurrency exchanges for Bitcoin, Ethereum, Solana, TON and 80+ other blockchains. It supports 3,000+ tokens and works as an extension and a mobile app.
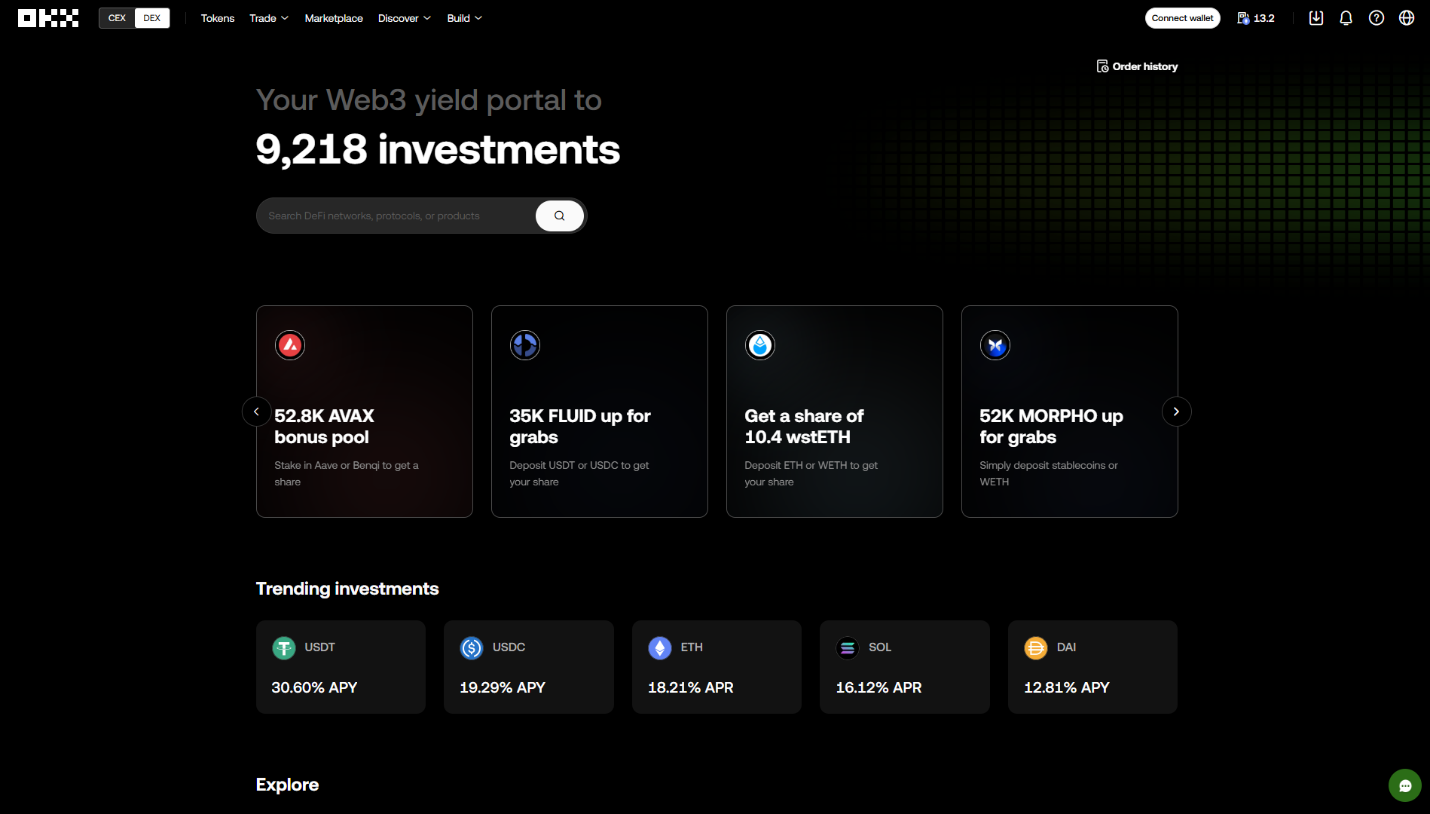
OKX allows you to not only buy, sell and exchange assets, but also use DeFi, NFT collections, staking and DApps. All this is called Web3 in the crypto world. We will tell you all about this in the article.
Everything is known in comparison, so let's start with the key differences and security of this wallet.
Security and functions
Security:
- 2FA – secure your account with two-factor authentication that requires two layers of confirmation.
- Hardware wallet integration – connect Ledger, Trezor, and other hardware wallets for increased security.
- Keyless wallets – eliminate the need for seed phrases by splitting your private keys into multiple parts.
Key features:
- Multiple blockchain support – leverage over 80 blockchains, including Ethereum, Solana, Polygon, BSC, Avalanche, and TON.
- Integration with Web3– access decentralized exchanges, NFTs, and 180+ DeFi protocols for staking and liquidity mining.
- Cross-chain exchange – exchange tokens across different blockchains without external bridges.
- Discover & Airdrops – access trending projects, token giveaways, and NFT distributions.
In terms of convenience, here are the following blocks:
Convenience:
- Simple interface – tokens are already added and ready to use. Unlike other wallets, you don’t need to add them manually via smart contract addresses.
- Cross-platform – use the wallet on any device: mobile, browser, and web version.
- Seamless integration with OKX exchange – direct access to trading, staking, and other financial services.
Access keys:
- Seed phrase – gain full control over your wallet with a 12-24 word recovery phrase.
- Private key – protect your assets with a unique cryptographic key that gives you full access to your wallet.
In theory these functions seem convenient, but the world of crypto is learned through practice, not theory. So let's move on to the practical guide and look at the wallet.
Download and installation
Download the browser extension or desktop version from the official website or from the Chrome Web Store. We will consider the mobile application below, giving preference to the extension.
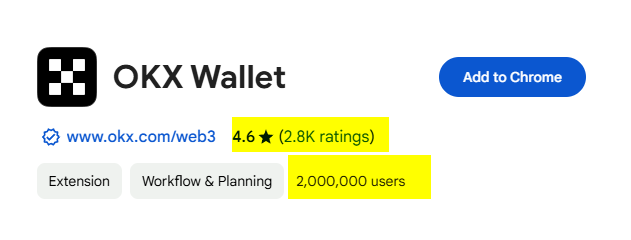
Make sure that you are installing a non-fake version by looking at the number of reviews and installations.
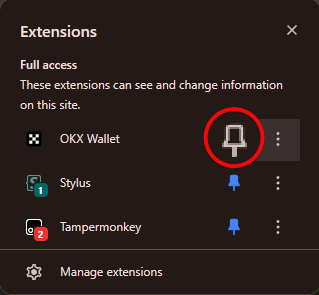
After installing the extension, pin it to Chrome to have quick access to the wallet.
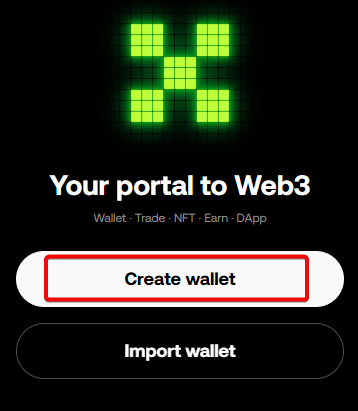
After opening the extension, a standard menu appears with a choice: create a new wallet or import an old one.
Create a new wallet
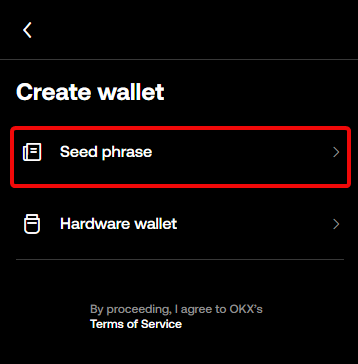
To create a new wallet, select Create Wallet.
We will be asked to either use a recovery phrase or connect a hardware wallet. Let's choose Seed phrase.
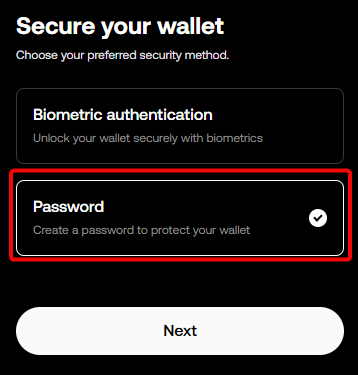
In the next step, select a method for logging into the wallet: a classic password or biometrics. As OKX themselves say:
“Advanced counterfeiting techniques can bypass biometric systems. For example, high-resolution images or fingerprints printed on a 3D printed data can fool scanners."
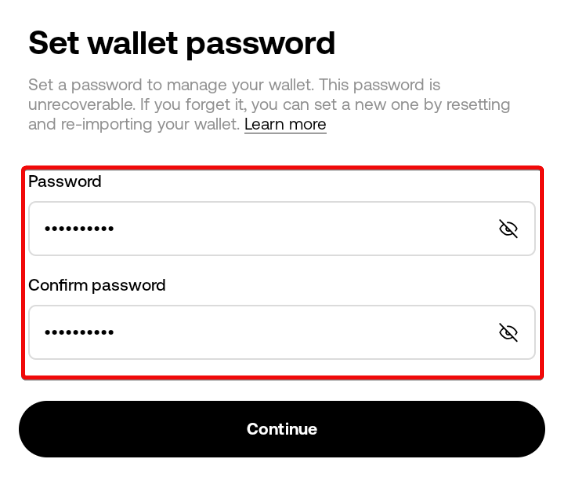
So let's not bother with biometrics and choose the usual method - a password.
Create a strong password with letters, numbers and symbols that is not used on other sites so that it cannot be guessed.
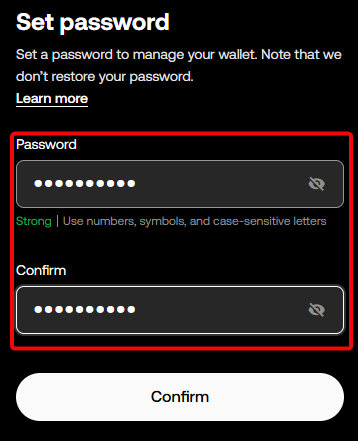
Make sure that the password passes the Strong assessment and click Confirm. Now it's time for one of the most important tasks - recording the recovery phrase.
Backup
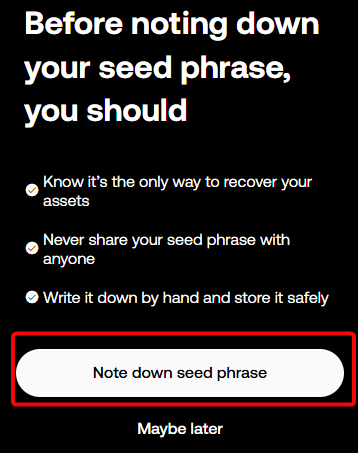
The recovery phrase is used to back up the wallet and transfer it to other applications in case OKX closes or we need another wallet. Click Note down seed phrase.
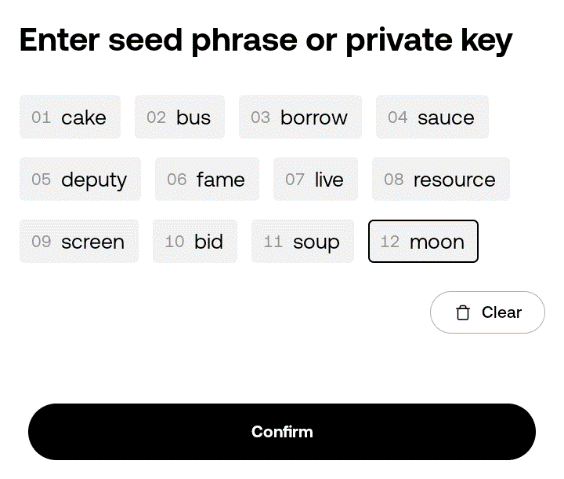
Make sure no one is watching your screen and open the phrase by clicking on it. This will display 12 words generated for your wallet.
Warning: do not show these words to anyone. We have disclosed them for the purposes of this guide only.
Only the paranoid survive in the wild west of crypto!
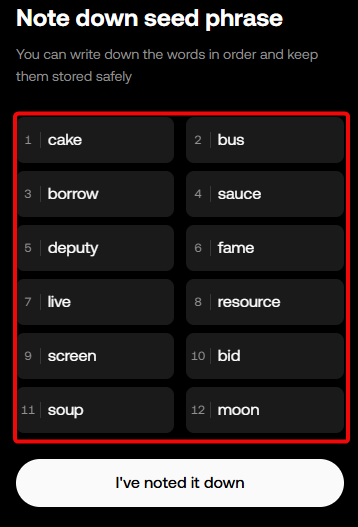
It is important to write down all the words and their sequence. Without this, the wallet will not be recovered. Make sure you have written it down correctly and click I’ve noted it down.
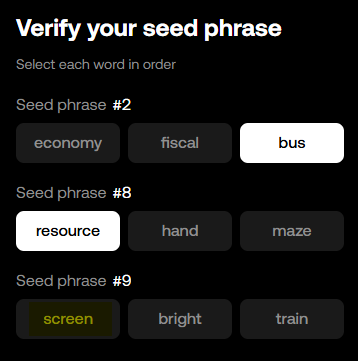
The wallet wants to make sure we have written everything down correctly. So it will ask us to select some words from the list. After entering the correct data, the wallet will finally be installed.
It offers to plunge into the world of Web3: decentralization, DeFi protocols and NFT collections. However, before you dive in, you need to learn how to swim. And at the beginning, this is replenishment, withdrawal and use of addresses.
How to use
Your total balance is displayed at the top, and below are the balances of individual coins. If necessary, hide balances by clicking on the eye symbol.
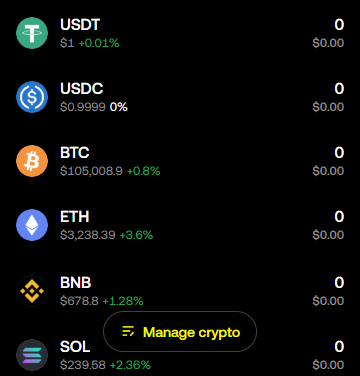
To manage tokens, click Manage crypto at the bottom of the extension. You can add or remove tokens that will be displayed in the main wallet menu.
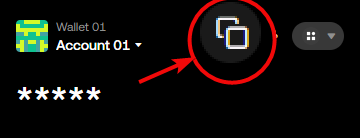
How to create an address
Addresses are created automatically. To see your addresses, click either on the coin or on the copy icon:
Cryptocurrencies with your addresses will be displayed.
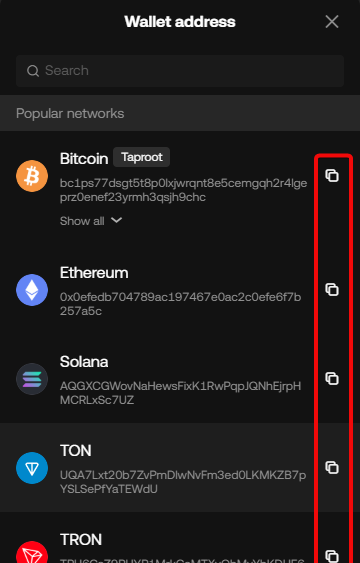
You can also click on a separate coin on the main screen to get an address or QR code.
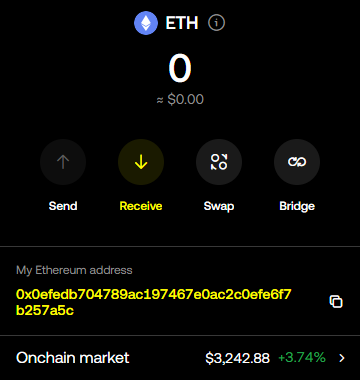
Click the Receive button to get a QR.
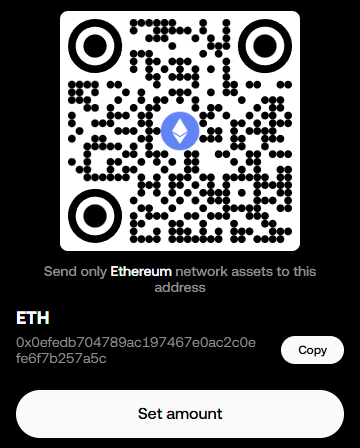
In cryptocurrency, QR codes are used to quickly exchange addresses. They simplify sending and receiving payments by eliminating the manual entry of complex and long alphanumeric addresses.
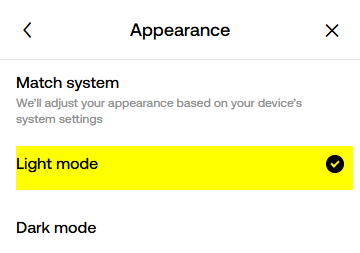
Looking ahead, in addition to the QR code settings, we can change the color theme if we want to use light colors.
How to top up
We will choose Ethereum for topping up. Copy the address and share it with the sender or send them a QR code. You can also specify the amount you want to receive. In this case, when sending the QR code, a request for the specified amount will be visible. This is an analogy with a receipt (invoice) that needs to be singed.
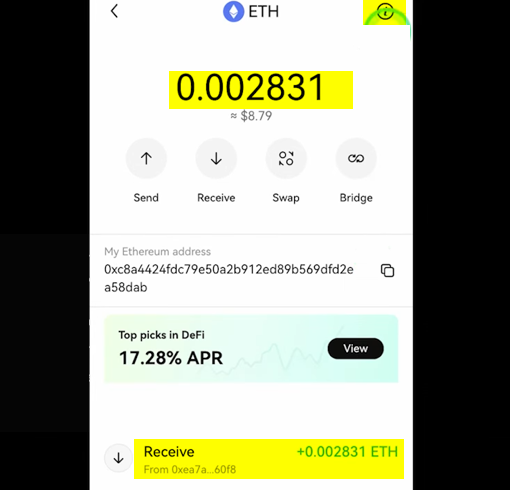
As soon as the funds are received, they will be displayed in the balance.
At the top of the extension, the balance is displayed in your selected currency, for example, in USD.
There are also functions for sending (Send), receiving (Receive), exchanging (Swap) and transferring between networks (Bridge).
The Top picks in DeFi bar displays popular offers for staking.
Clicking the i icon in the upper right corner will give you more information, such as the market cap, maximum and circulating supply.
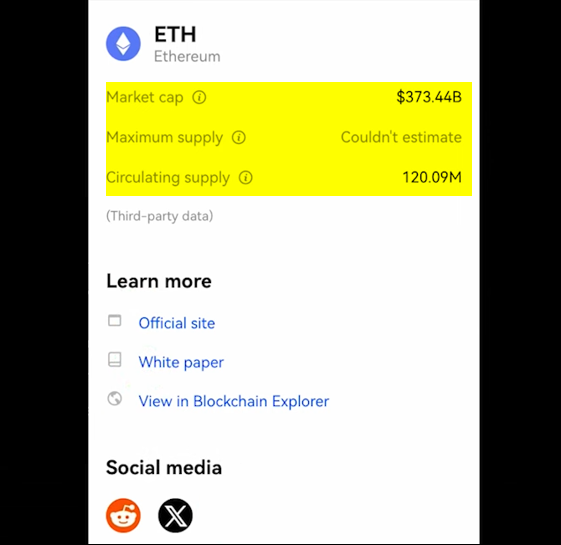
You will also find links to the official website, the project's development vision (white paper), the blockchain explorer and the coin's social networks.
How to withdraw
Now let's send some cryptocurrency. You can click Send right here or go back to the menu and select Send on the main screen.
Select a coin - in our case, it's ETH, since it's the only one in the wallet. Enter the recipient's address and add it to your address book if you want.

Save the recipient's name, for example Maxim Anisimov, and click Confirm.
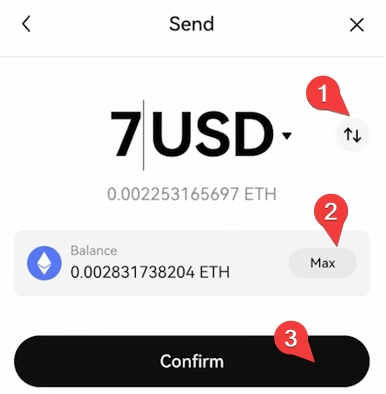
- Enter the amount you want to send, either in crypto or USD.
- You can also click
Maxto send all funds. - Click
Confirm.
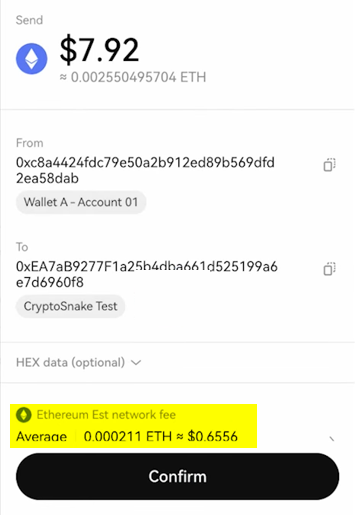
Check the details, adjust the gas fee (network fee) if necessary. The wallet offers several preset transaction speed options depending on their fee:

Use Custom to set a different fee value.
Click Confirm to confirm the transaction.
Your funds will be sent and the balance will be updated. You can view the sent transactions in the coin menu. Click on a transaction to view details and copy the TX hash so the recipient can check its status and amount.
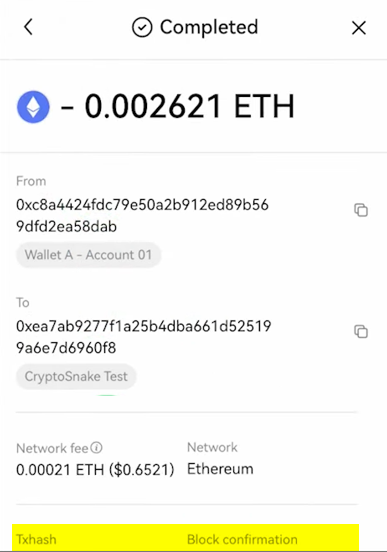
You can also click the link at the bottom of the transaction window to get detailed information about it.
Check balances
The History tab displays the history of your transactions across all networks, allowing you to filter them by network or date range for convenience. tracking.
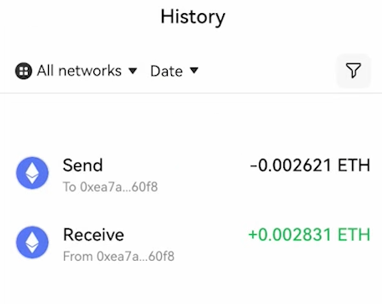
For example, to check a past swap or bridge transaction, go to the History tab and view the details.
Seed phrase and private key
To get the seed phrase, go to the Settings menu and select Backup.
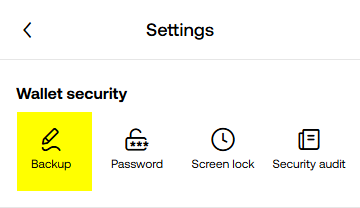
Enter your wallet password and get a seed phrase.
The private key is obtained in the same way. It is in another tab.
Important: each blockchain has its own private key. If you want to save private keys, do it for all blockchains.
Example:
Bitcoin private key: L1rpsjxAzBCTFbMkQ3o2Jh16ia8uVkUYqt3JtwKr8UjwxGpWCHje
Ethereum private key: 0x204541dd57061e8215b47bf0016ac051014c6f717eff71bd86652795c5e95e37
The seed phrase, unlike the private key, is the same for the entire wallet.
Exchange
Function Swap allows you to exchange one token for another without having to use a centralized exchange.
Let's look at how to exchange and transfer coins between networks directly in your wallet. Click Swap to get started.
- Select the coins you want to swap.
- Then enter the amount and you will see a calculation of the coins you will receive in return.

- You can choose between automatic mode (
Auto mode) andSnap mode, which is only available for certain assets. - When you are ready, click
Swap.
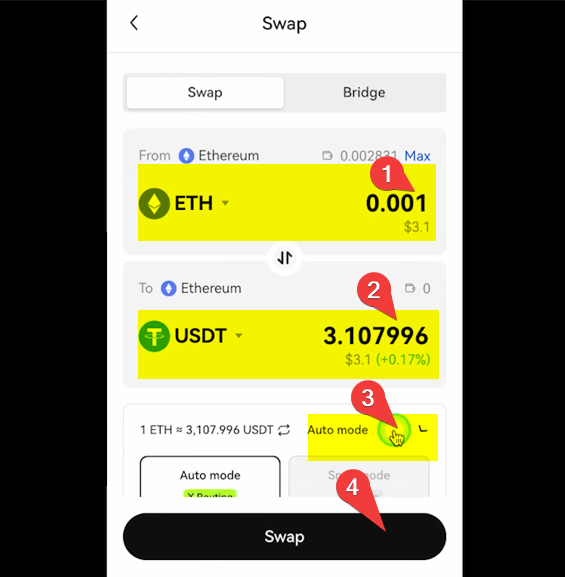
Fees: Transactions incur network fees fees depending on liquidity and market conditions.
You can swap within the same chain (for example, Ethereum to USDT) or across different blockchains using a bridge.
Bridge
Bridges allow you to move tokens from one blockchain to another, such as from Ethereum to Solana or other supported networks.
Why else would you need a Bridge?
This is especially useful for users who want to interact with decentralized applications (dApps) or tokens on different blockchains.
Sometimes using different blockchains can reduce transaction fees or increase speed.
To start using this feature, click Bridge.
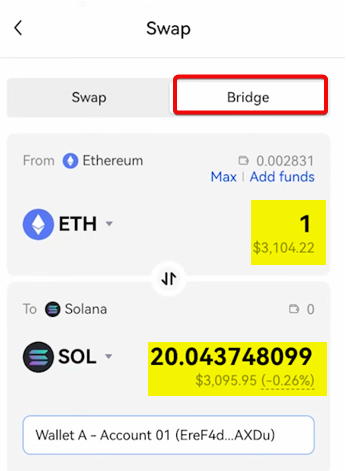
Select the desired networks and tokens, then enter the amount. If you are happy with the terms, click the Swap button to continue.
OKX will calculate the network fee and suggest various bridge routes, including the most profitable and fastest options.
These blockchain transactions incur gas fees, which vary depending on the networks involved.
Staking, Earn, and DeFi
The DeFi tab provides access to a variety of investment options, including liquidity pools, staking, and lending. Click Explore to explore the possibilities.
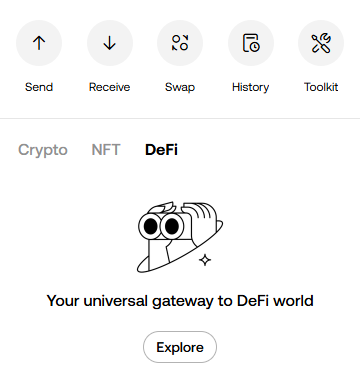
This will open the OKX Earn platform, which simplifies the investment process. It allows you to manage various DeFi products from one place without having to switch between different protocols.
What's available here?
Start staking stablecoins by choosing assets like USDT, USDC, DAI, and more to earn annual percentage yield (APY). For example, USDT can yield up to 30.60% APY.
While higher rates may indicate higher returns, they may also signal higher risk, volatile rates, or promotional incentives.
Use bonuses to earn additional rewards for staking certain tokens.
Keep in mind that bonus distribution conditions vary by project and are subject to change.
Risks associated with third-party interactions, such as smart contract vulnerabilities or lack of liquidity, should also be considered. For example, using liquid pools may result in impermanent losses due to price fluctuations.
Stake individual tokens, such as BTC or ETH, through staking or lending protocols to earn without the risk of impermanent losses.
Participate in liquidity pools - add multiple cryptocurrencies to earn income from transaction fees and liquidity mining.
Assess the risk of impermanent losses arising from due to fluctuations in asset prices.
Creating your NFT and airdrops
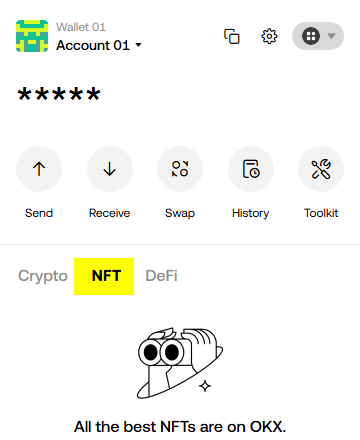
Going from the Crypto tab, you will find a tab for exploring the NFT market.
In terms of NFT, we have the following options:
- Create your NFT on OKX – upload image, name it and add a description.
- Marketplace – access NFTs from OpenSea, LooksRare, Magic Eden and IMX Official.
- Buy/Sell – explore, buy and list NFTs for sale on the OKX NFT Marketplace. Sort them by price, blockchain or collection.
- Rewards and Airdrops – participate in giveaways, earn discounted NFTs by completing tasks such as following, reposting, participating in events, buying or selling.
To create your NFTs, go to the OKX page and click Connect wallet. Then you can upload images to the form on the website.
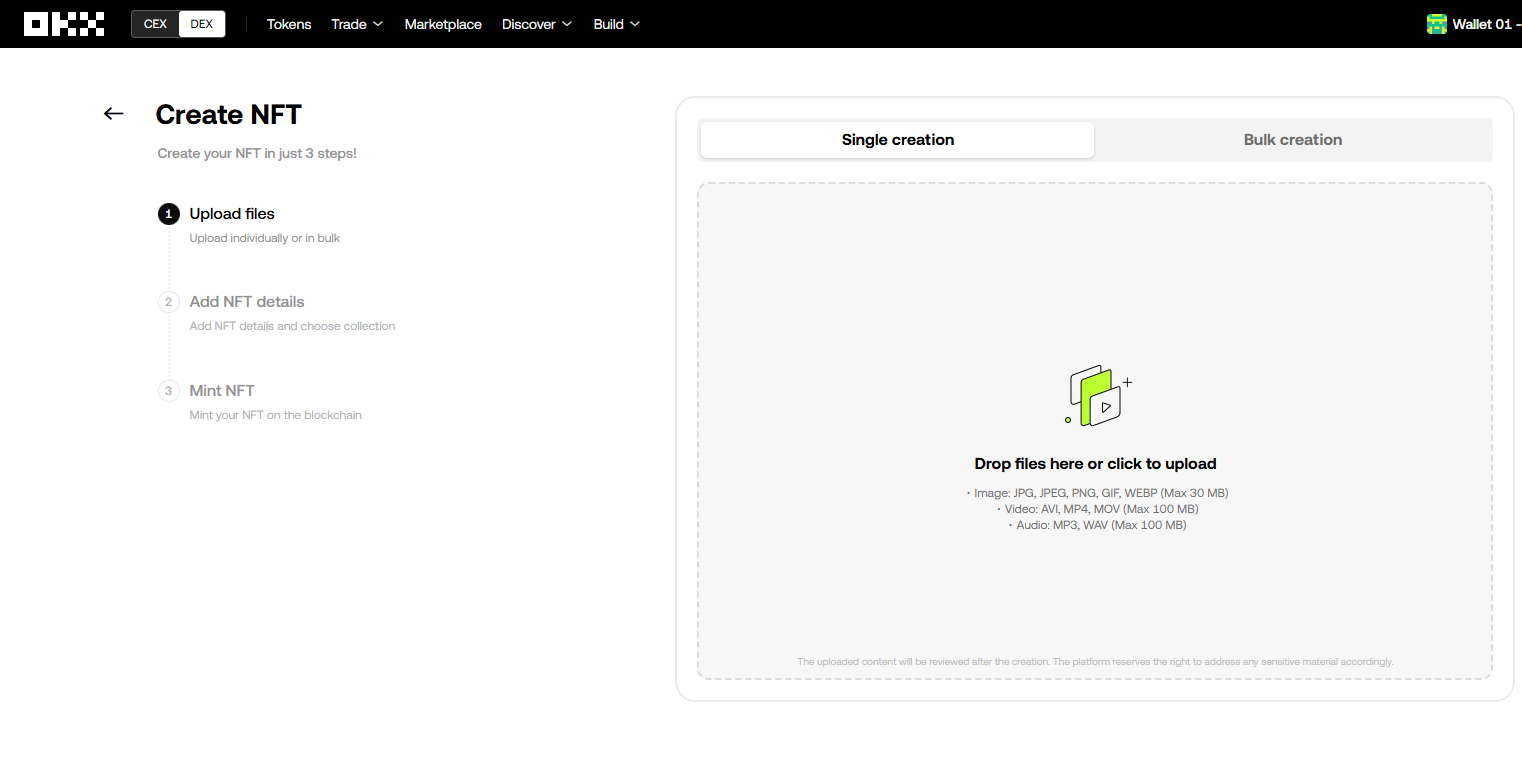
- Upload a file (e.g. image, video, audio) that you want to turn into an NFT. Add metadata such as name, description, and properties.
- Select the blockchain you want to deploy the NFT to (e.g. Ethereum, Binance Smart Chain, Polygon).
- Pay the minting fee.
Confirm the transaction and wait for the NFT to be created and registered on the blockchain.
Once created, it will appear in your wallet's NFT collection. You can transfer, sell... or show it off.
We've covered the main use cases. However, there are still quite a few interesting settings in the wallet.
Advanced settings
The settings menu is divided into 3 blocks:
- Wallet security – everything related to wallet security is here.
- Basic – account management, adding networks and configuring the extension interface.
- Advanced – settings for switching the server, synchronization with a virtual machine, etc.
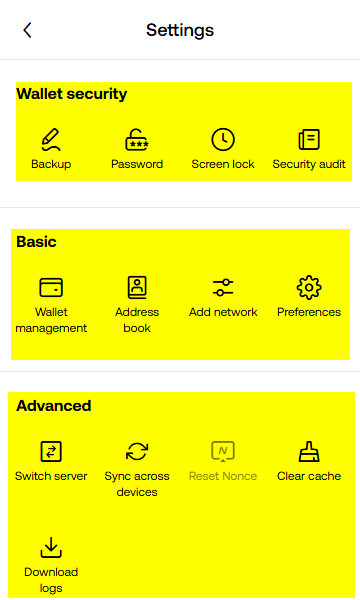
In Preferences you can select your preferred currency and language, set up an auto-lock timer, and enable or disable the display of NFTs in the total balance.
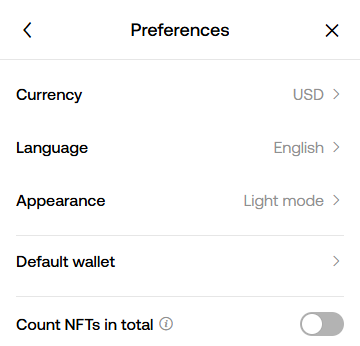
You can also set OKX as your default wallet and contact the center support.
There is another menu on the main screen – Toolkit. It contains various useful tools.
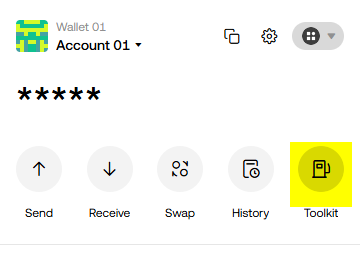
For example, receiving test coins, bulk sending and a gas cost tracker.
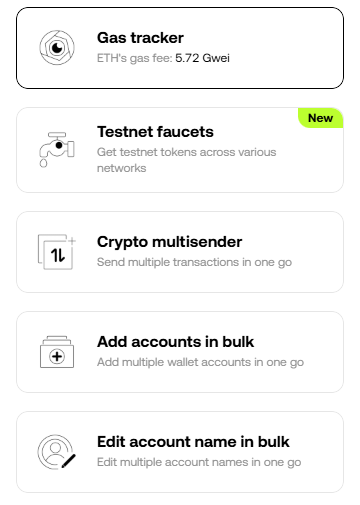
- Gas Tracker – shows current transaction fees in different blockchains, helping to calculate the cost before sending. For example, in Ethereum, the fee can vary from $0.08 to $10, and in Binance Smart Chain - only $0.05.
- Testnet Faucets – distributes free test tokens for work in test networks. Useful for testing smart contracts and DeFi applications. Tokens from the testnet cannot be sold, but can be used to test transactions.
- Crypto Multi-Sender – allows you to send cryptocurrency to several addresses at once. This is convenient for mass transactions.
- Add Accounts in Bulk – helps you create and manage several accounts in OKX Wallet at once. Makes it easier to work with several wallets.
- Edit Account Name in Bulk – allows you to rename several accounts at once. Helps you organize your wallets better.
Gas Tracker
Select the blockchain network you want to check gas fees for, such as Ethereum, Binance Smart Chain, or Polygon.
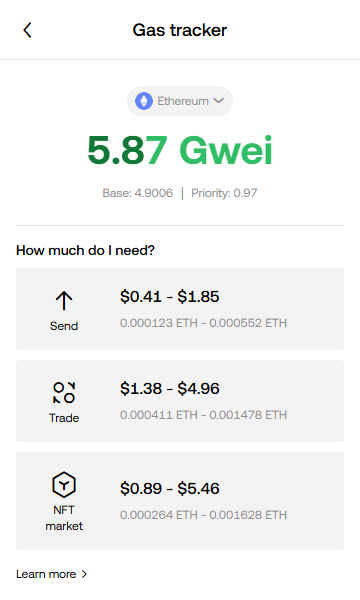
Gas Tracker displays current fees in real time, divided into three levels:
Send– minimum and maximum cost for sendingTrade– gas cost for tradingNFT market– fees for NFT
When sending a transaction, you can manually set the fee based on the tracker's recommendations.
Adding tokens
To add a custom token, go to the Manage Crypto section in the extension interface. Select the Custom Crypto option.
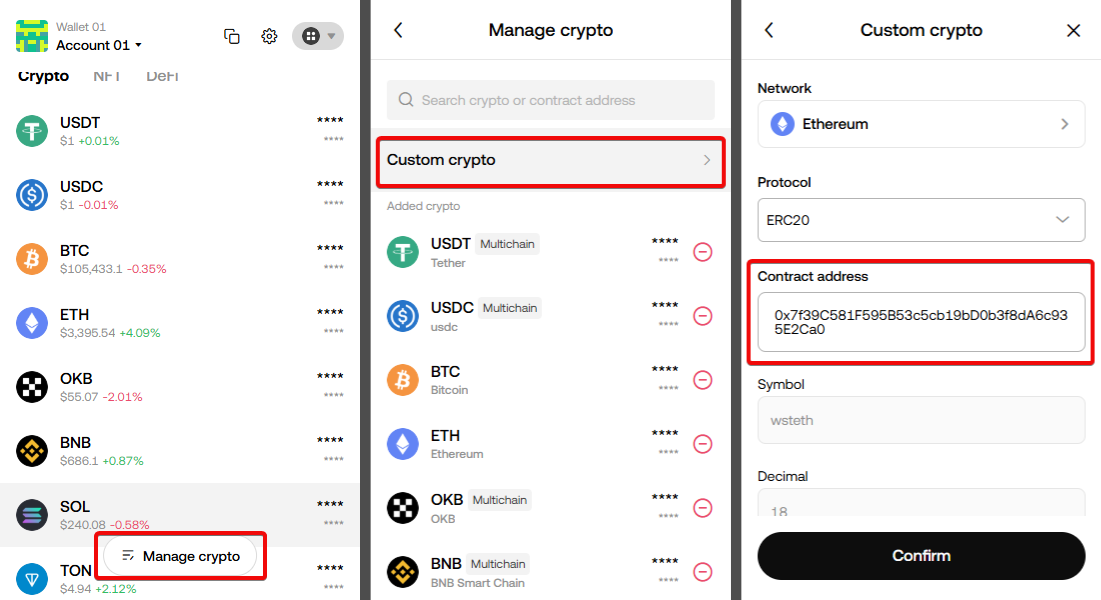
If necessary, change the network from the default (e.g. Ethereum) to the desired blockchain network.
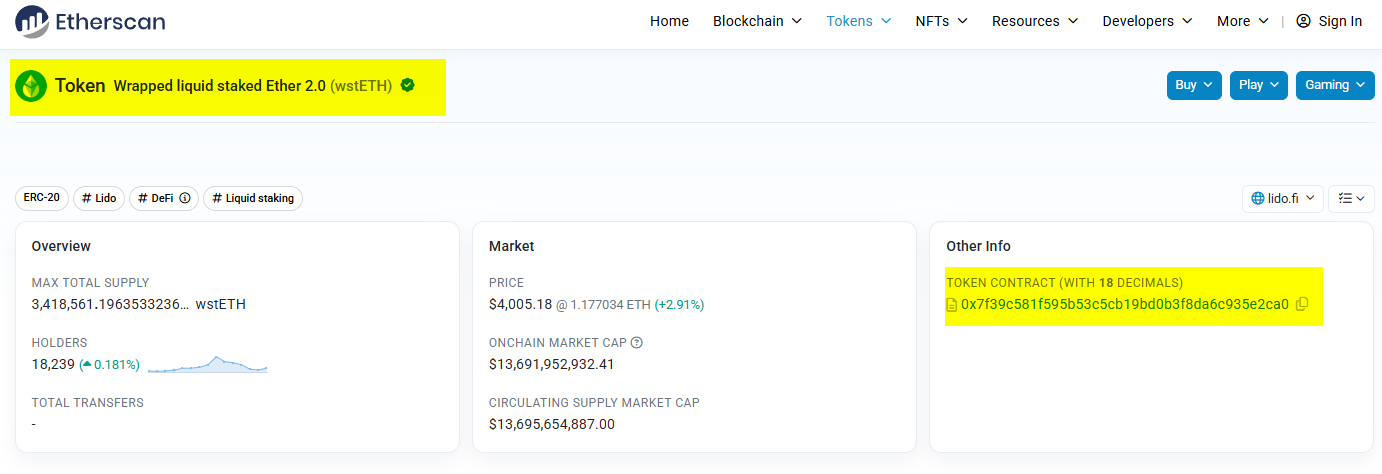
Enter the custom token contract address, which can be found on platforms like Etherscan. In the example, we added Wrapped liquid staked Ether 2.0 (wstETH).
After inserting the contract address, the rest of the data, including the symbol and decimal values, will be filled in automatically. Confirm the action to add the token to the wallet and make it available for transactions.
Adding wallets and accounts
You can have multiple wallets in one extension. Why do you need it? For example, use one for dApps and another for storing cryptocurrency.
dApps can be vulnerable, so it is not recommended to keep large amounts in such wallets.
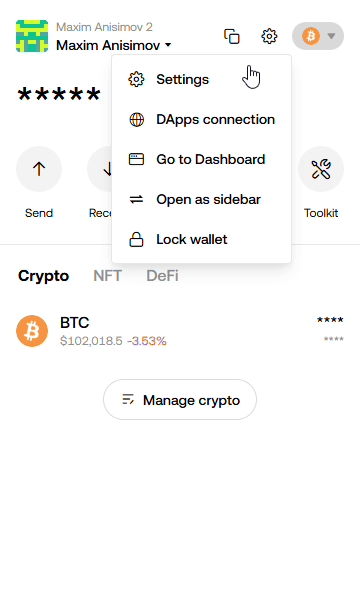
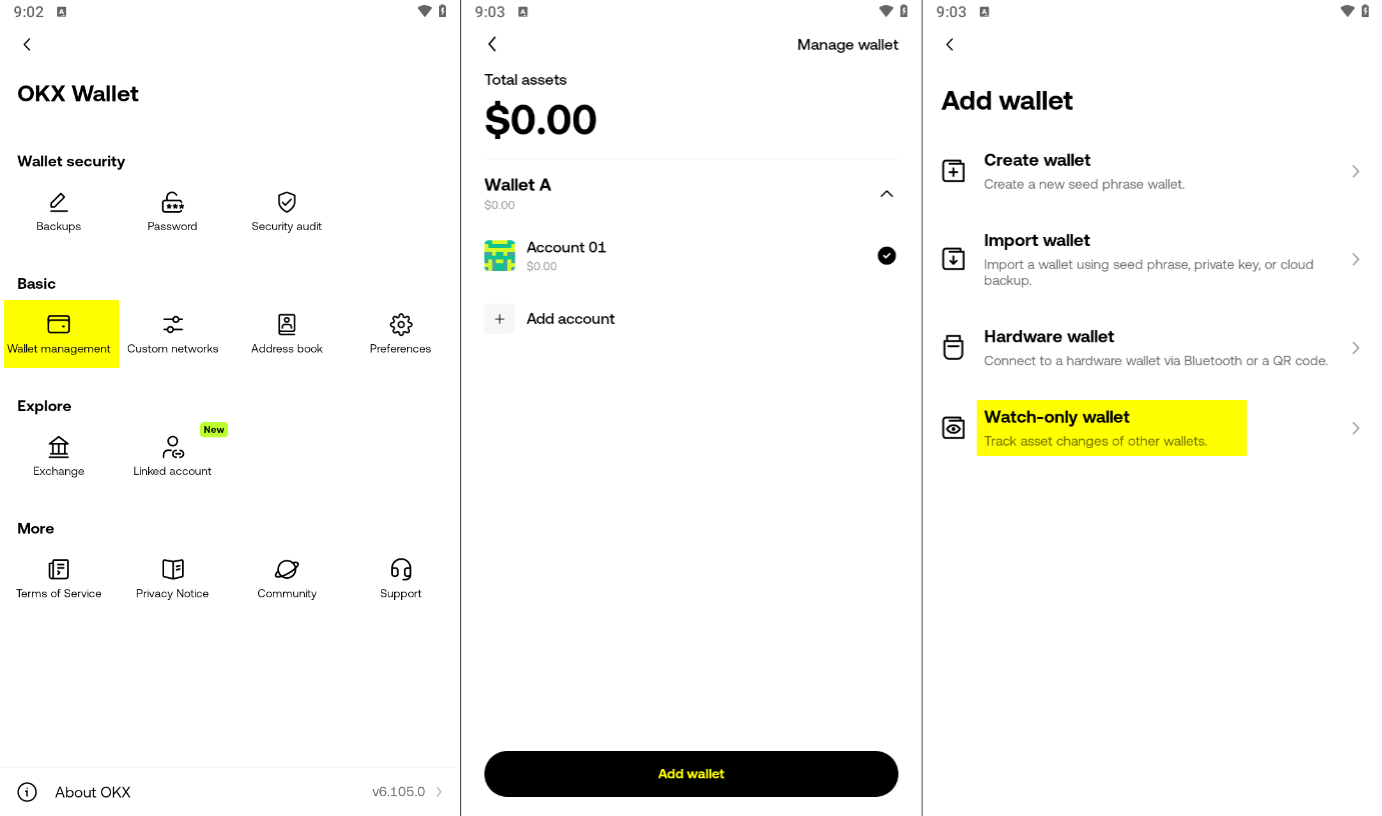
To manage accounts and wallets, click on your account in the upper left corner.
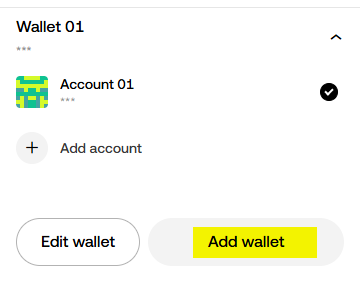
Here you can create a new account (Add account) or add a wallet.
Here you can import and connect a hardware wallet.
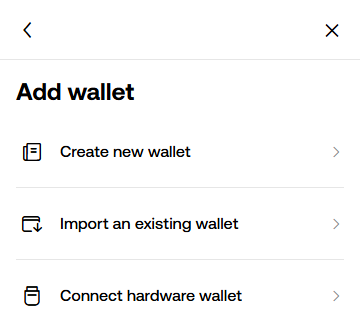
Integration with Ledger
OKX supports integration with hardware wallets such as Ledger, Trezor, Keysone and OneKey.
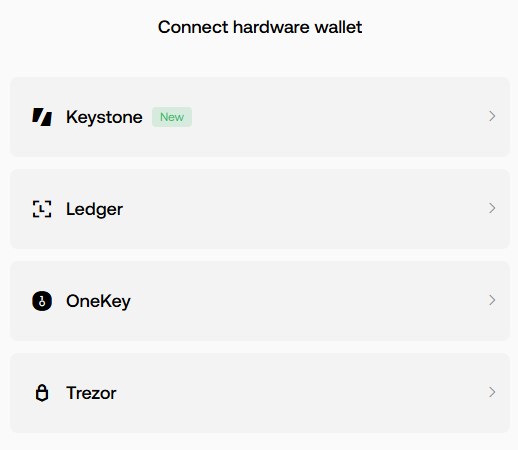
Connect your hardware wallets by linking them via Bluetooth or USB. This ensures that private keys are securely stored on the physical device, while transactions are signed externally.
Keyless Wallets
Keyless Wallet is a crypto wallet that works without the usual private keys and seed phrases. The idea is to split this private information into pieces so that if hacked, hackers only have a piece of the key.
It's like a complex password that is split into three parts. Each part is useless on its own. This technology is called Multi-Party Computation (MPC) and the open source code is on Github.
Where are Keyless key fragments stored?
Three independent fragments are created. The first is generated by the OKX server, the second is stored on your device, and the third is encrypted and uploaded to a cloud storage service such as iCloud or Google Drive.
Is the technology safer than a private key or seed phrase? In our opinion, no. Such wallets are easier to create, but you need two keys to restore:
- A key from the cloud
- A key from the OKX server
Thus, in the case of a private key, you control it yourself, and in the case of Keyless, you need to rely on the iCloud cloud or Google Drive + the OKX server. And are they eternal? Will the OKX server exist, say, in 10 years?
Keyless is not recommended if you want to manage your keys yourself.
The second disadvantage is the dependence on this technology. You won't be able to transfer your wallet to other platforms that don't support Keyless.
In contrast, private keys and seed phrases are universal and secure. They can be imported to any other wallet. And if stored properly, they are better than Keyless.
Some features, such as "watch-only address", are only available in the mobile app. Therefore, we will restore our wallet on the mobile.
Mobile application
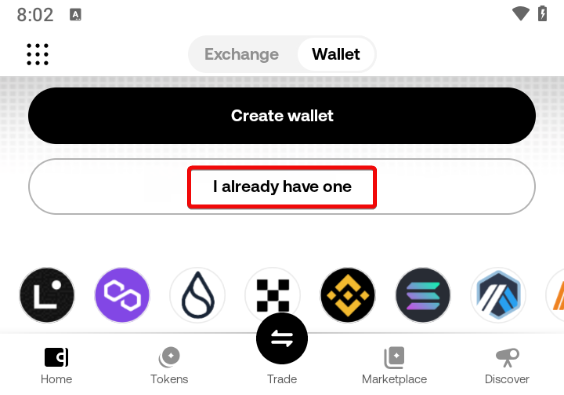
Download the mobile application from the official website via QR code or through Google Play and App Store. Because we already have a wallet, we will select I already have one for recovery.
Recovery
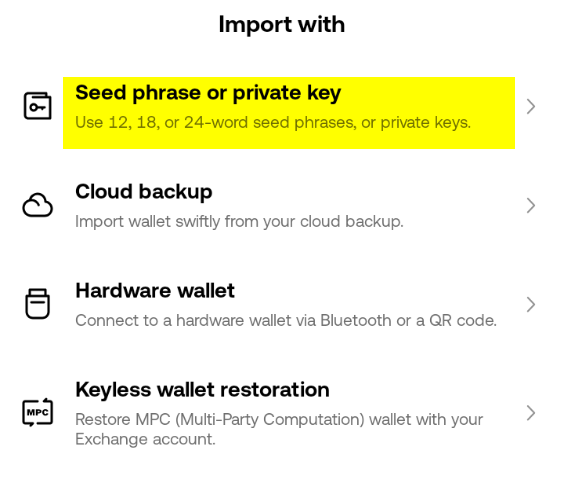
We are offered 4 import options:
Seed phrase or private key- use 12, 18 or 24 word seed phrases or private keys.Cloud backup- import wallet from cloud backup.Hardware wallet- connect to hardware wallet via Bluetooth or QR code.Keyless wallet restoration- restore wallet from exchange account.
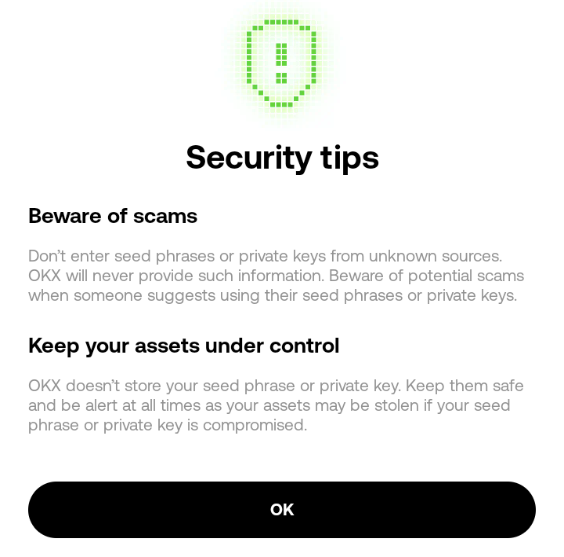
We will select the seed phrase, because we saved it in the "backup" section. The wallet will show a security warning:
Enter the seed phrase in the correct order and click Confirm.
Create a strong password consisting of letters, symbols, and numbers and click Continue.
That's it, we have restored the wallet on the mobile.
Some features are only available in the mobile app. These include Watch-Only.
Watch-Only
With Watch-only, you can track transactions of any public address, such as Vitalik Buterin's wallet. This will allow you to see when it receives or sends Ether, how much it transfers, and to what addresses.
This approach is useful for investors and analysts who follow the actions of large players, as well as for transparent monitoring of organizations.
However, you will not have access to managing funds - only the ability to monitor the movement of funds in real time.
To add Watch-Only, go to the add wallets menu and select Watch-Only Wallet.
Enter the wallet address you want to watch and select the network.
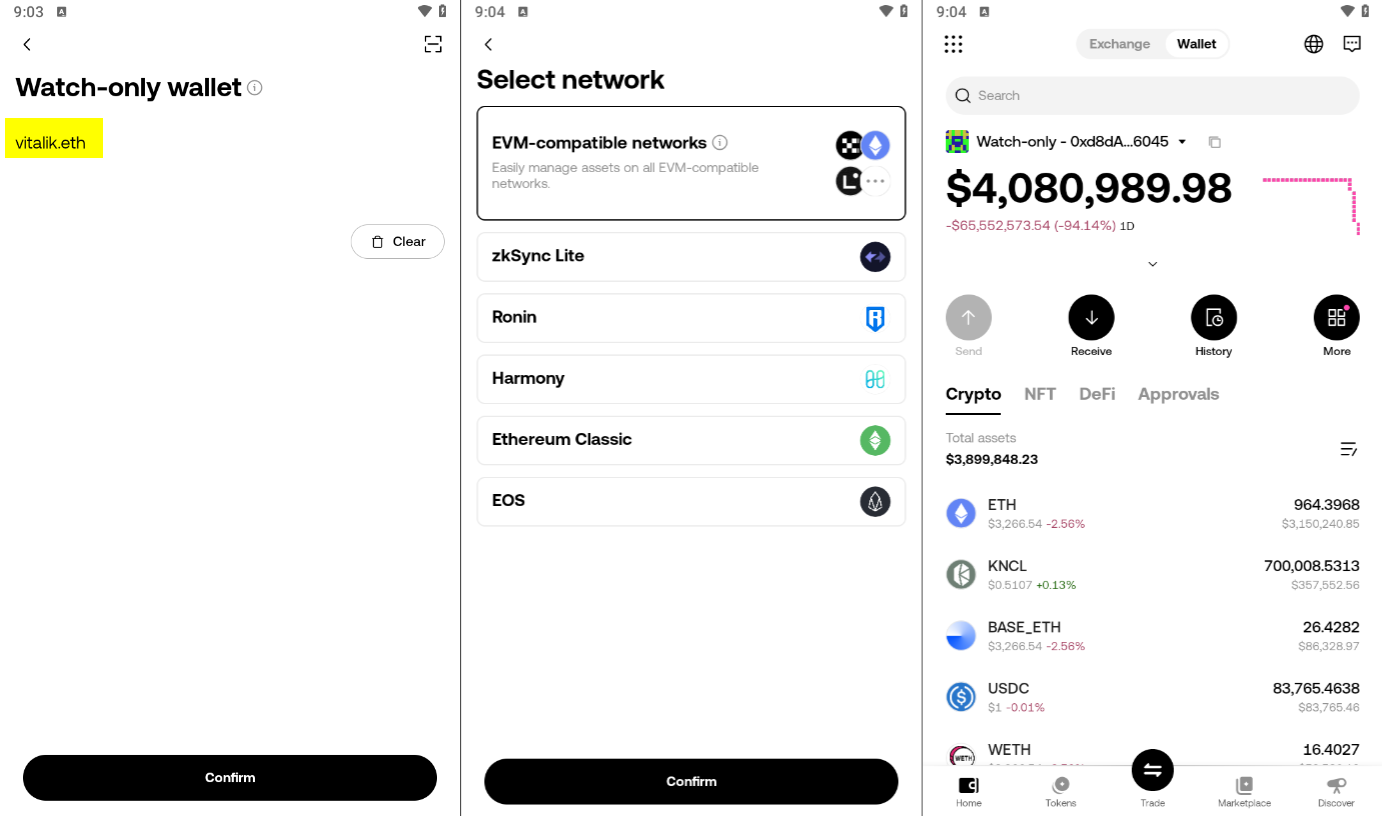
We have added Vitalik Buterin's wallet and can see his balances, transaction history, NFTs and all his activity in the ETH network.
Results: comparison with MetaMask
With a popularity of 16 million installs, any hot wallet is compared to MetaMask. Let's look at the two wallets in the table.
|
Feature |
OKX Wallet |
MetaMask |
|
Security |
Top cybersecurity rating from Certik, biometric authentication, additional protection against phishing. |
Often targeted by phishing and malware attacks, no built-in biometric authentication. |
|
Supported Networks |
Supports over 70 blockchains, including Bitcoin, Solana, Tron, Aptos, Cardano, and EVM chains. |
Primarily supports Ethereum and EVM-compatible networks. |
|
Ease of Use |
Pre-installed blockchain networks, no manual configuration required. |
Non-Ethereum chains require manual network setup. |
|
NFT support |
Built-in marketplace and NFT trading. |
Third-party dApps required for NFT trading. |
|
Cross-chain swaps |
Integrated cross-chain swaps and bridge support. |
Limited to EVM-based swaps, requires external bridges. |
|
DeFi Integration |
Direct access to DeFi staking, liquidity mining, and passive income tools. |
Supports DeFi, but requires separate connection to dApps. |
|
Vulnerable to hacks |
Fewer reported phishing attacks due to lower adoption rate compared to MetaMask. |
High risk of phishing due to popularity, many users have lost funds. |
Conclusion: OKX Wallet provides broader blockchain support, higher security, and built-in DeFi/NFT functionality, making it a versatile alternative to MetaMask.
The wallet is designed to meet the needs of both crypto enthusiasts and experienced traders. It is completely open source, meaning anyone can examine its code.
Hacks and Vulnerabilities
There have been user scams in the past, but that was the exchange, not the wallet.
- A OKX user lost $2 million in cryptocurrency due to a hack.
- Multi-million thefts after SIM swap attacks
OKX said it was working on a fix and compensation to affected users.
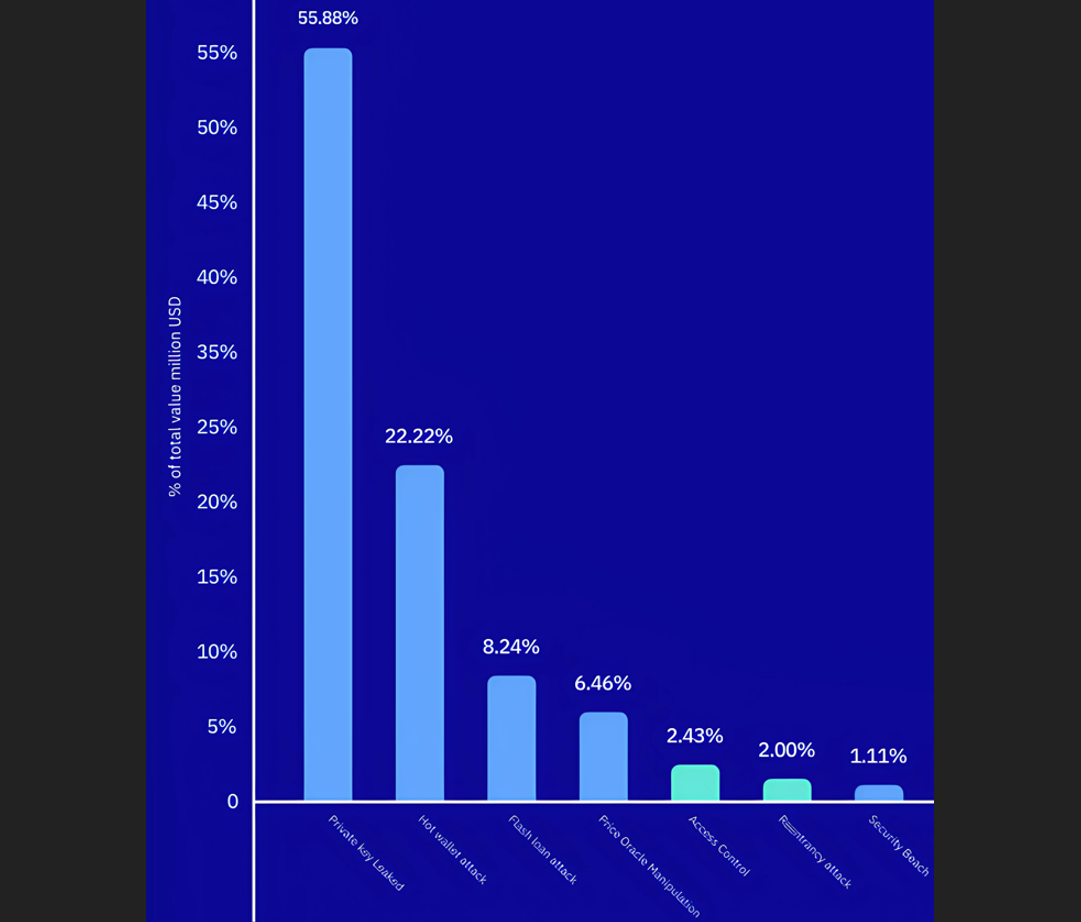
Overall, not only OKX, but also Merkle Science HackHub report, more than 55% of cryptocurrency is lost due to private key leaks. Hot wallets have a 22% risk of being hacked. Therefore, we do not recommend using hot wallets.
Return to the wallets section if you want to choose a reliable cold wallet.
Technical support
- Mail: wallet@okx.com
- Support center: https://www.okx.com/help
- Contact form: https://www.okx.com/contact-us.html


