Guide to Setting Up the Ellipal Titan Mini Wallet: Overview and Critique
Unlike the Ellipal Titan 2.0, the Mini runs on its own proprietary firmware rather than a full Android operating system. This reduces its attack surface.
Ellipal Titan Mini is a hardware wallet for cryptocurrencies that offers you self-custody of your keys. It provides the same core functionality as the Titan, but in a more compact and affordable form.
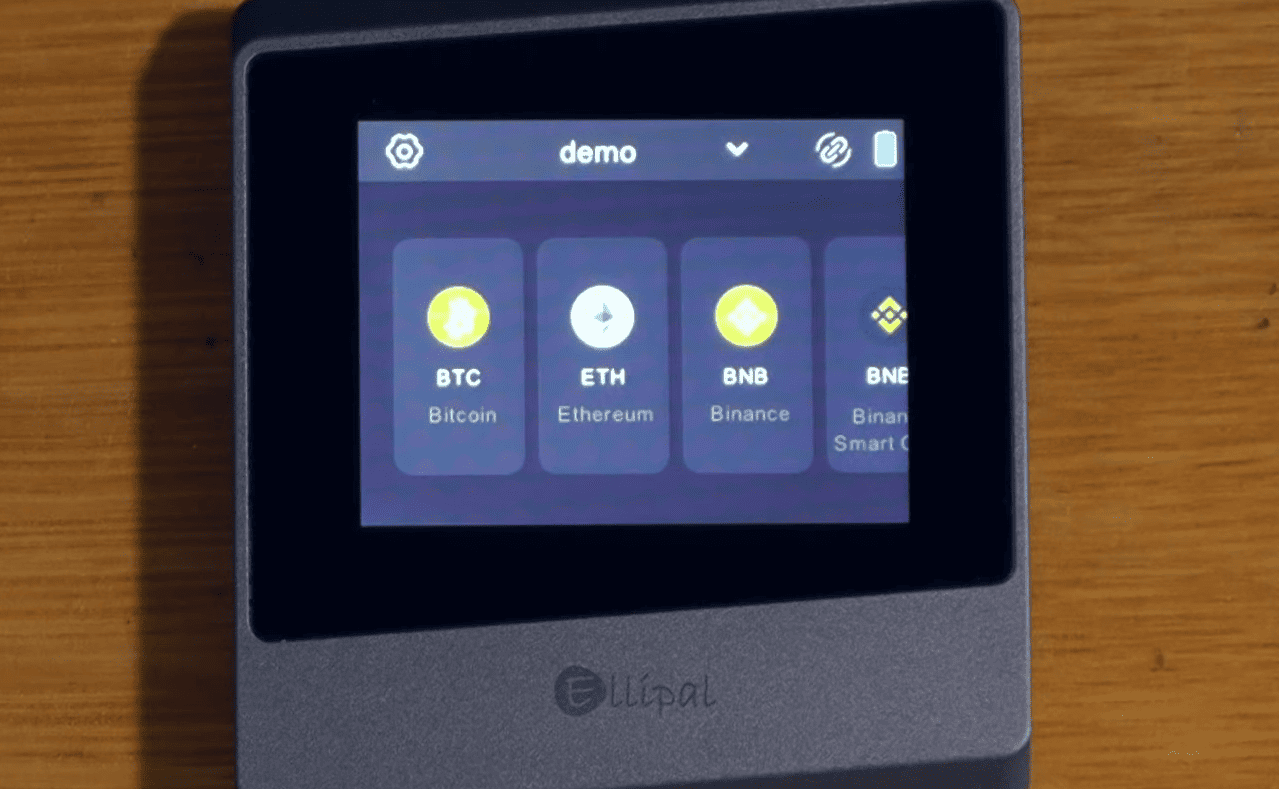
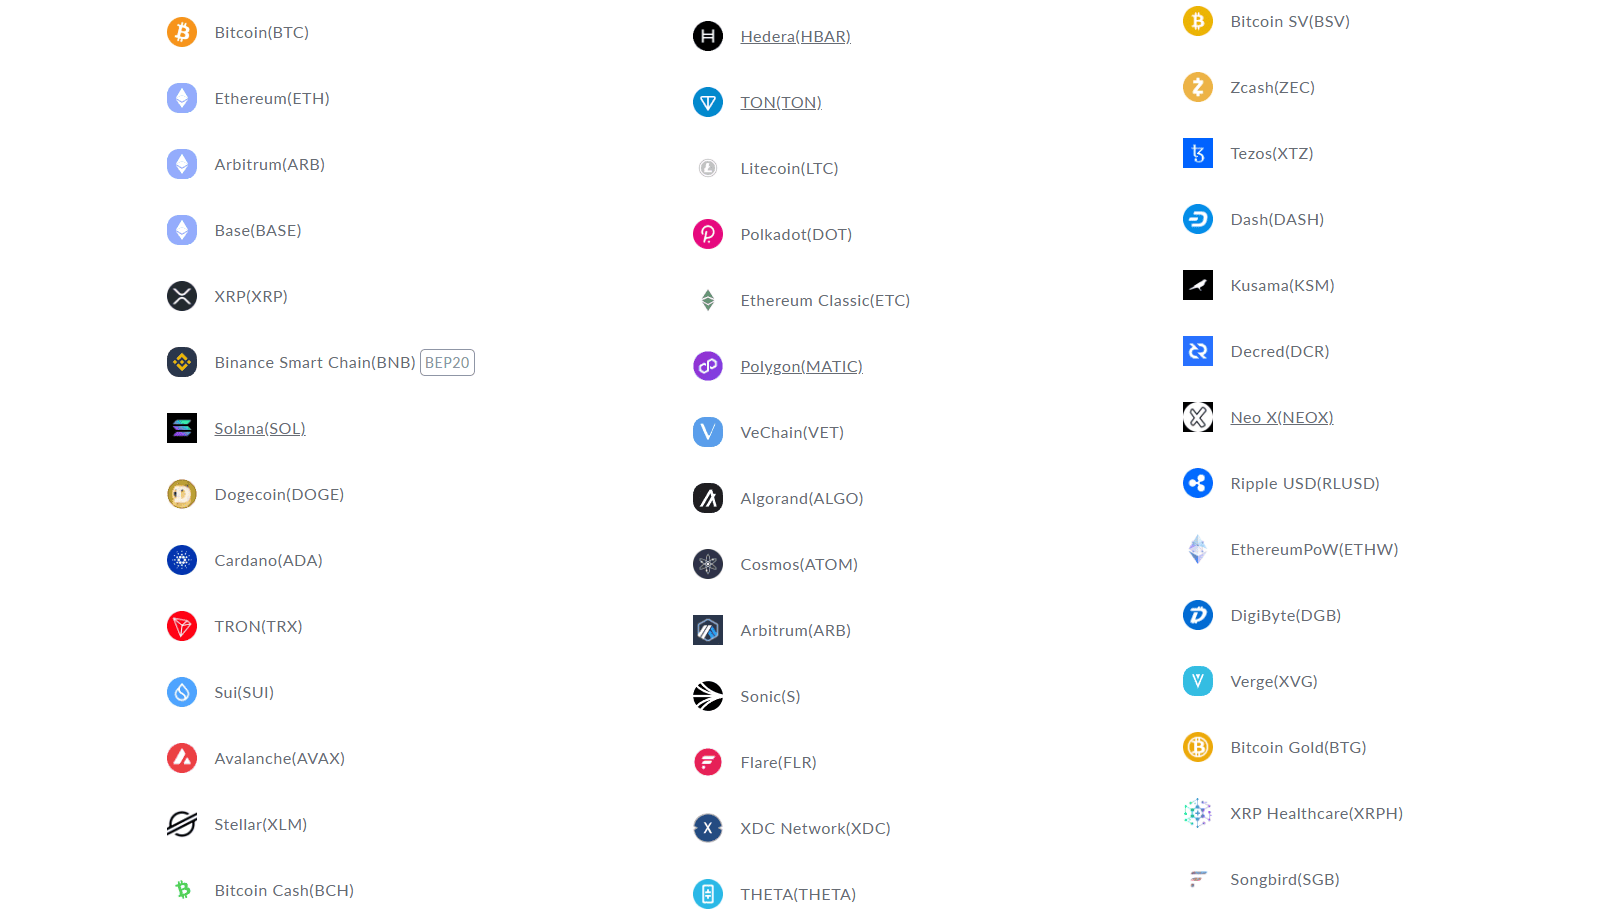
The hardware device supports 40 blockchains and over 10,000 tokens across those networks. You’ll definitely find popular ones here: BTC, ETH, SOL and the ERC20, BSC, TRX networks, among others.
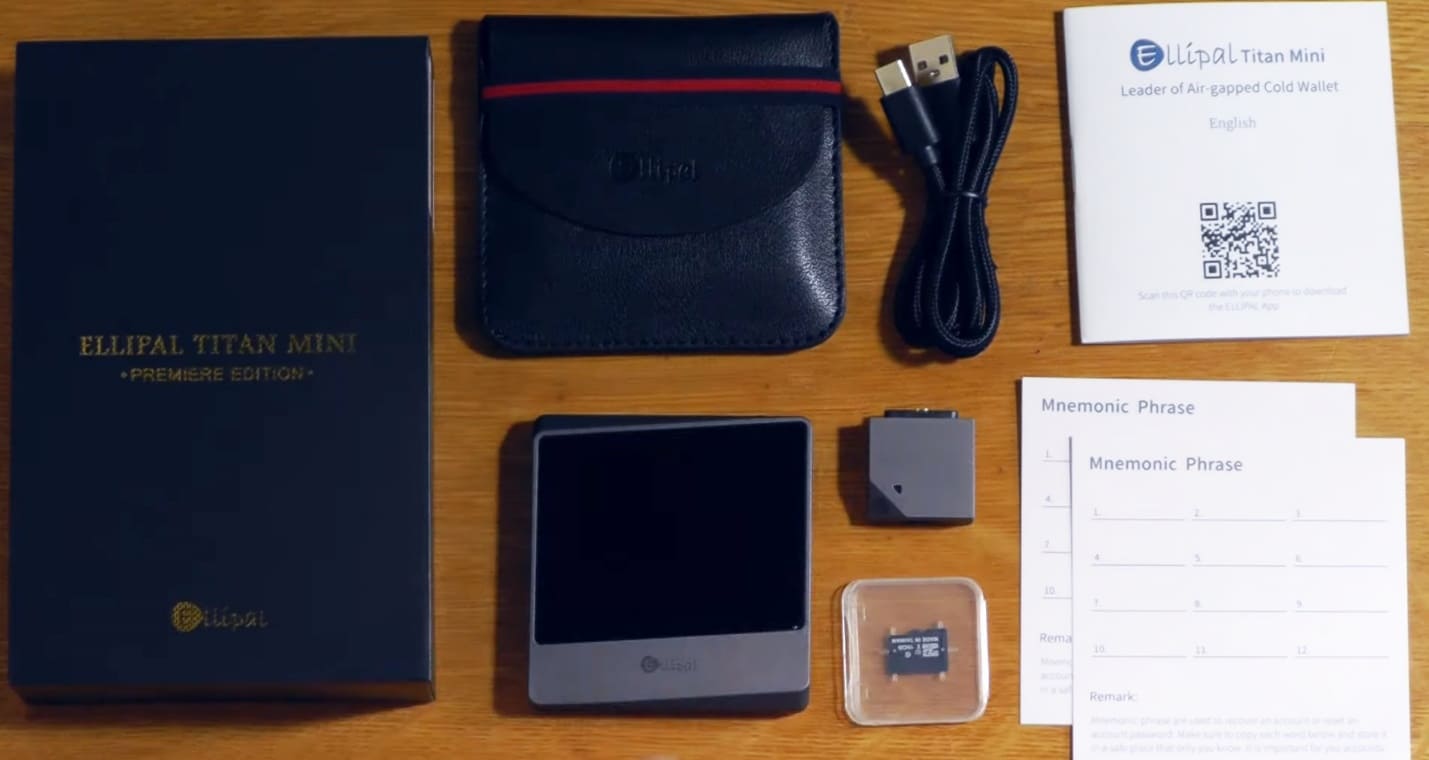
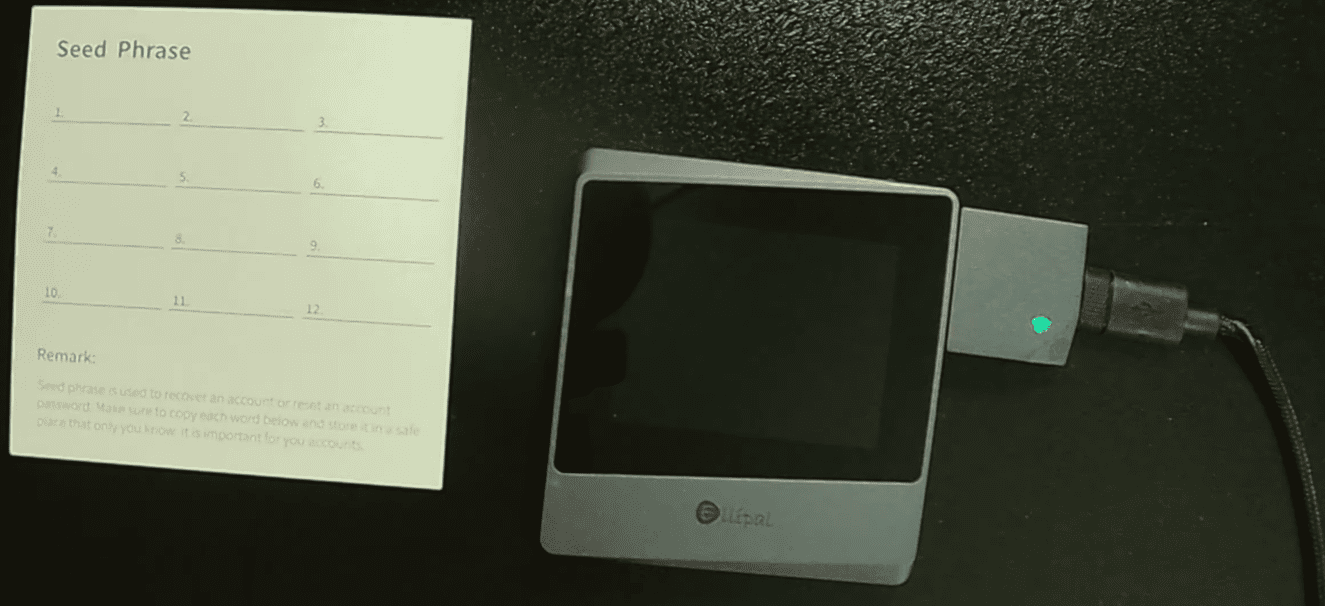
The package includes the ELLIPAL Titan Mini, a Type-C cable for charging, a security adapter, a user manual, and two recovery phrase record sheets.
Now let’s get to the most important part – the security overview of this wallet version.
Security and Features
The security of hardware wallets consists of protection against phishing (you need to see all transaction details on-screen) and physical security against tampering. Let’s examine these points in detail.
Your Security:
- Complete Air-Gap – the device has no network or physical ports (USB, Bluetooth, Wi-Fi, etc.), and all data transfers happen solely via QR codes. Private keys never leave the device.
- Open QR Format – all information exchanged between the wallet and the app is open-source. Anyone can review the repository on GitHub to verify that keys are never transmitted.
- Auto-Erase – if tampering is detected, all data is instantly wiped.
In addition to these options, the ELLIPAL Mini offers extra security features:
Advanced Protection:
- Hidden Accounts – you can add a secret passphrase to your 24-word recovery phrase to create a hidden wallet. If someone steals your 24-word phrase without the passphrase, they’ll see an empty wallet.
- Self-Defense – after 10 incorrect PIN attempts, the device completely wipes itself and returns to factory settings.
- Steel Backup Plate – instead of vulnerable paper, use a metal backup plate that’s resistant to fire, moisture, and corrosion. Note: this is sold separately.
The chassis is made of solid metal and is rated IP65 for dust and water resistance.
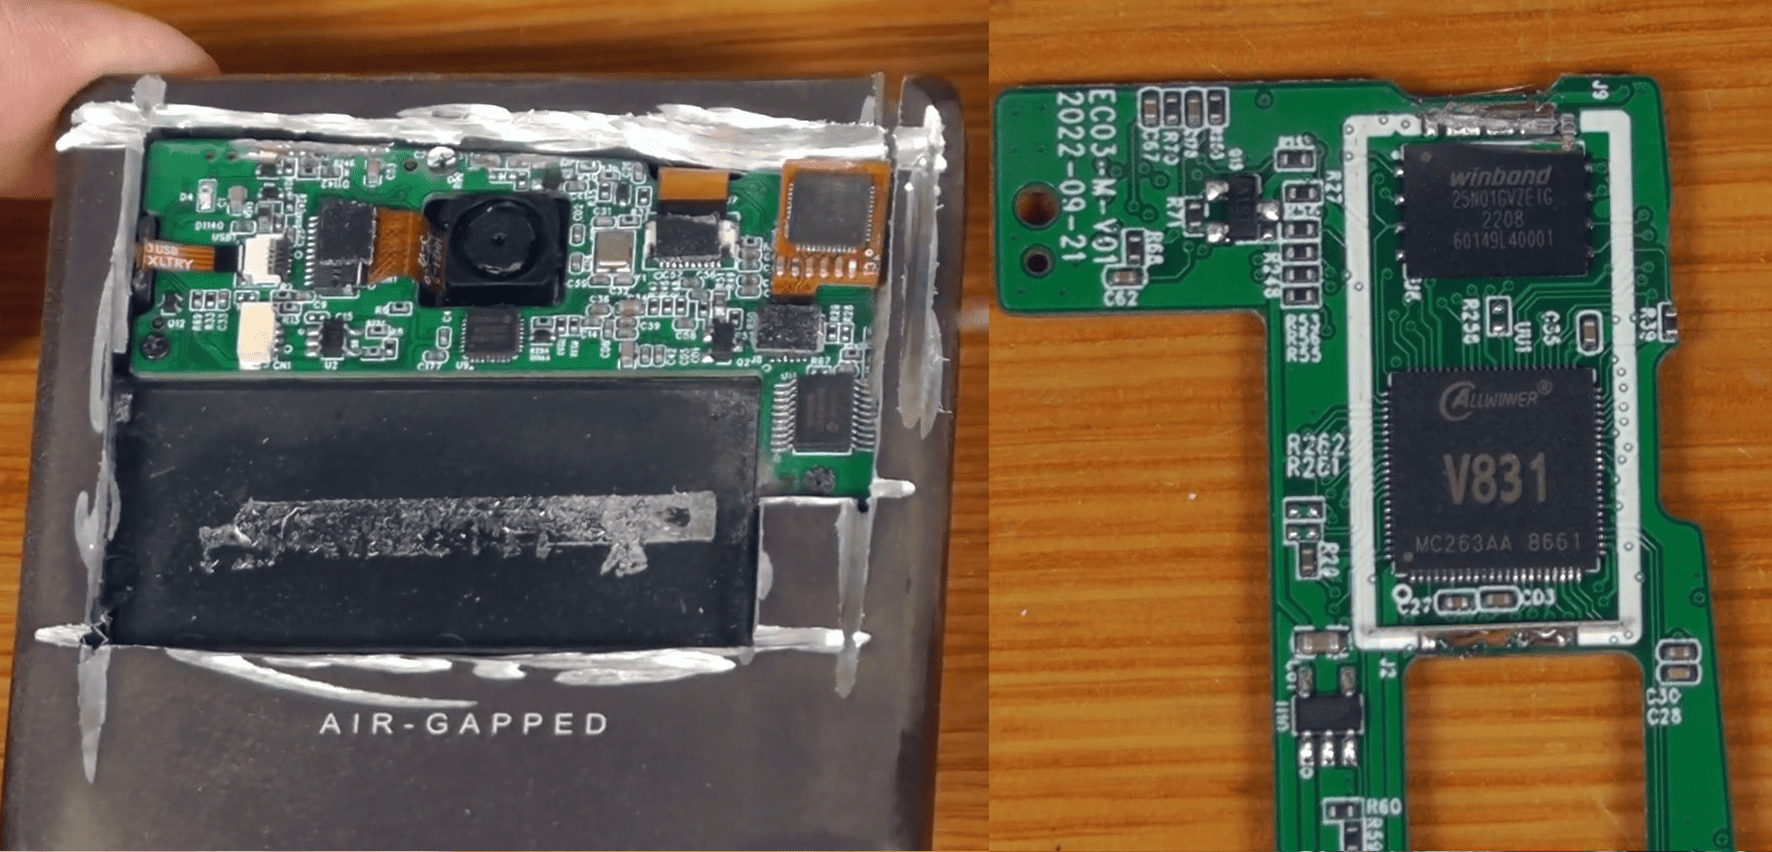
There is less surface area vulnerable to physical attack because the Mini version uses a reduced-size board and different firmware than the Titan version.
Now let’s move on to the economic side of the wallet. All features below work in tandem with the mobile app.
Your Benefits:
- Multi-Currency and Multiple Accounts – unlimited number of cryptocurrencies and up to 10 accounts on a single wallet.
- dApp Browser – over 100 DeFi, gaming, and trading apps accessible directly in the wallet.
- Swap, Buy & NFT – built-in aggregator to exchange assets without using external platforms.
Cons (details provided during setup):
- QR-Based Transactions take more time.
- Price is higher than competitors.
- Battery Drain in sleep mode – you must power it off manually.
- Firmware is not fully open for audit.
- No Charging/Updates without the original dock, which is expensive to replace.
- Firmware Update via microSD is secure but somewhat complicated for beginners.
Let’s proceed to installation and linking the wallet to the app.
Setup and Creating a New Wallet
Setting up the wallet begins with charging it using the USB-C cable.
Turn on the wallet, select your language, and you’ll be prompted to download the app.

Scan the QR code with your smartphone’s camera and install the app. We’ll handle linking to the app later; for now, let’s move on to creating a new wallet on the device itself.
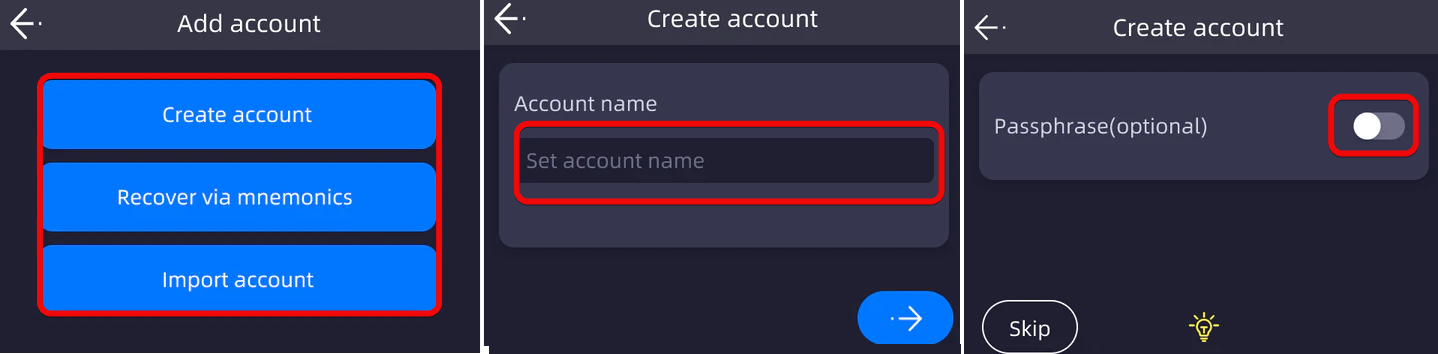
Since this is a fresh setup, select Create Account, choose a memorable name, and set a password.
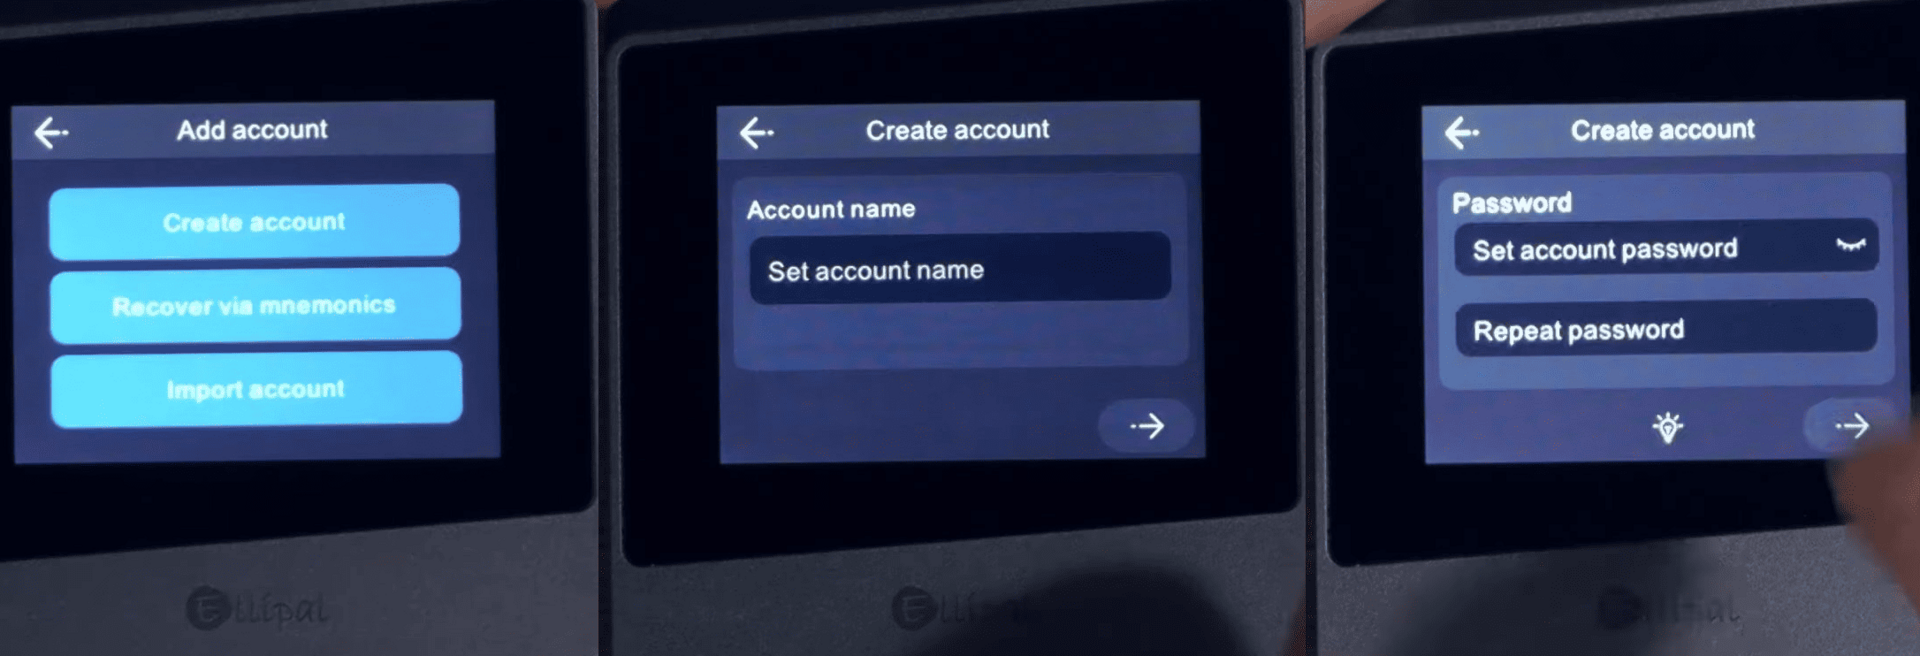
On the next screen, you’ll be offered the option to use a Passphrase – an additional word to append to your recovery phrase. We’ll cover that below; for now, skip this step.
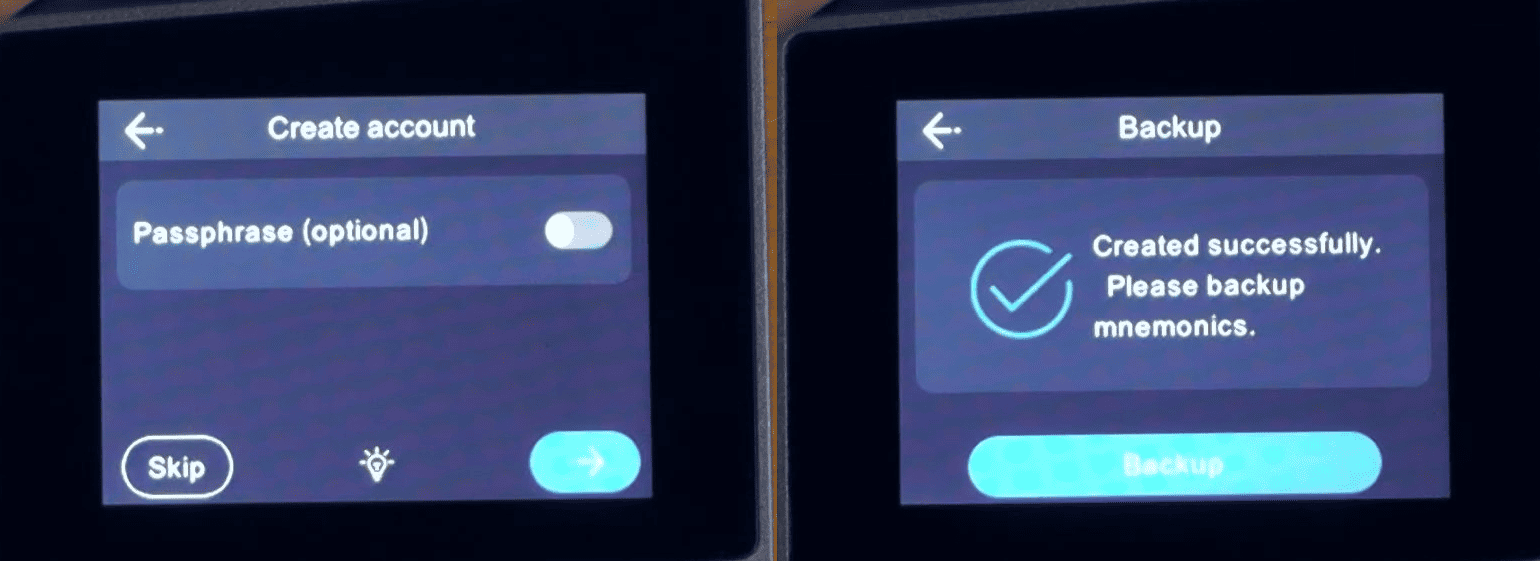
Tap the arrow to continue, and you’ll see a confirmation that the wallet has been created successfully. It’s now time to back up your recovery phrase. Tap Backup.
Backup
The device will display twelve words, numbered in order. Carefully write down each word in the correct sequence.

Then confirm the words by tapping each word in the correct order on the device.
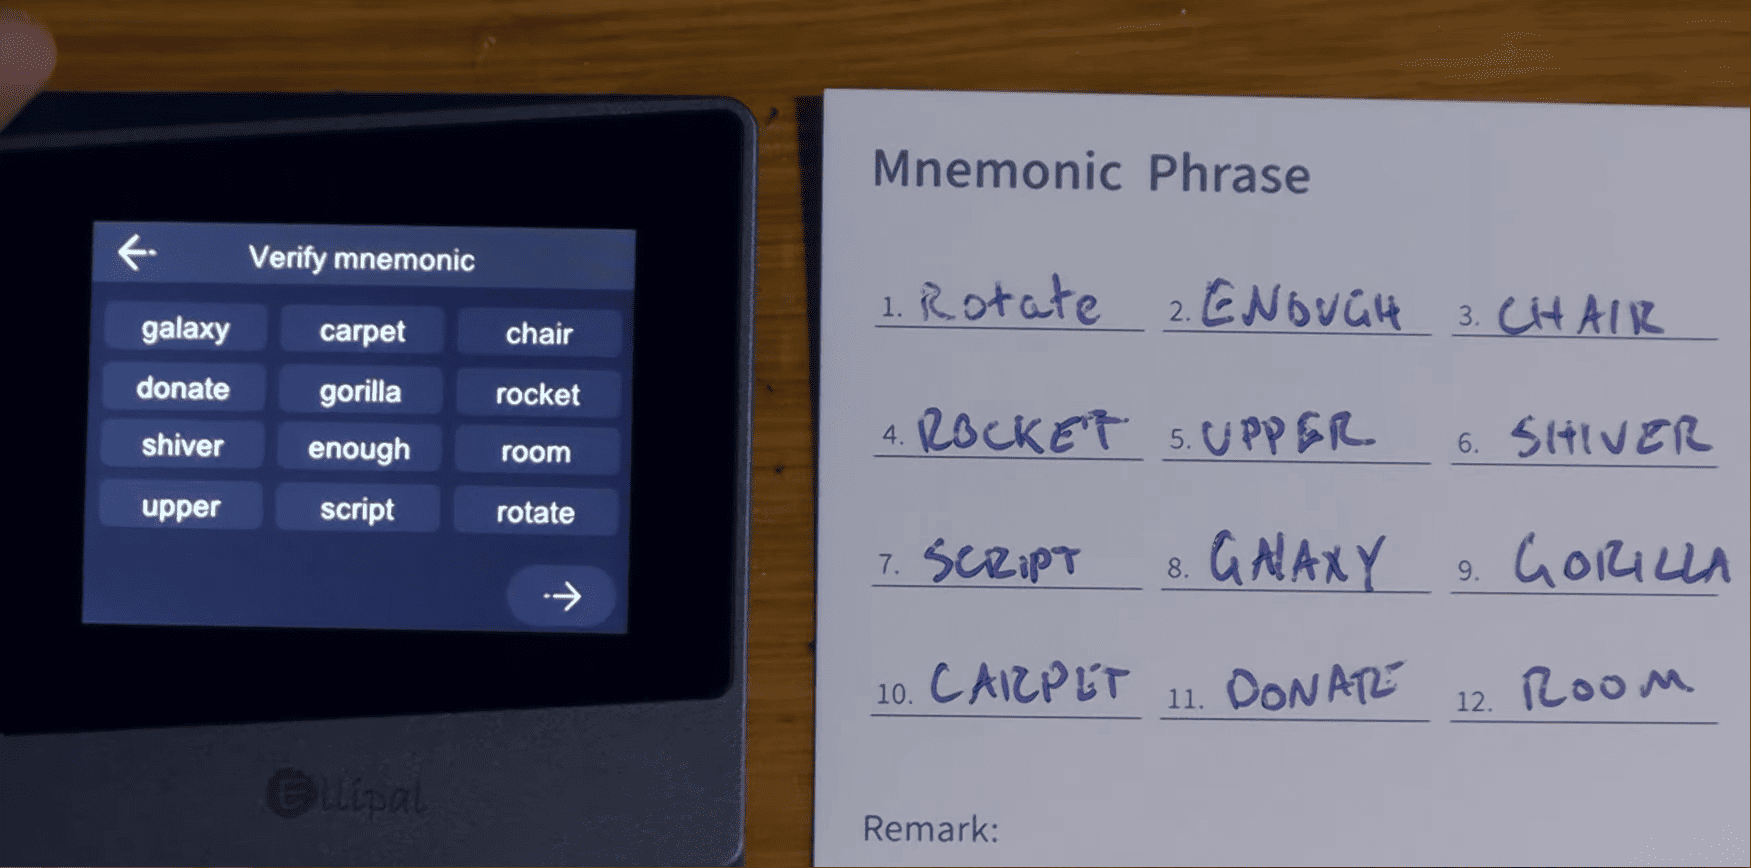
After successful verification, the wallet will notify you that the backup is complete.
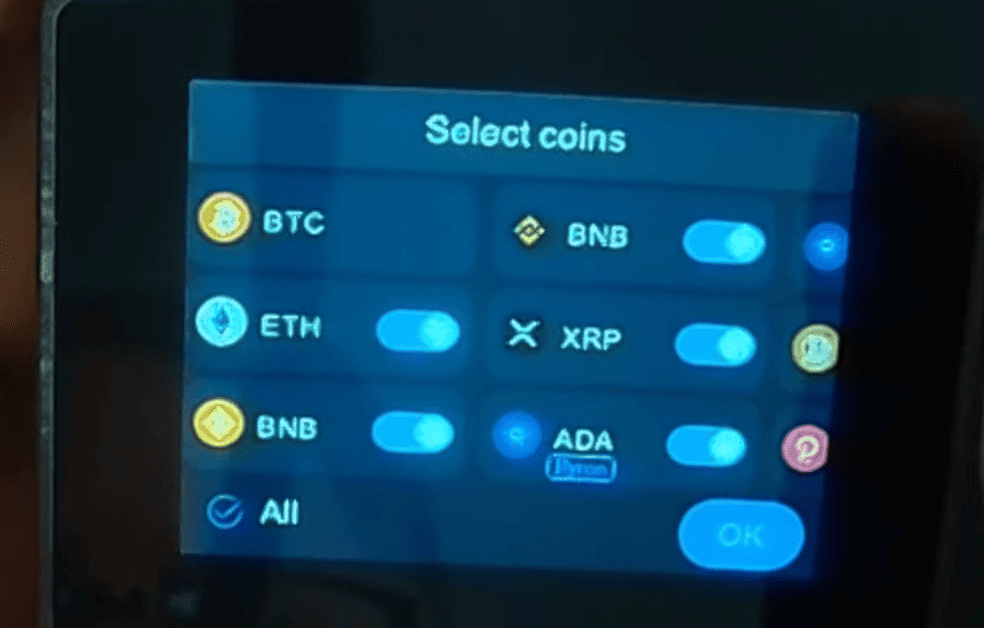
Now proceed to select the coins you want to use or enable all and confirm your selection.
You’ve successfully created the wallet and backed it up. Keep your recovery sheet in a safe place and get ready to link the Ellipal Titan Mini to your phone.
Connecting to the App
Synchronization between the app and the wallet happens via QR code scanning, allowing you to track balances and transaction history online. Meanwhile, the private key remains offline on the hardware device.
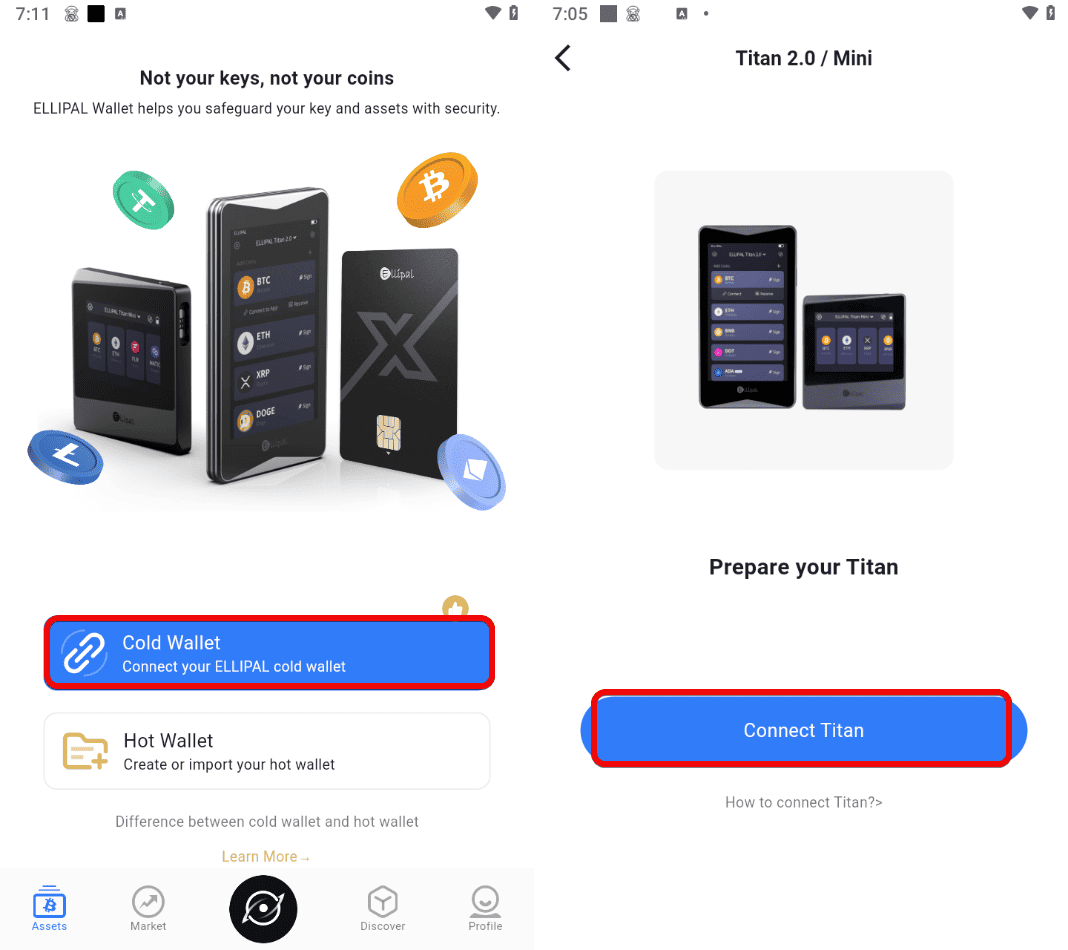
To connect the device to your phone, tap Cold Wallet in the mobile app.
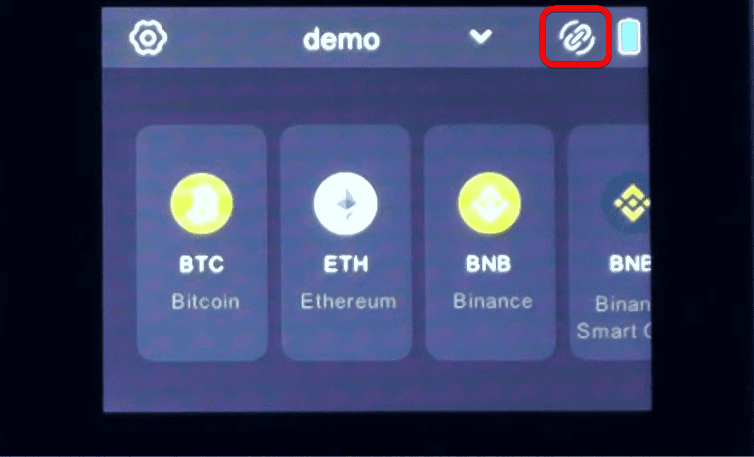
Give the app permission to access your camera. On the Ellipal device, tap the chain icon to activate the QR code scanner.
Scan the sequence of QR codes displayed on the device with your phone.
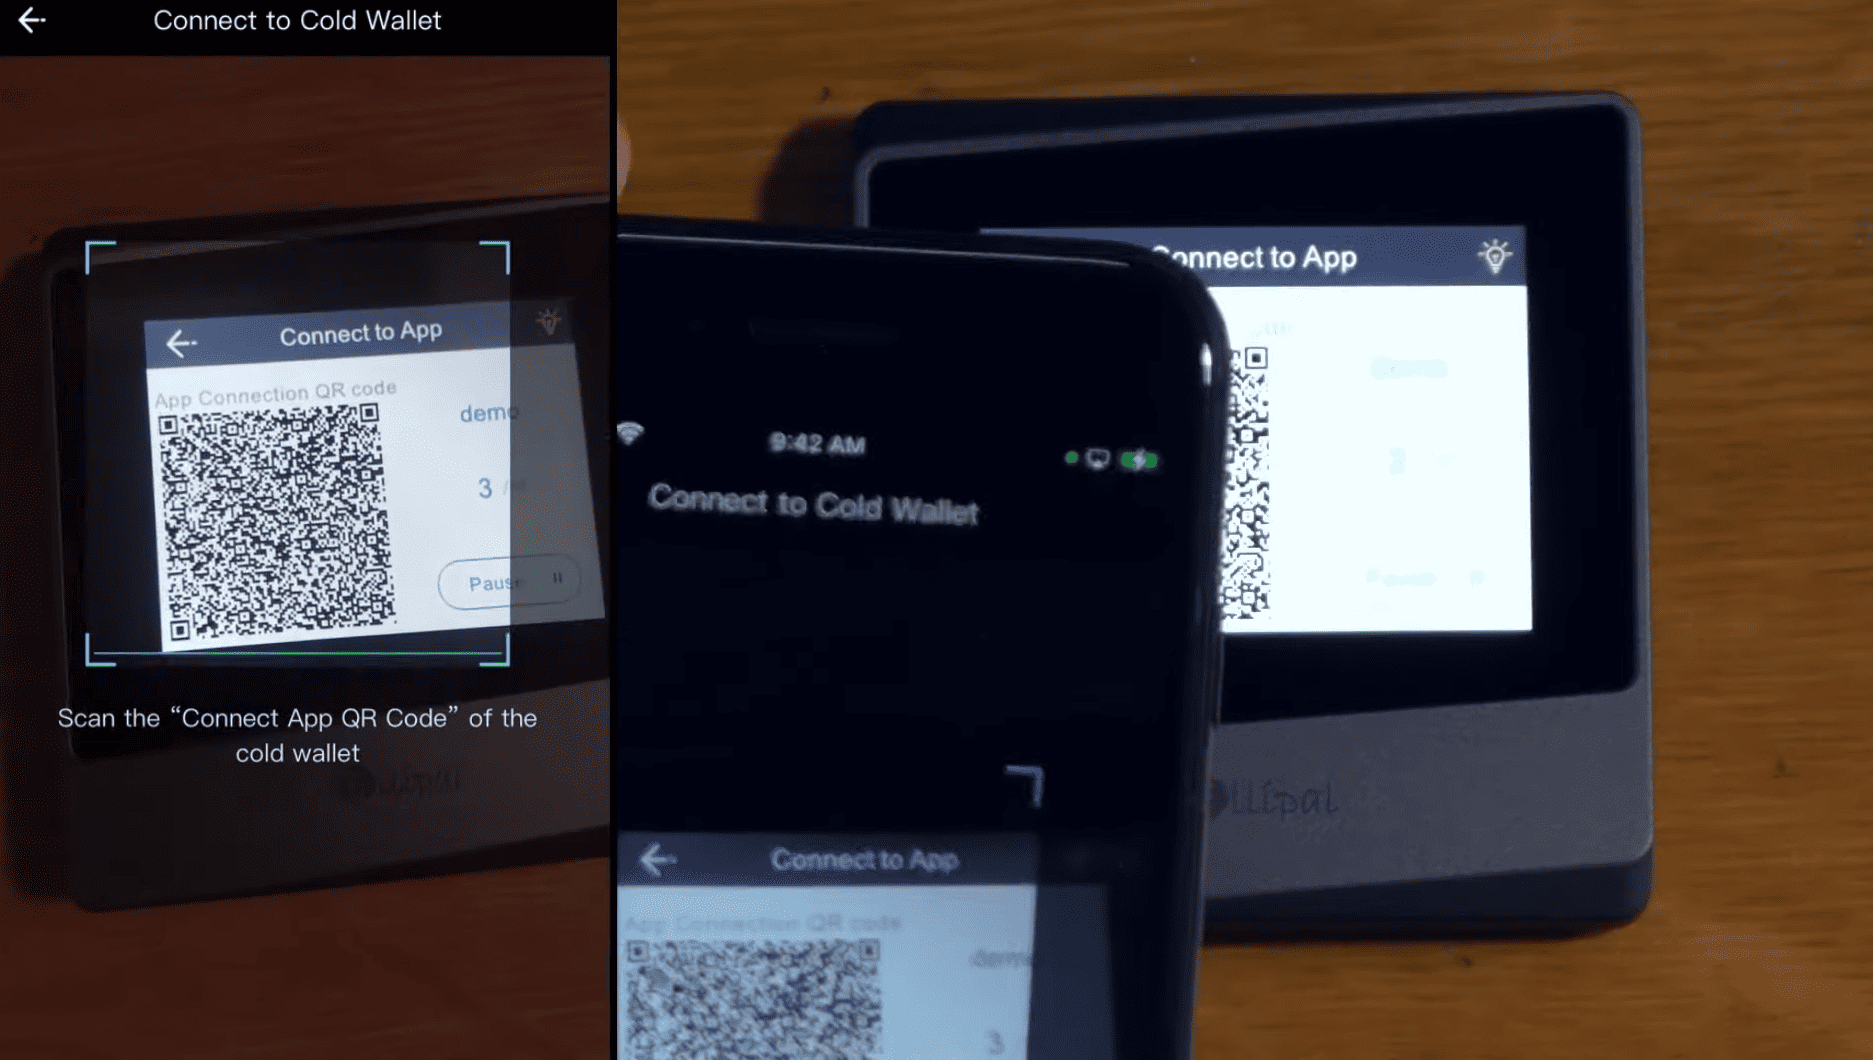
There will be multiple codes, each one opening a receiving address for the chosen coins. The address list in the app will update in real time.
After scanning the codes, you can start using the hardware wallet.
How to Use
The first thing you need to do is ensure that the accounts in the phone app exactly match those displayed on the hardware wallet.
This is necessary to be certain that funds will be sent to the correct address even if your computer or phone is compromised by malware. The key is that the addresses match exactly.
How to Verify the Address
On both the phone and the hardware wallet, go to the coin section (for example, Bitcoin) and tap Receive. Make sure the address on the phone matches the address on the Ellipal Titan Mini.
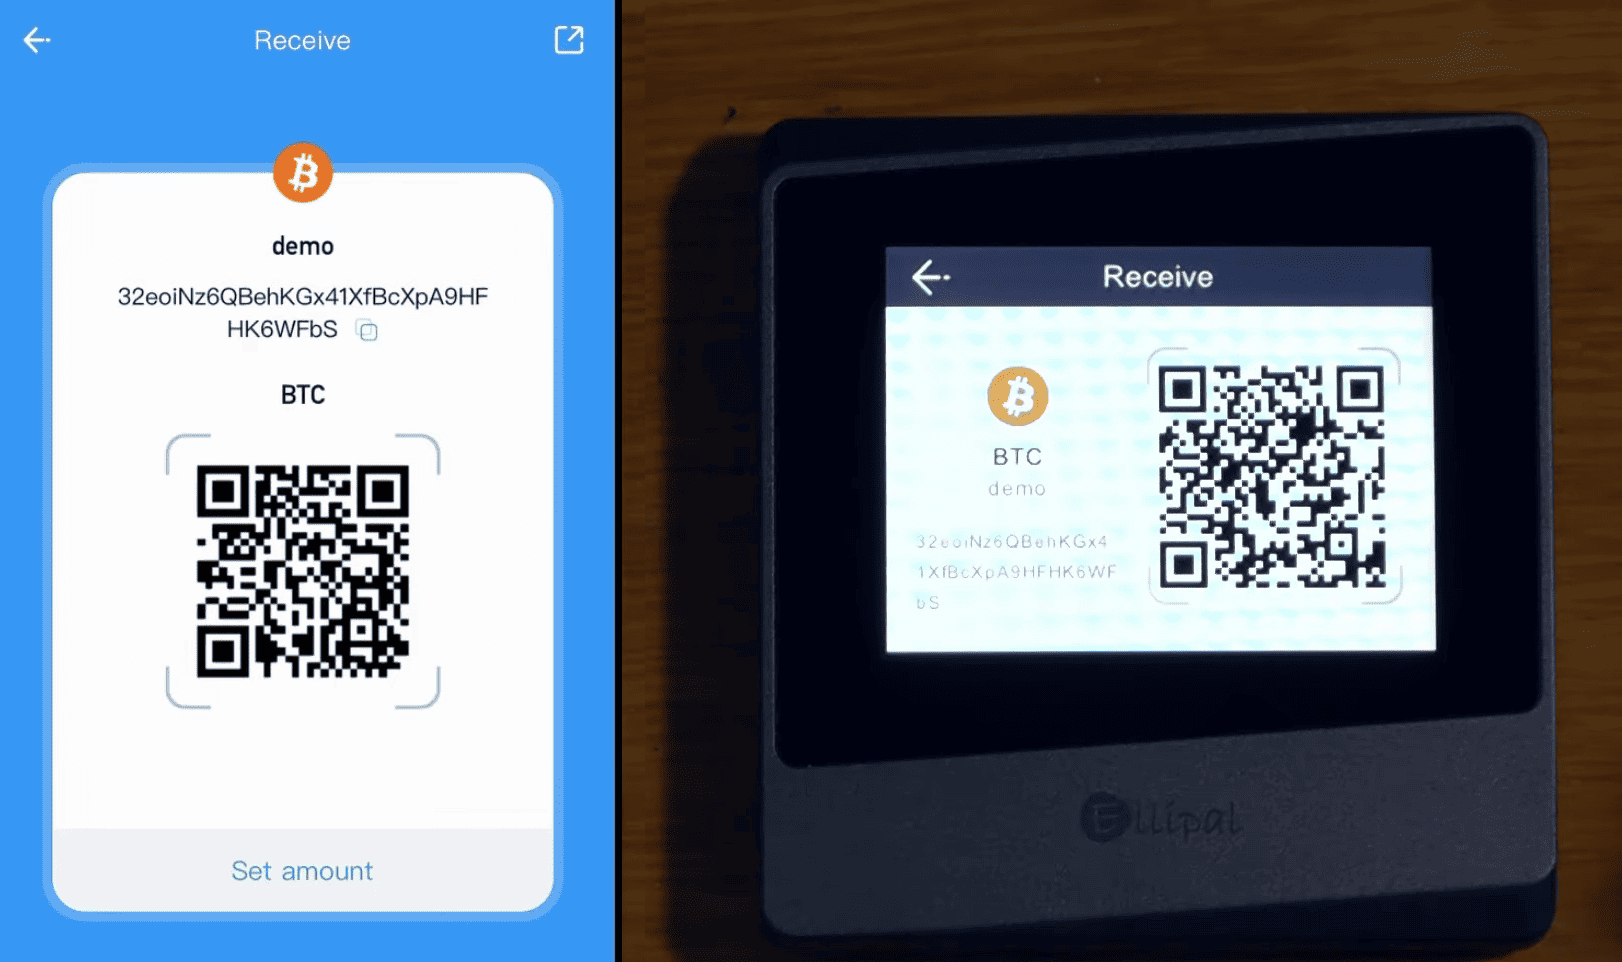
Now you can deposit funds to the wallet using your address.
How to Deposit
To deposit, tap Receive – choose the cryptocurrency you want, then get the address and QR code.
For example, we’ll send BTC from the Kraken exchange. After a few confirmations on the blockchain, the BTC will appear in the app.
It’s recommended to start with a small amount to ensure everything works correctly.
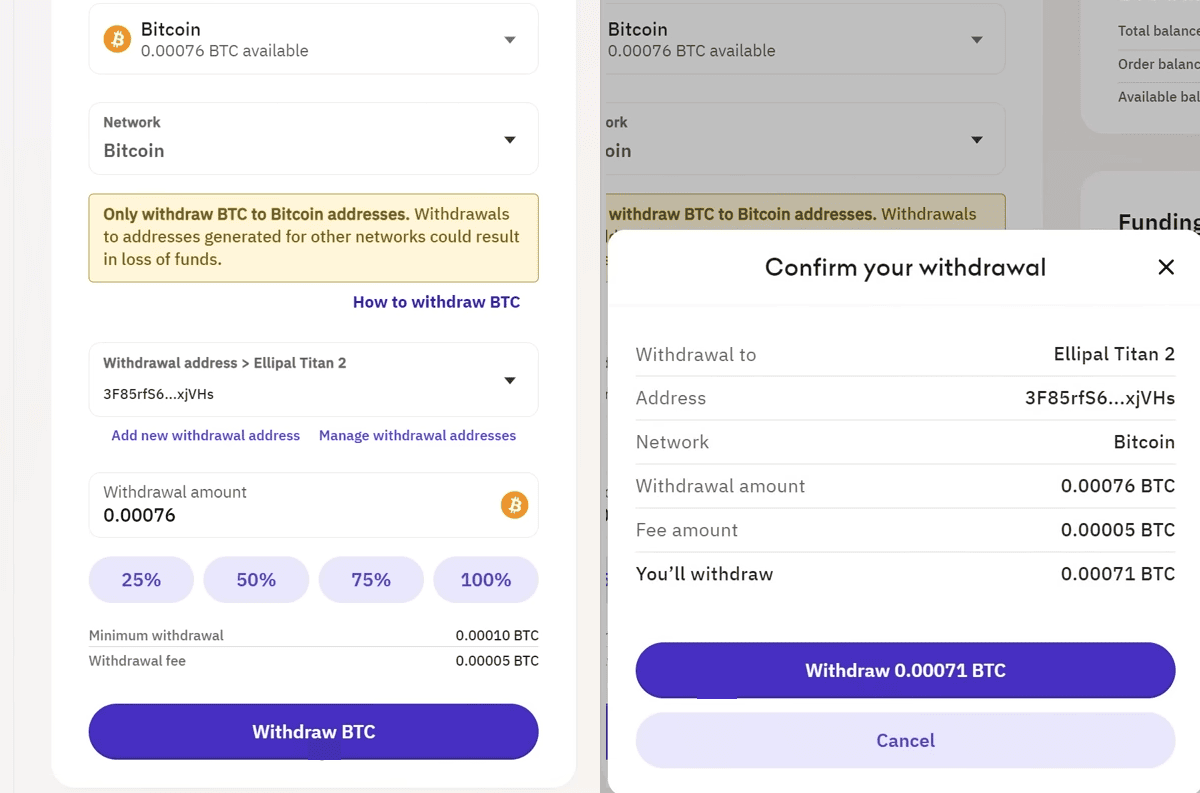
How to Withdraw
To withdraw funds, go to the coin in the mobile app (e.g., BTC), tap Send, and enter the destination address. Select Max Out to send your entire available balance.

If the app suggests too high a fee, lower it manually—for instance, to 2 satoshis per byte—and proceed.
When reviewing transaction details, verify the accuracy of all details and the destination address.
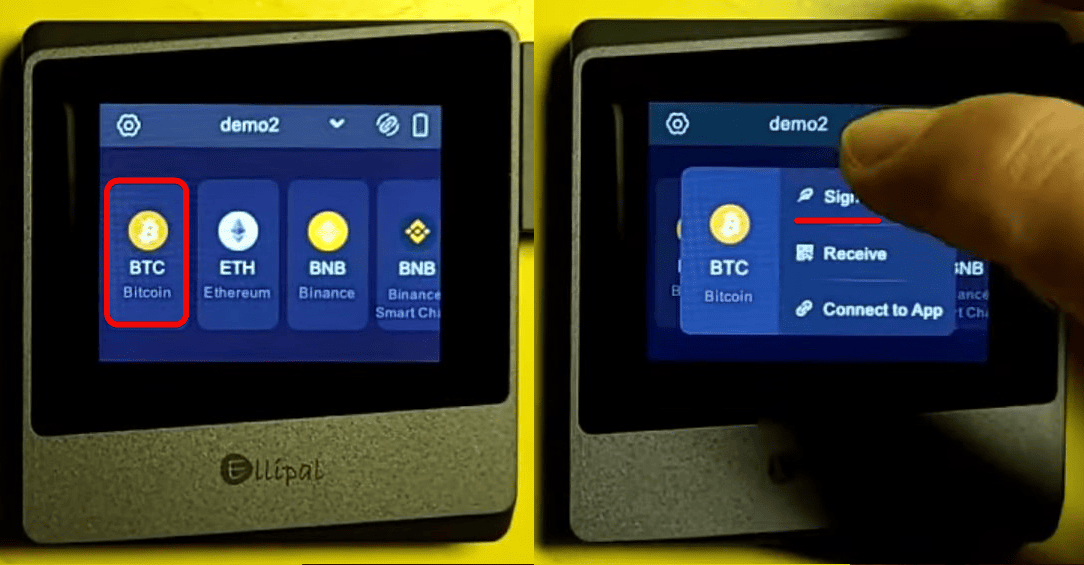
Now confirm the transaction on the hardware device: go to BTC, tap Sign, and enter your password.
Next, scan the QR codes from your phone for signing on the hardware device. Verify the transaction details, then scan the signed QR code from the hardware wallet back into the app.
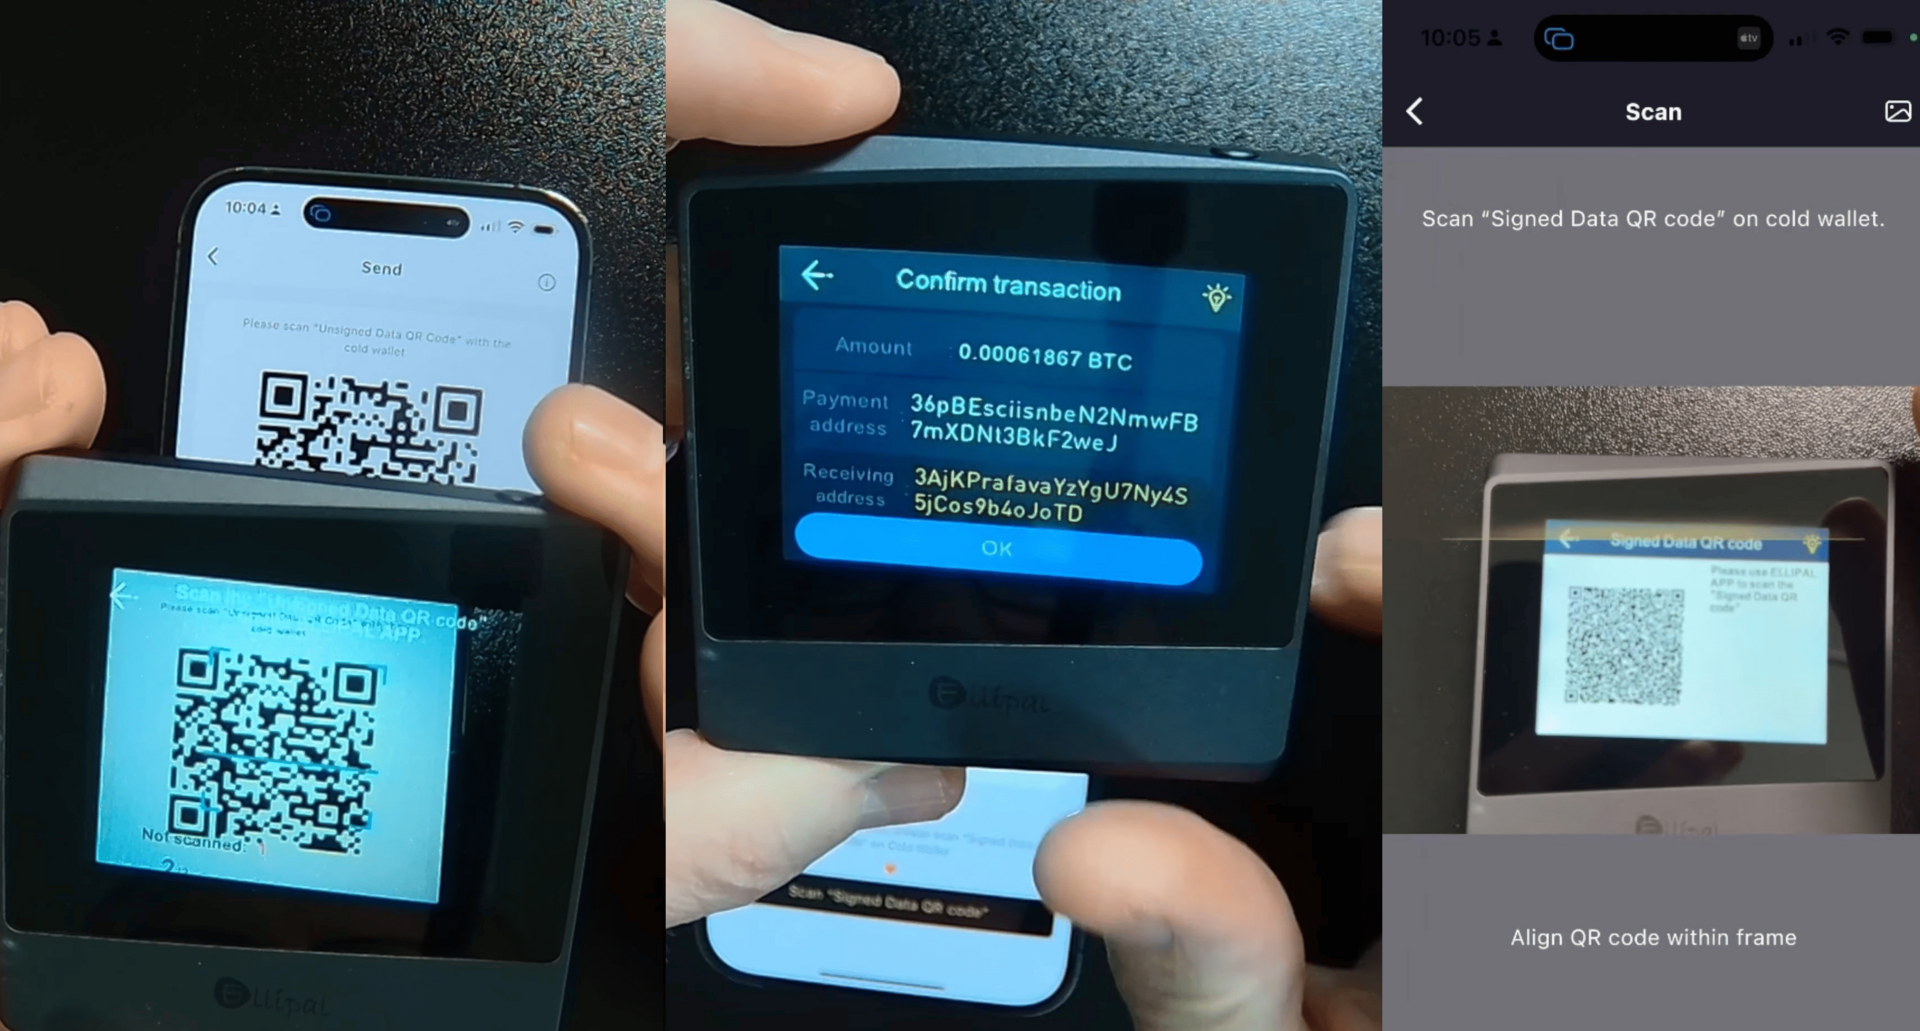
At the final step, the signed transaction is broadcast to the network, and you can track its status in the transaction list in the app and confirm receipt of funds at the specified address.
Throughout this process, no cables, Bluetooth, or internet connection ever touch your private keys—all operations occur via offline QR code scanning.
Advanced Settings
If you go to the Settings menu, you can select language, set or change the PIN code, and configure auto-lock timeout. There’s also a firmware update option and an About tab with system information.

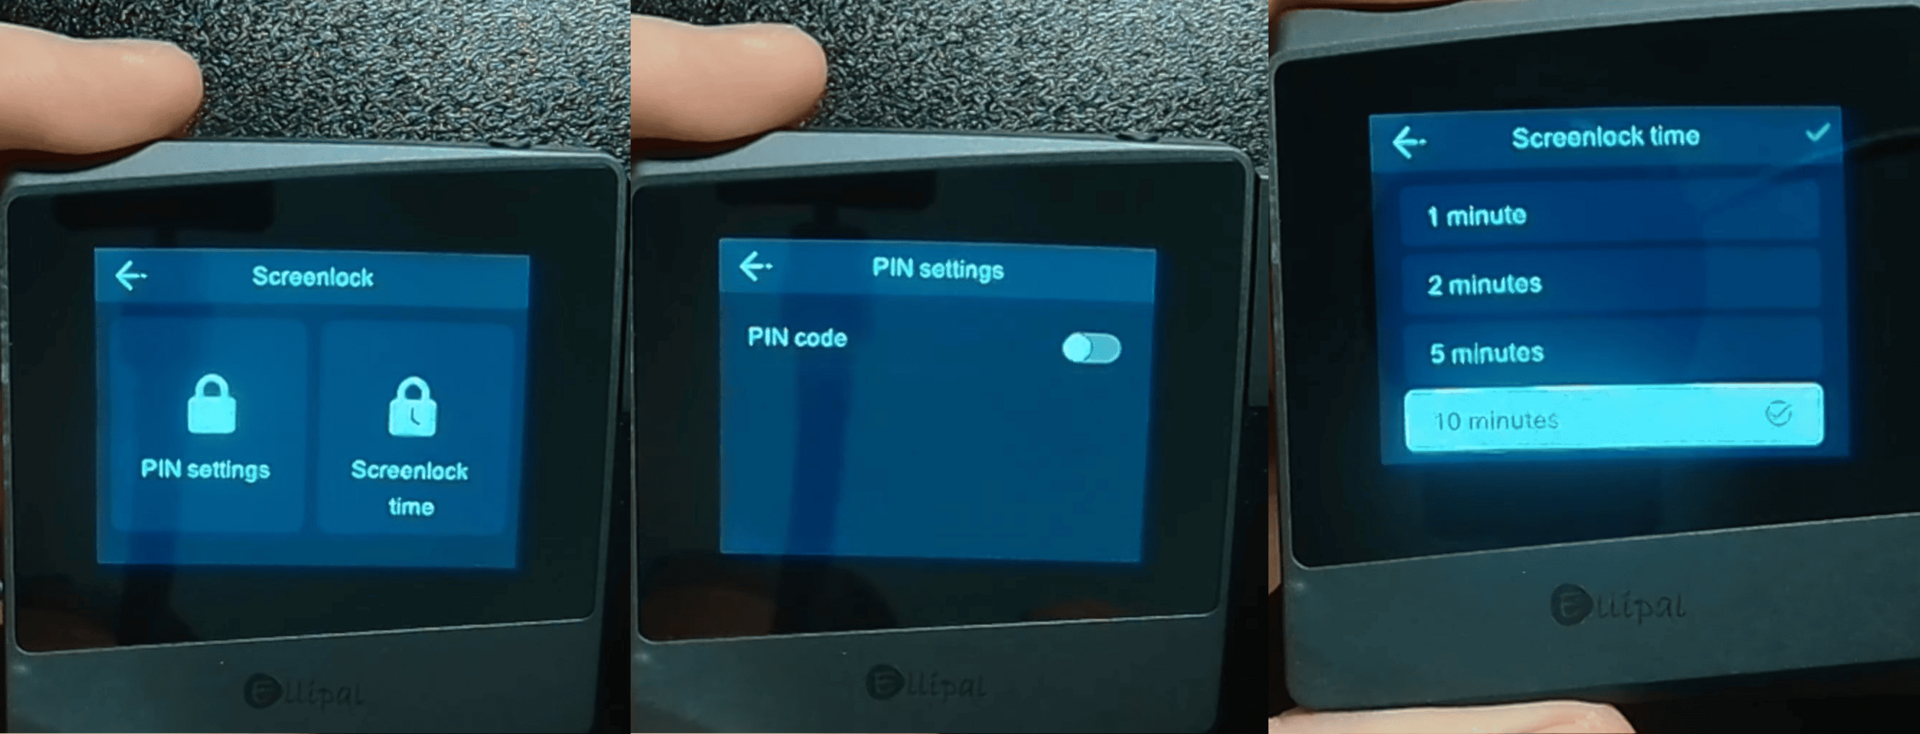
In the Screenlock submenu, you can configure your PIN code and screen timeout. It’s recommended to set a PIN for added local security.
Once you set a PIN, you can adjust the screen lock time. One minute may be too short—it’s usually more convenient to allow more time while using the device. Ultimately, it’s up to your comfort preference.
Now let’s look at specific options—hidden wallets, watch-only accounts, firmware updates, and import/recovery.
Import and Recovery
This section covers the standard wallet recovery process.
To recover a wallet:
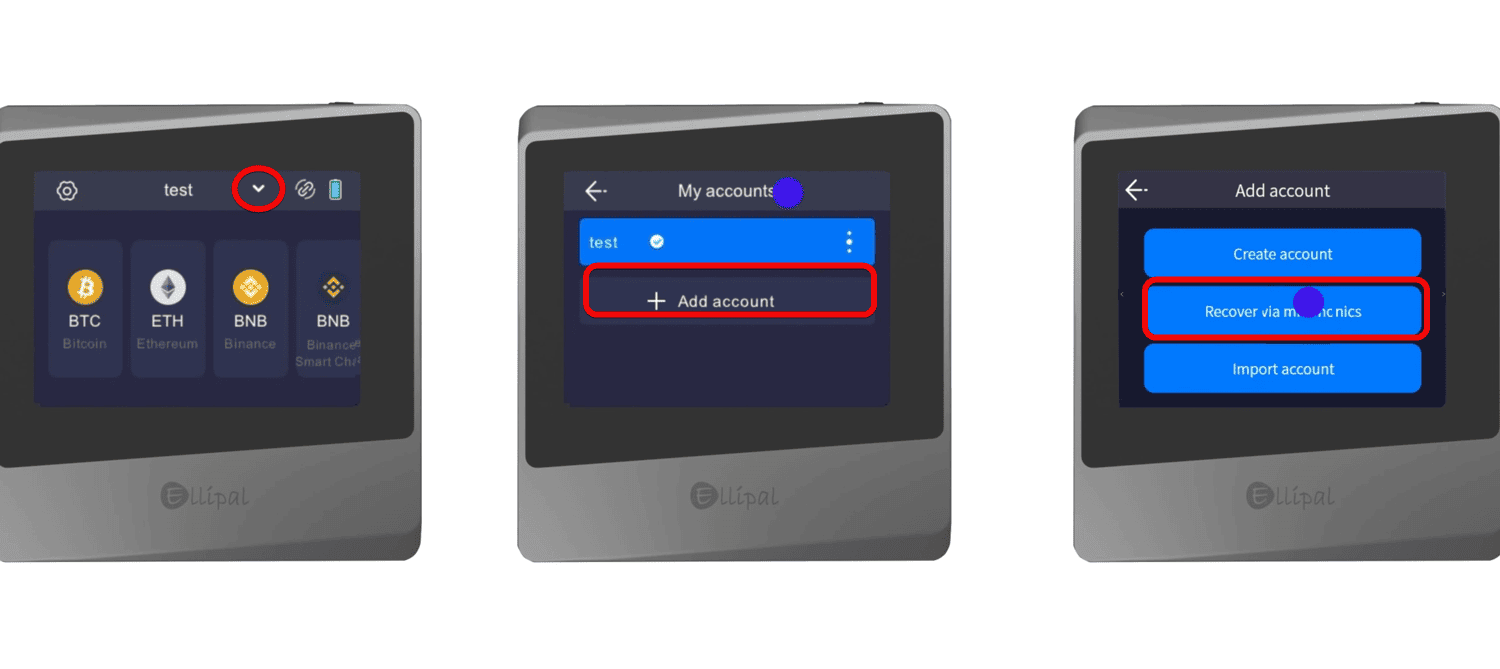
- Go to the Accounts menu and tap
Add Account - Select
Recover via Seed Phrase
- Next, choose the number of words in your seed phrase
- Enter your seed phrase in the correct order
- Set a password, provide a name, and wait for the process to complete

You’ll see a confirmation message once you have successfully recovered the wallet.
Importing a seed phrase from another wallet works the same way.
Passphrase – Hidden Wallet
The Passphrase feature creates a hidden wallet. Without it, only an empty account is visible; with it, you see the real wallet. It supplements your standard seed phrase and adds extra protection.
To enable a Passphrase, go to the account creation or recovery menu, enter a passphrase, and give the hidden wallet a name.
Write these down carefully—without them, your seed phrase will show a zero balance.
Even if an attacker obtains your 24 words, without the passphrase they’ll only see an empty wallet.
Watch-Only
The Watch-Only option creates an additional wallet for monitoring balances without spending access. You can assign it a separate PIN or unlock gesture so that it’s the only account shown when the device is unlocked, keeping the main wallet hidden.
A watch-only wallet also enhances privacy—if someone coerces you to unlock your wallet, you can set it to display the watch-only account, which has only a negligible amount of funds.
Firmware Update
Firmware updates add new blockchains and fix bugs. To perform an update, you’ll need an SD card formatted as FAT32—the one included in the package will work.
See the separate guide on updating Ellipal firmware.
Conclusion: Critique and Whether It’s Worth Using
Ellipal Titan Mini is a significant improvement over the original Titan. It delivers the same core functionality in a more compact and accessible package.
Although the interface resembles its predecessor, both the hardware and software have been redesigned from the ground up.

However, let’s turn to the criticism.
The Catch
Nonetheless, the product launch was rocky. When the Mini first appeared in 2022, many advertised features were missing, firmware updates either failed or bricked devices!
Worse yet, the initial firmware generated insecure seed phrases, meaning early adopters were effectively beta-testing with real funds.
In the end, Ellipal addressed these issues. They released firmware updates, shipped replacement units, and responded to users on their Subreddit.
However, since this is closed-source hardware, we cannot independently verify that all vulnerabilities have been resolved. If you already own a Mini, it’s wise to follow the Ellipal subreddit for updates.
On the positive side, the QR-based data format used between the mobile app and the device is publicly documented. You can inspect exactly what information is exchanged and be sure that the device only signs the data you intend to sign.
Whether to use this wallet or choose one from a comparison ranking is ultimately up to you.
Technical Support:
- User Support Page.
- Contact email: cs@ellipal.com.
- Contact Us Page.


