Guide to Using the Ellipal Titan 2.0 Hardware Wallet: Overview and Security
Completely air-gapped connectivity, open-standard QR-code communication, self-destruct data-wipe feature, hidden (stealth) accounts, factory-reset mode, multi-currency support (up to 10 wallets), built-in DApp browser, integrated exchange aggregator, on-device crypto purchases, full NFT management.
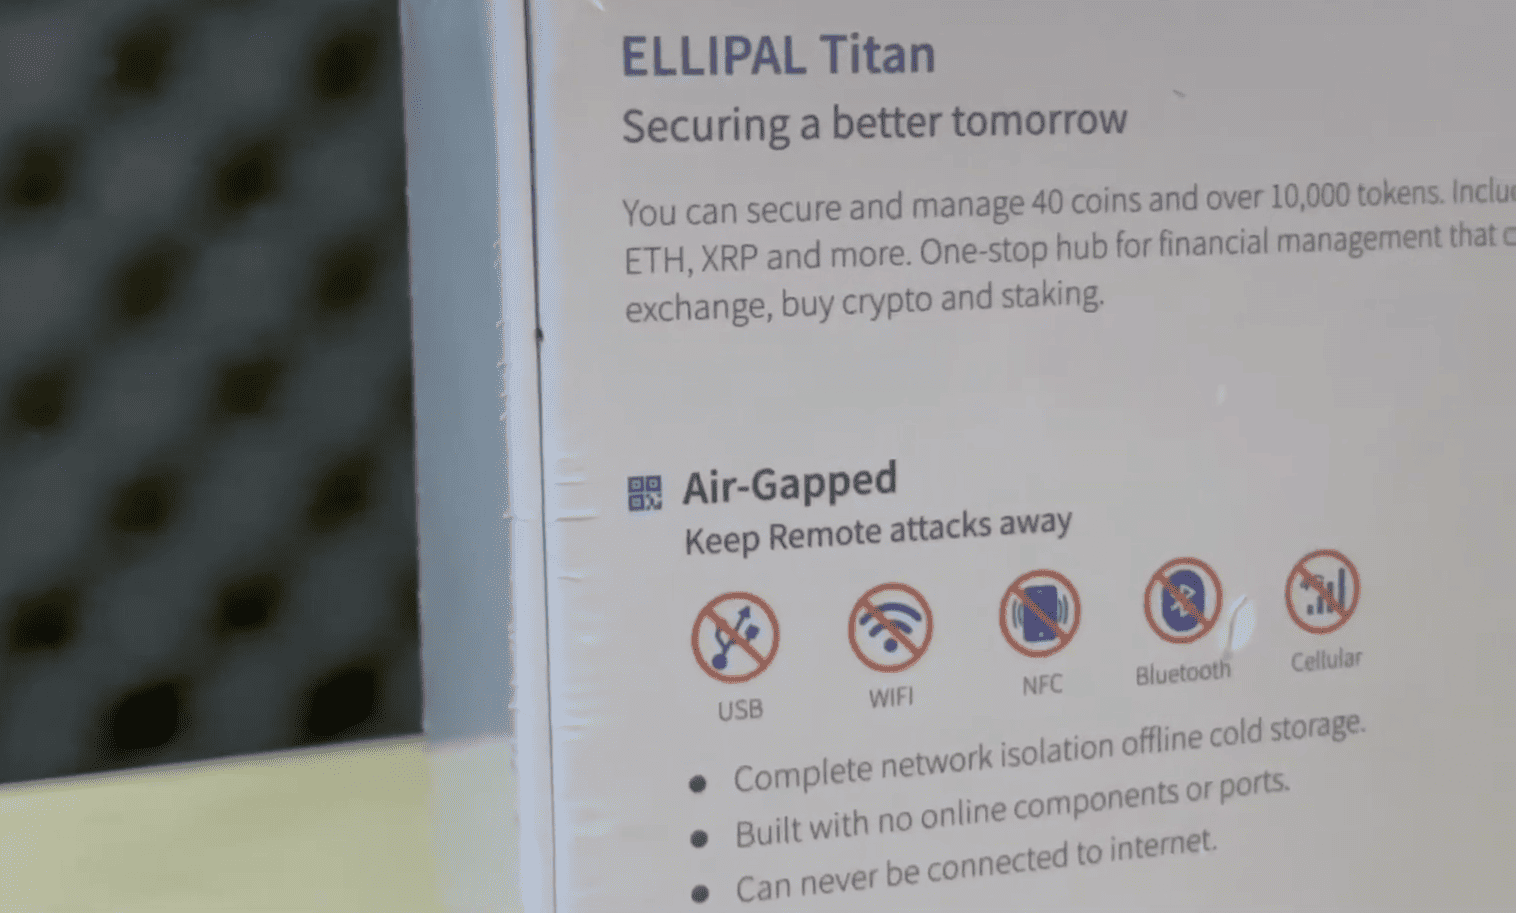
Ellipal Titan is designed for the secure and convenient storage of cryptocurrency in a hardware wallet that resembles a smartphone. It features a touchscreen and a durable metal casing.
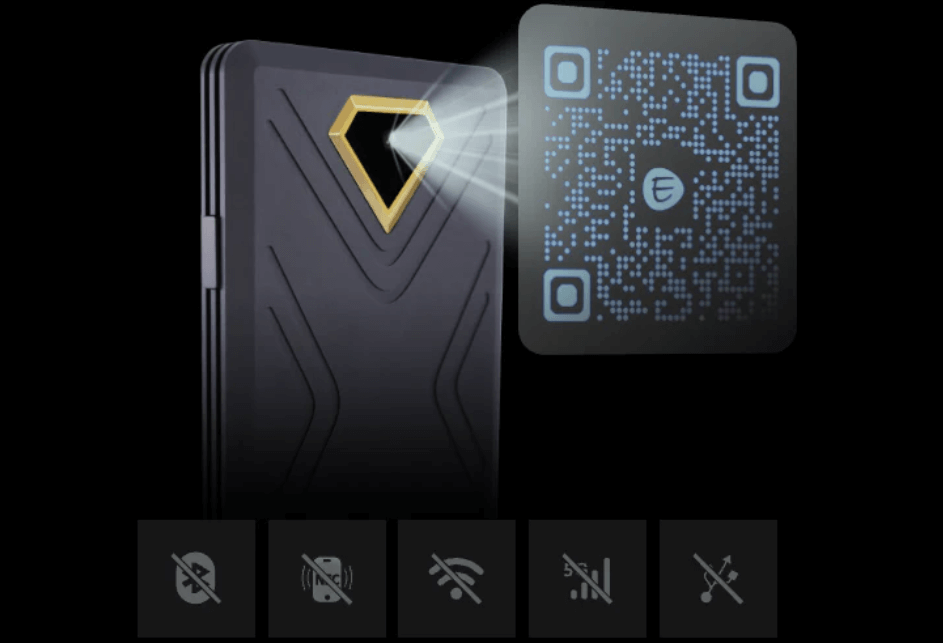
For security reasons, there are no external connectivity sources: no Wi-Fi, Bluetooth, USB, or networks. Instead, the wallet relies on QR codes for transactions—you scan them with the mobile app and confirm them on the device itself.
The Titan 2.0 package includes a charging dock with a stand, a USB-C cable, an SD card for firmware updates, seed phrase cards, a screen protector, and a user manual.
Although the hardware wallet looks like a smartphone, it can only be managed through another phone and the mobile app. There is no PC connectivity.
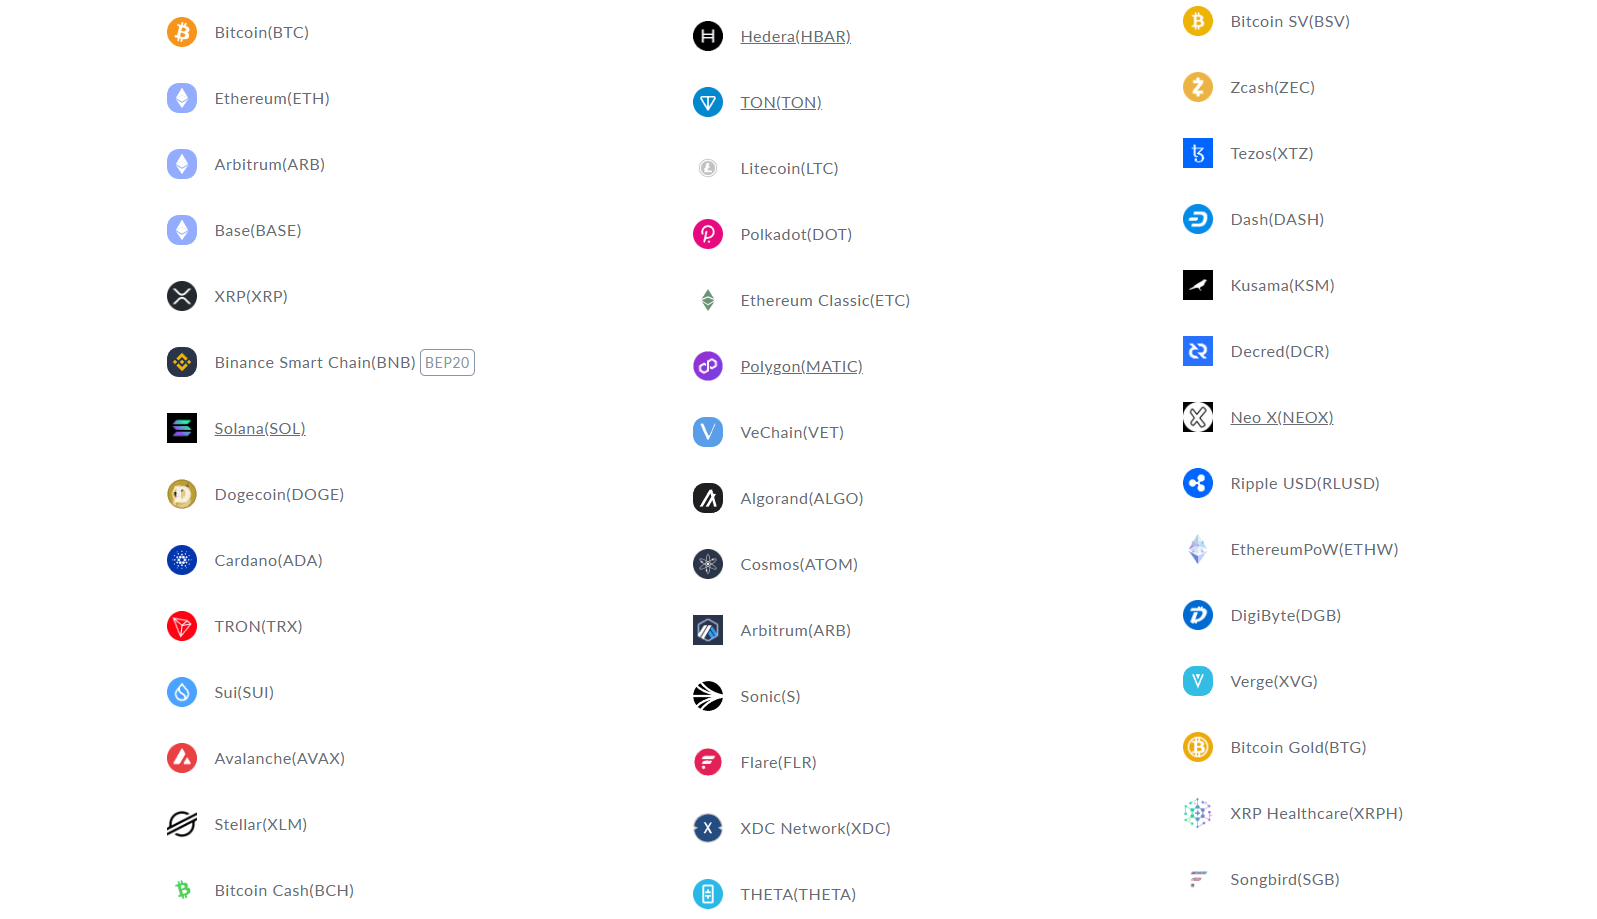
The device supports 40 blockchains and over 10,000 tokens across those networks. All major assets are certainly included: BTC, ETH, SOL and networks like ERC20, BSC, TRX, and others. You can also add tokens manually if they are not listed.
Security and Features
ELLIPAL Titan’s security is built on the following components.
Your Security:
- Complete isolation of connections – there are no network or physical ports (USB, Bluetooth, Wi-Fi, etc.); the only data exchange channel is QR codes. This ensures that private keys never leave the device.
- Open QR code format – all data transmitted between the wallet and the app is encoded in an open format. Anyone in the community can verify on GitHub that no private keys are transmitted off-device.
- Self-destruction – if a physical tampering attempt is detected, the wallet automatically wipes all data.
Additionally, it offers:
Advanced Security:
- Hidden accounts – when creating the wallet, you can add an extra passphrase that, combined with your 12–24 words, generates an entirely new private key and address. Without entering this passphrase, the hidden account remains invisible and inaccessible, providing extra anonymity and protection of your funds.
- Reset mode – after 10 consecutive unsuccessful PIN attempts, the device automatically erases all private data. It then reverts to factory settings, preventing further hacking attempts.
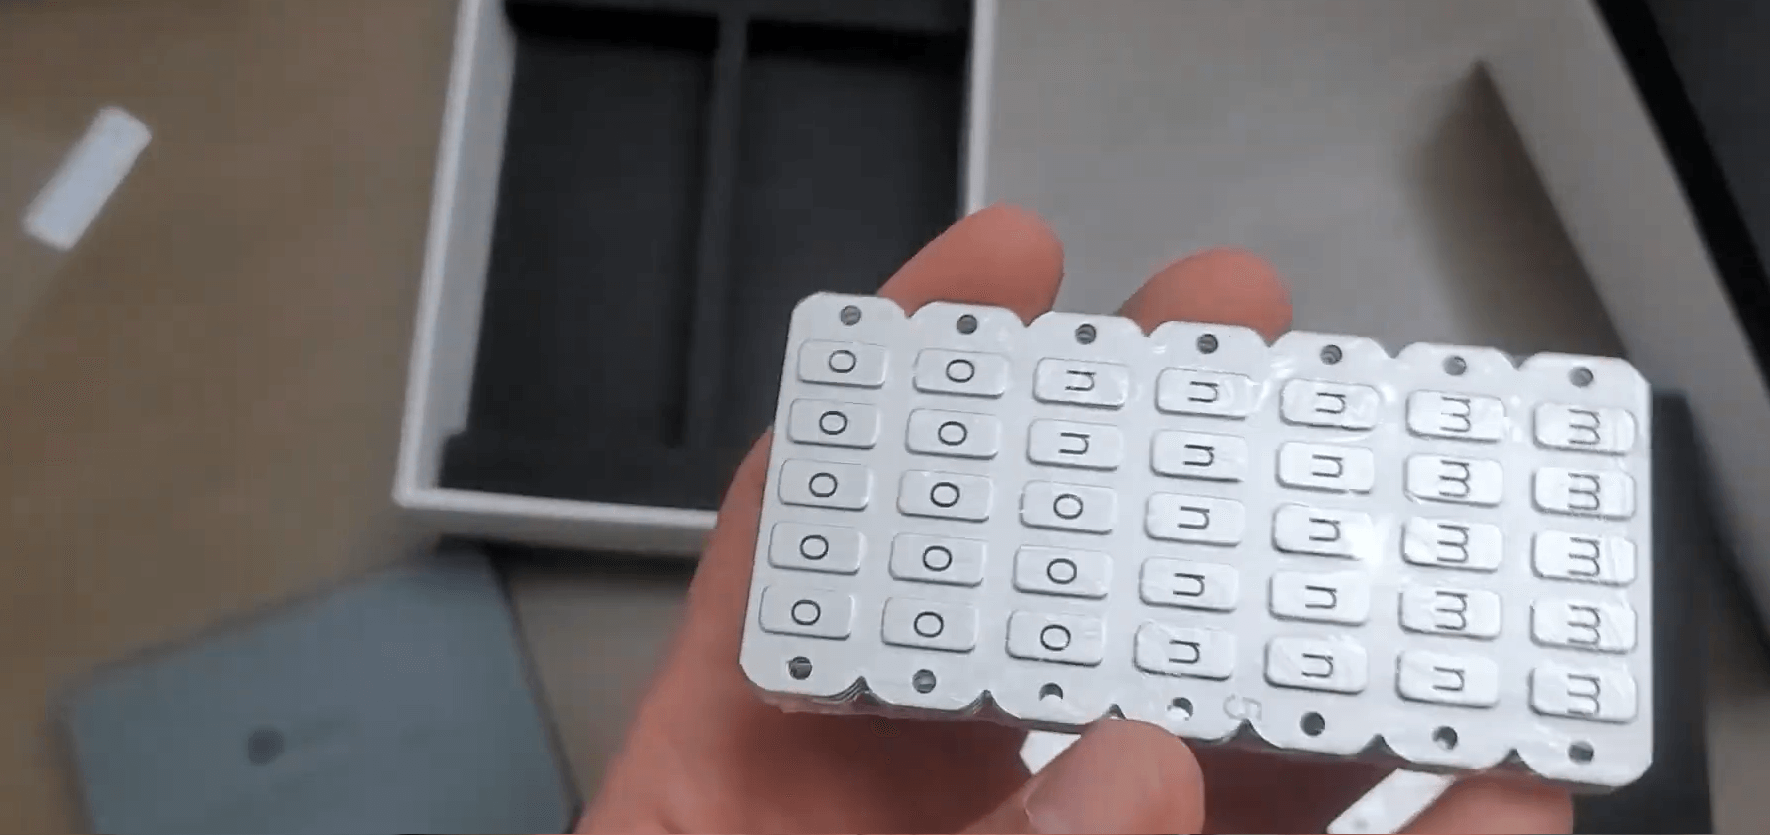
- Metal seed phrase plate – you can optionally purchase a steel plate on which, unlike paper, your seed phrase is protected from water and fire. This ensures long-term, reliable storage without the risk of loss or damage.
The metal casing of the wallet is rated IP65 for water and dust resistance. See this article for details.
Now let’s move on to the economic side. All of these features become available when paired with the mobile app.
Your Benefits:
- Multicurrency and multiple accounts – store an unlimited number of coins and tokens and use up to 10 accounts.
- dApp Browser – access 100+ DeFi, gaming, and trading applications directly from the wallet.
- Built-in swaps, buying, and NFT support – use the wallet as a Swiss Army knife for quick crypto exchanges without needing centralized exchanges.
Before setting up the wallet, let’s mention the drawbacks. We’ll address or refute them as we go through the setup.
Cons:
- QR-based transactions are secure but can be time-consuming to scan repeatedly.
- Higher cost compared to many alternatives, which is a budget consideration.
- Battery drains in standby mode, requiring you to manually power off the device.
Some may also view the following as disadvantages:
Additional Cons:
- Firmware is not entirely open-source, preventing a full independent audit.
- No original dock station means no charging or updates; replacement docks are expensive.
- SD card updates, while very secure, can be confusing for beginners.
Now we’ll test everything in practice by setting up a new wallet and linking it to the mobile app.
Setting Up and Creating Your Wallet
The Ellipal Titan operates on a battery, so before the initial setup, you need to fully charge it.
Place the wallet onto the dock station along the guides, and wait for the green indicator to show it’s charging.
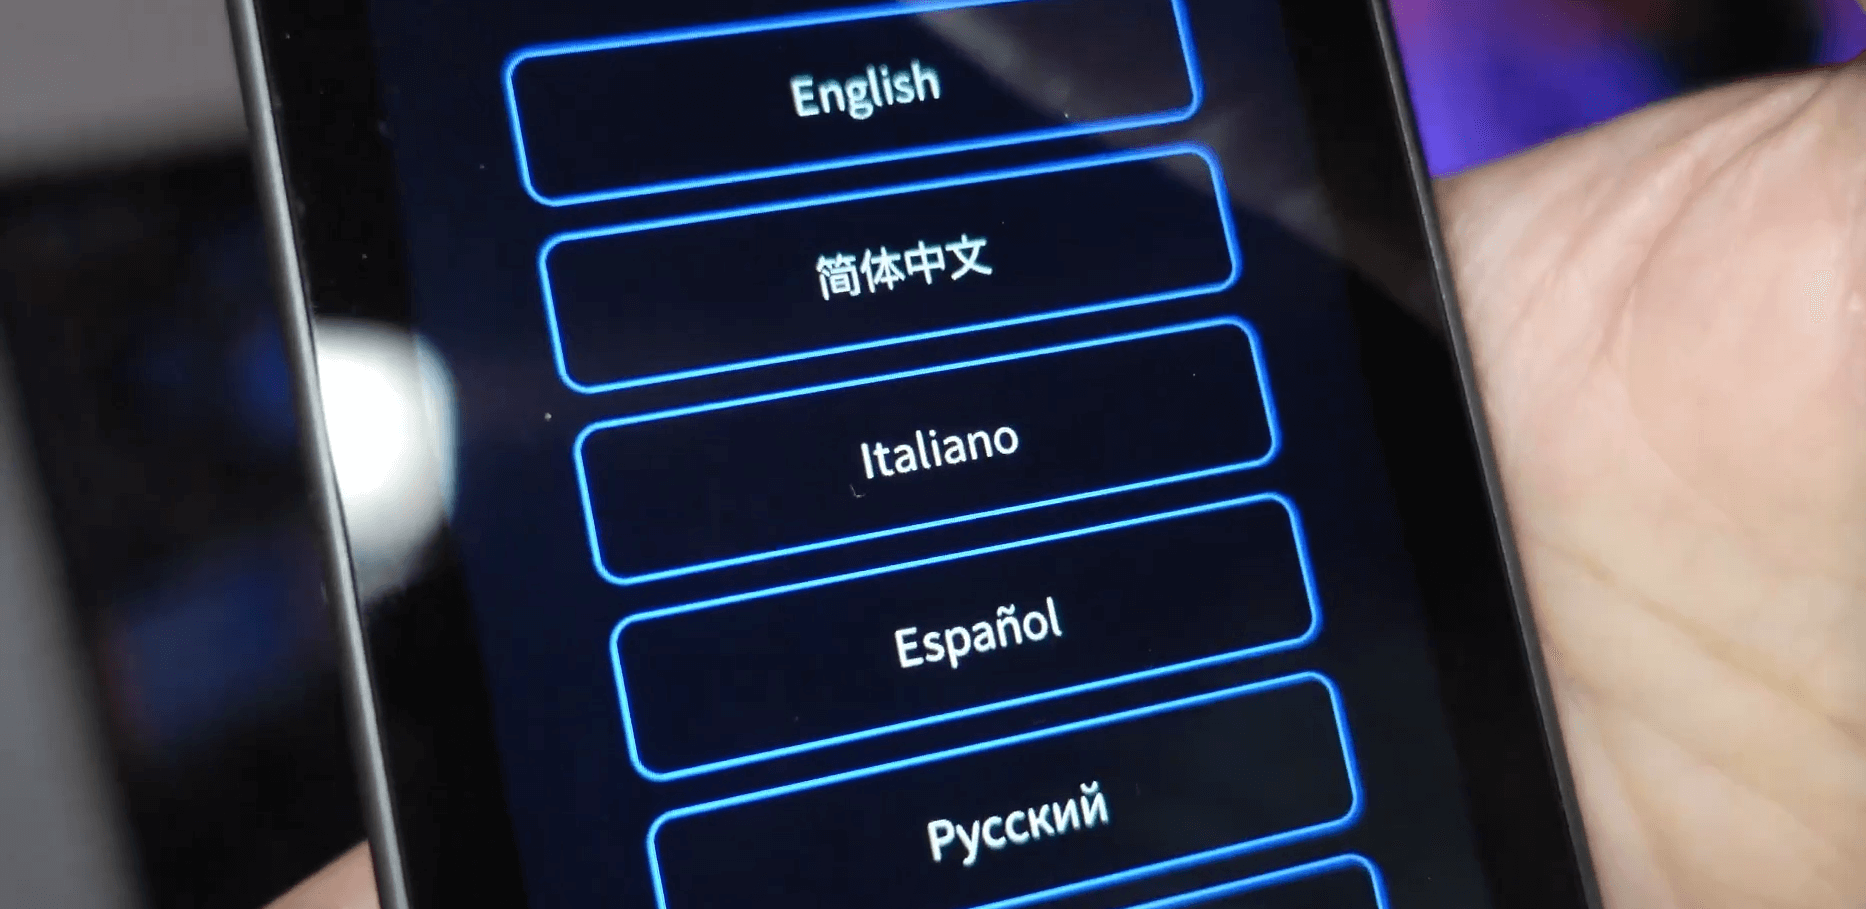
Next, choose your language. If your language isn’t in the list, you’ll need to update the firmware.
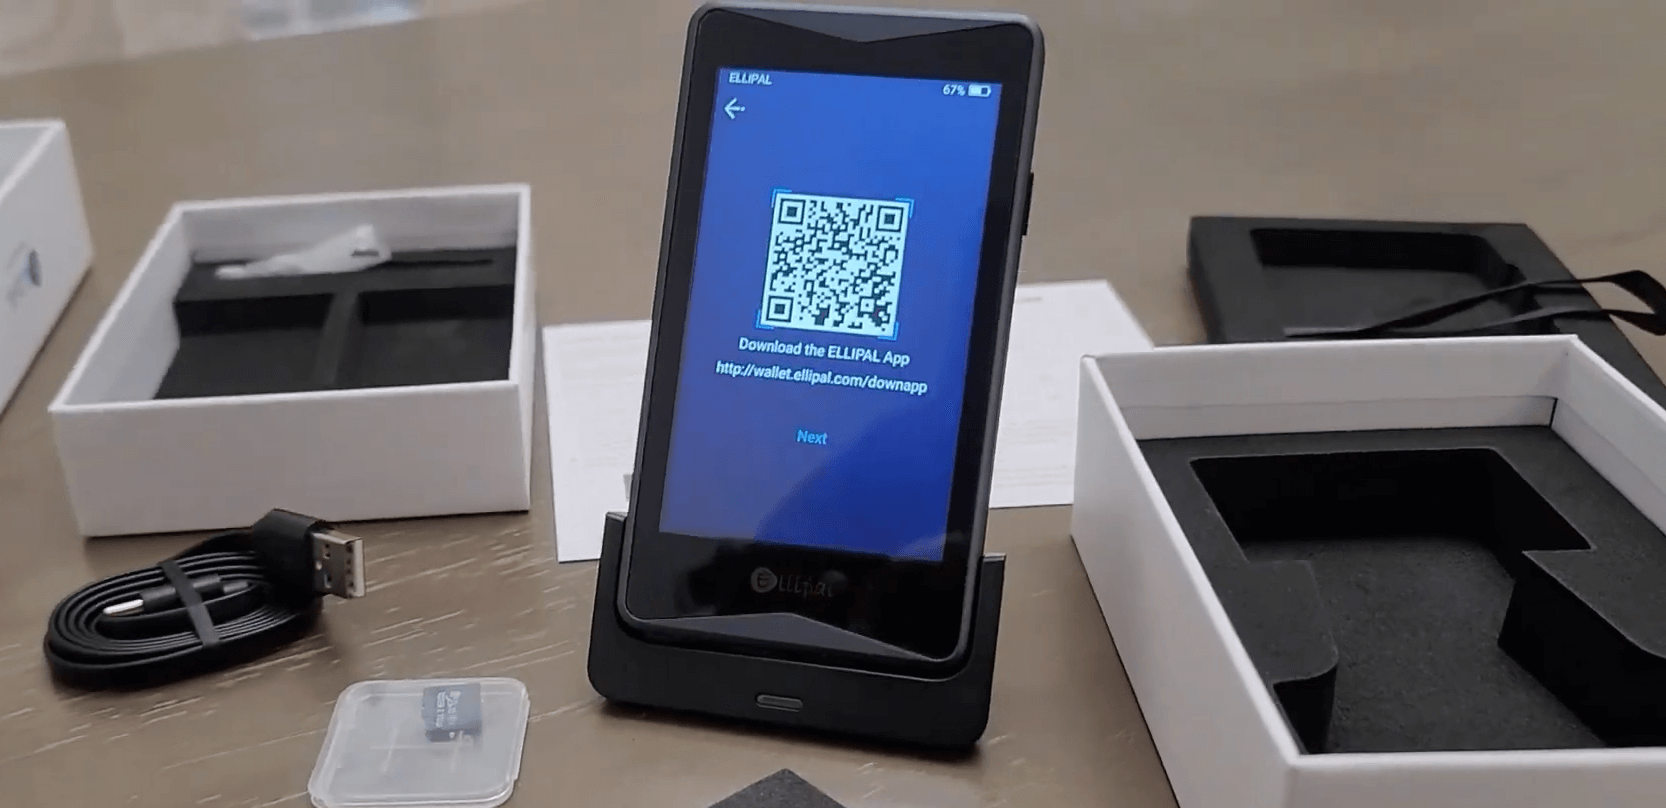
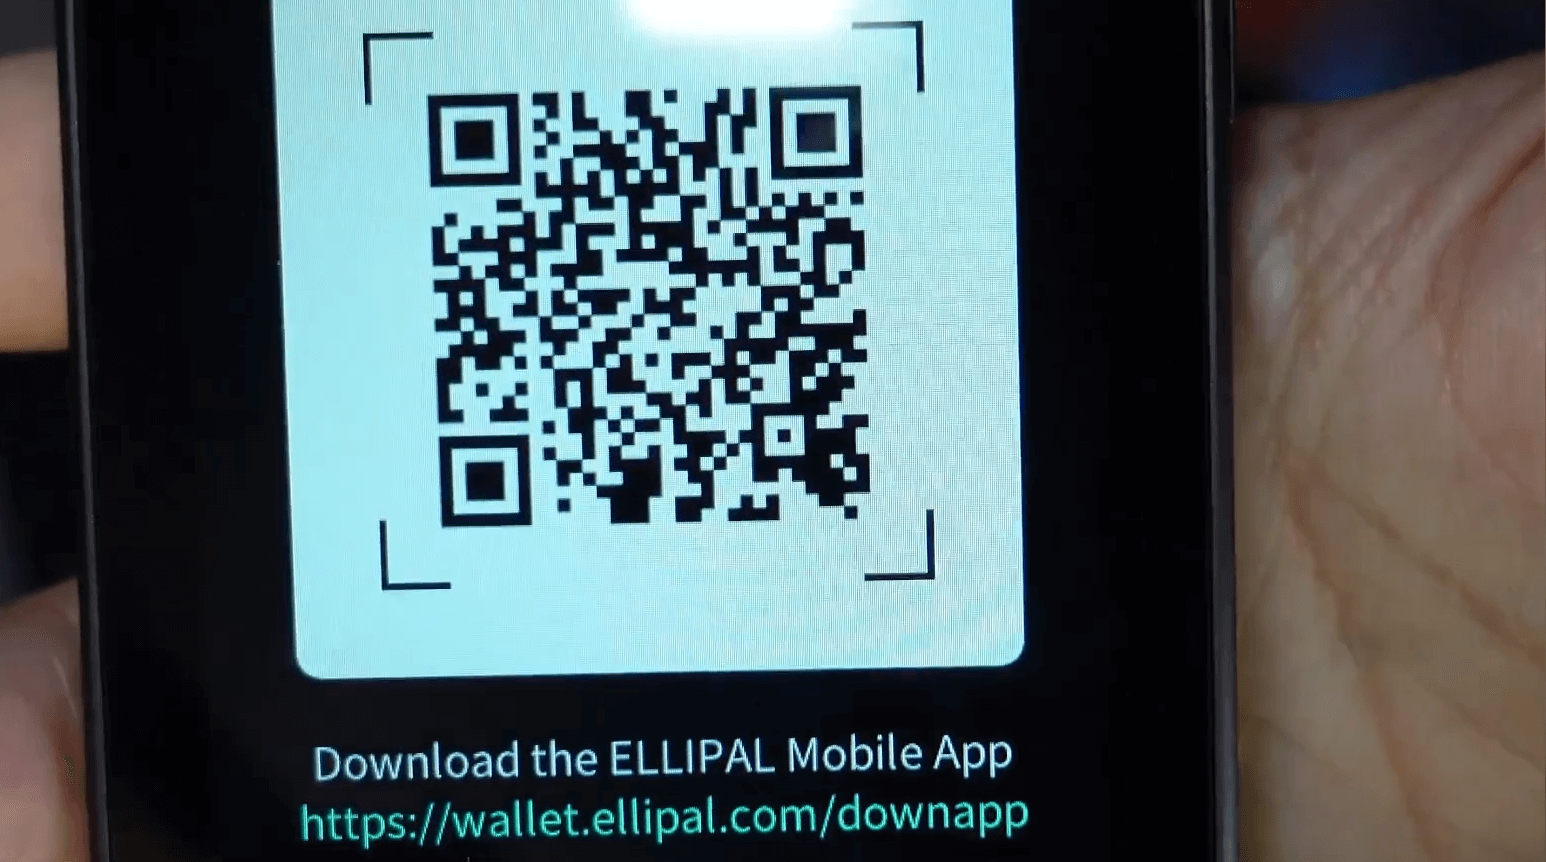
The device will prompt you to download the mobile app via a QR code. Open your phone’s camera, point it at the QR code, download the app, and enable notifications to stay updated on your balances.
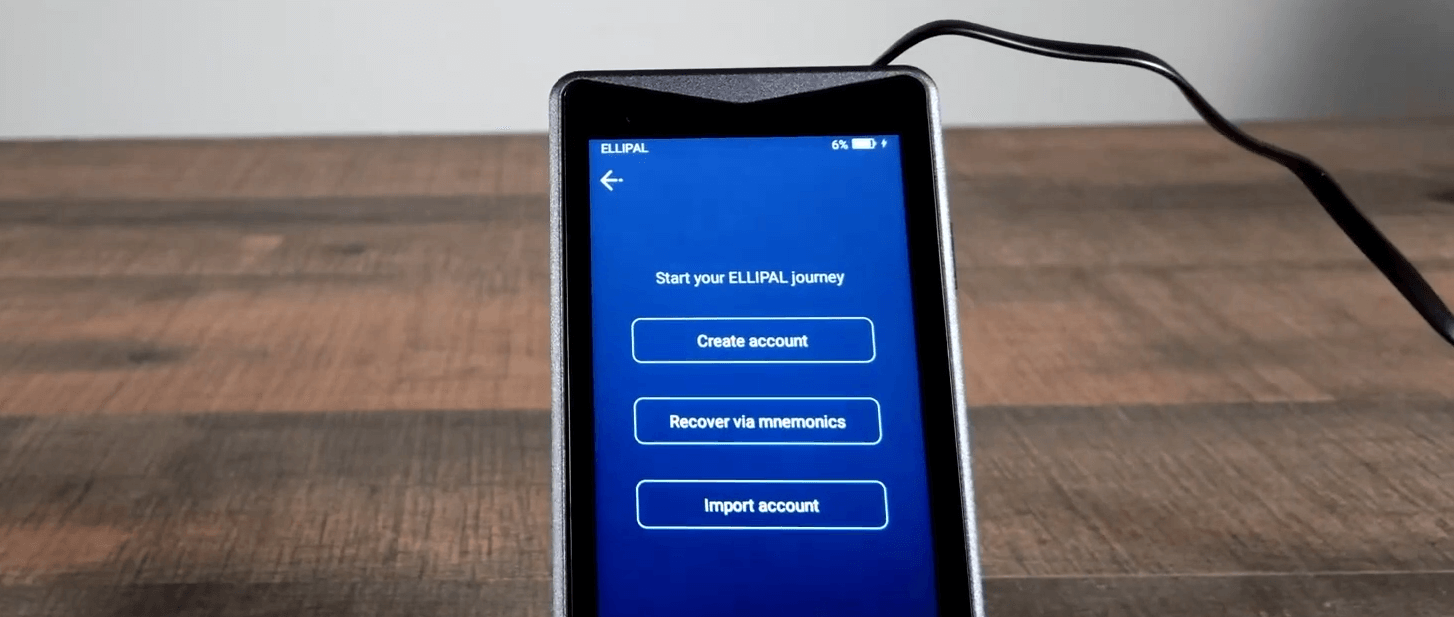
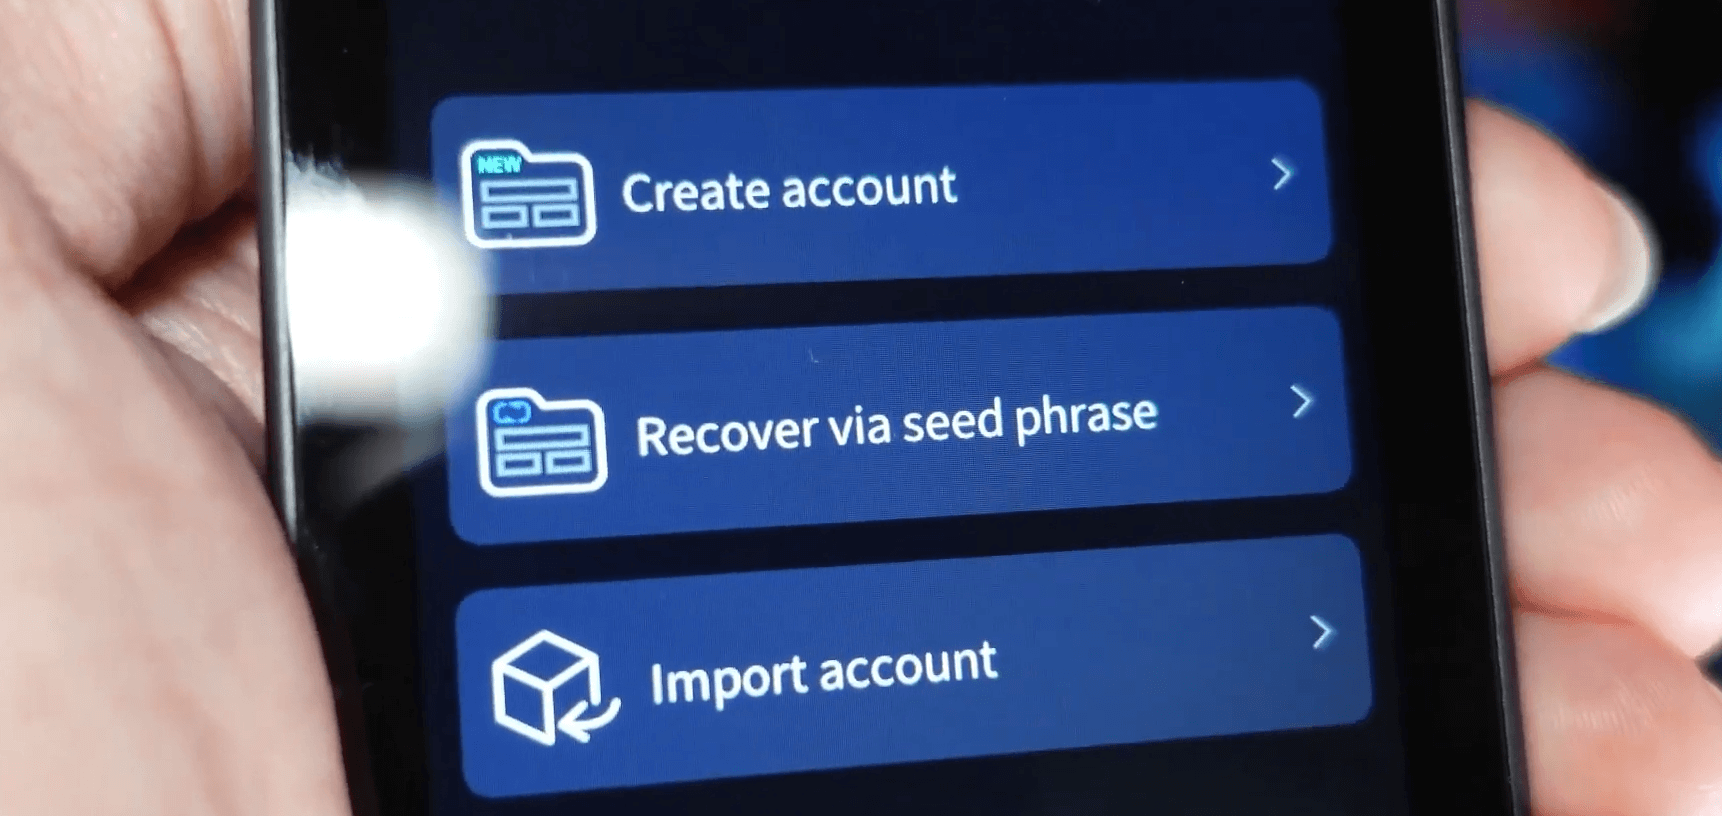
After installing the app, tap Next and proceed to create a wallet. Choose Create Account, or you can import an existing seed phrase from a previous hardware wallet.
For security, do not use seed phrases from online wallets like MetaMask.
Enter an account name, a strong password, and, if desired, add an extra passphrase to create a hidden account (we’ll cover this later). Then confirm by tapping Create Account.
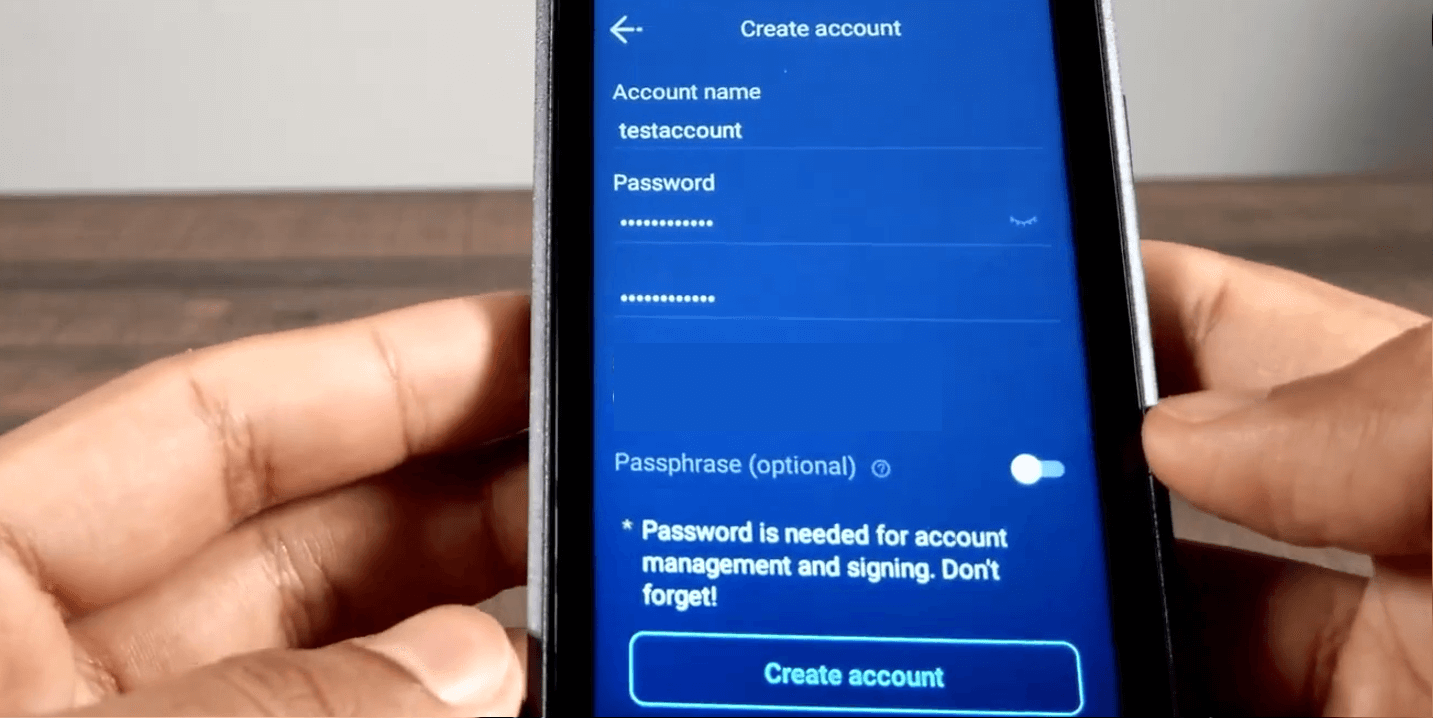
You will see confirmation of account creation and a prompt to back up your seed phrase for recovery.
Seed Phrase
The seed phrase is the only way to recover your funds if the device is lost or damaged.
- Tap
Backup Seed Phraseand store the phrase in a secure location. - Ensure no one is looking—especially not while you’re away from home.
- Confirm that Ellipal does not store or export your phrase, check all the boxes, and tap
Back Up Now.
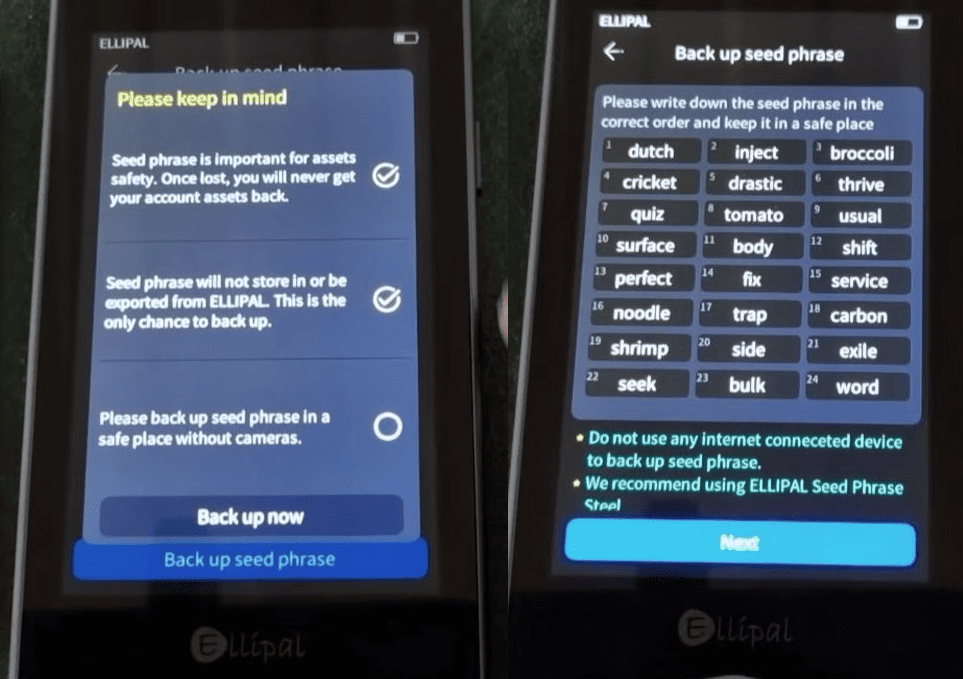
You will now be shown all 24 words of your seed phrase. Carefully write each word down in order. Do not store the phrase on your computer, as it could be hacked.
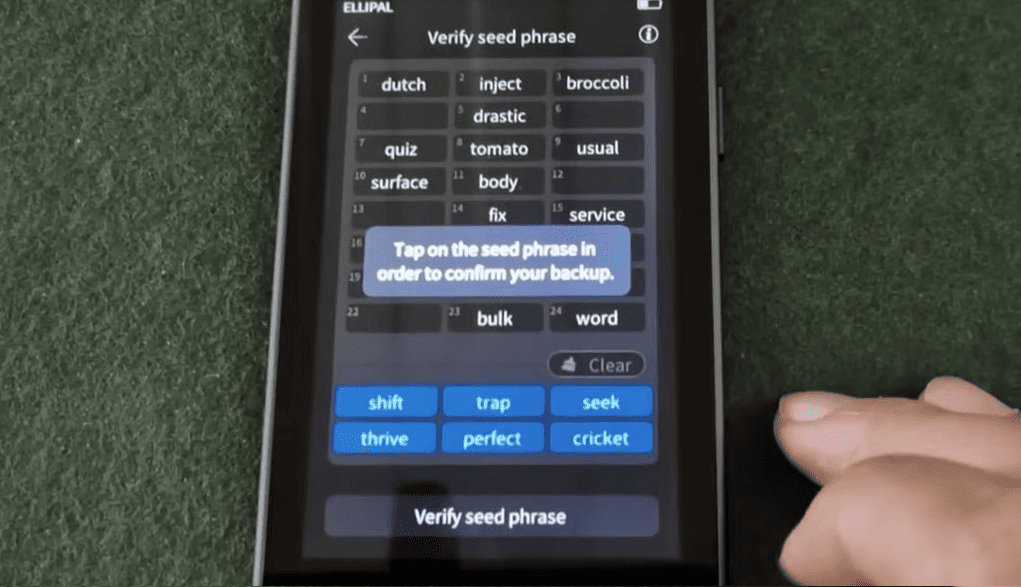
After that, the app will ask you to confirm the phrase by selecting certain words in the correct sequence.
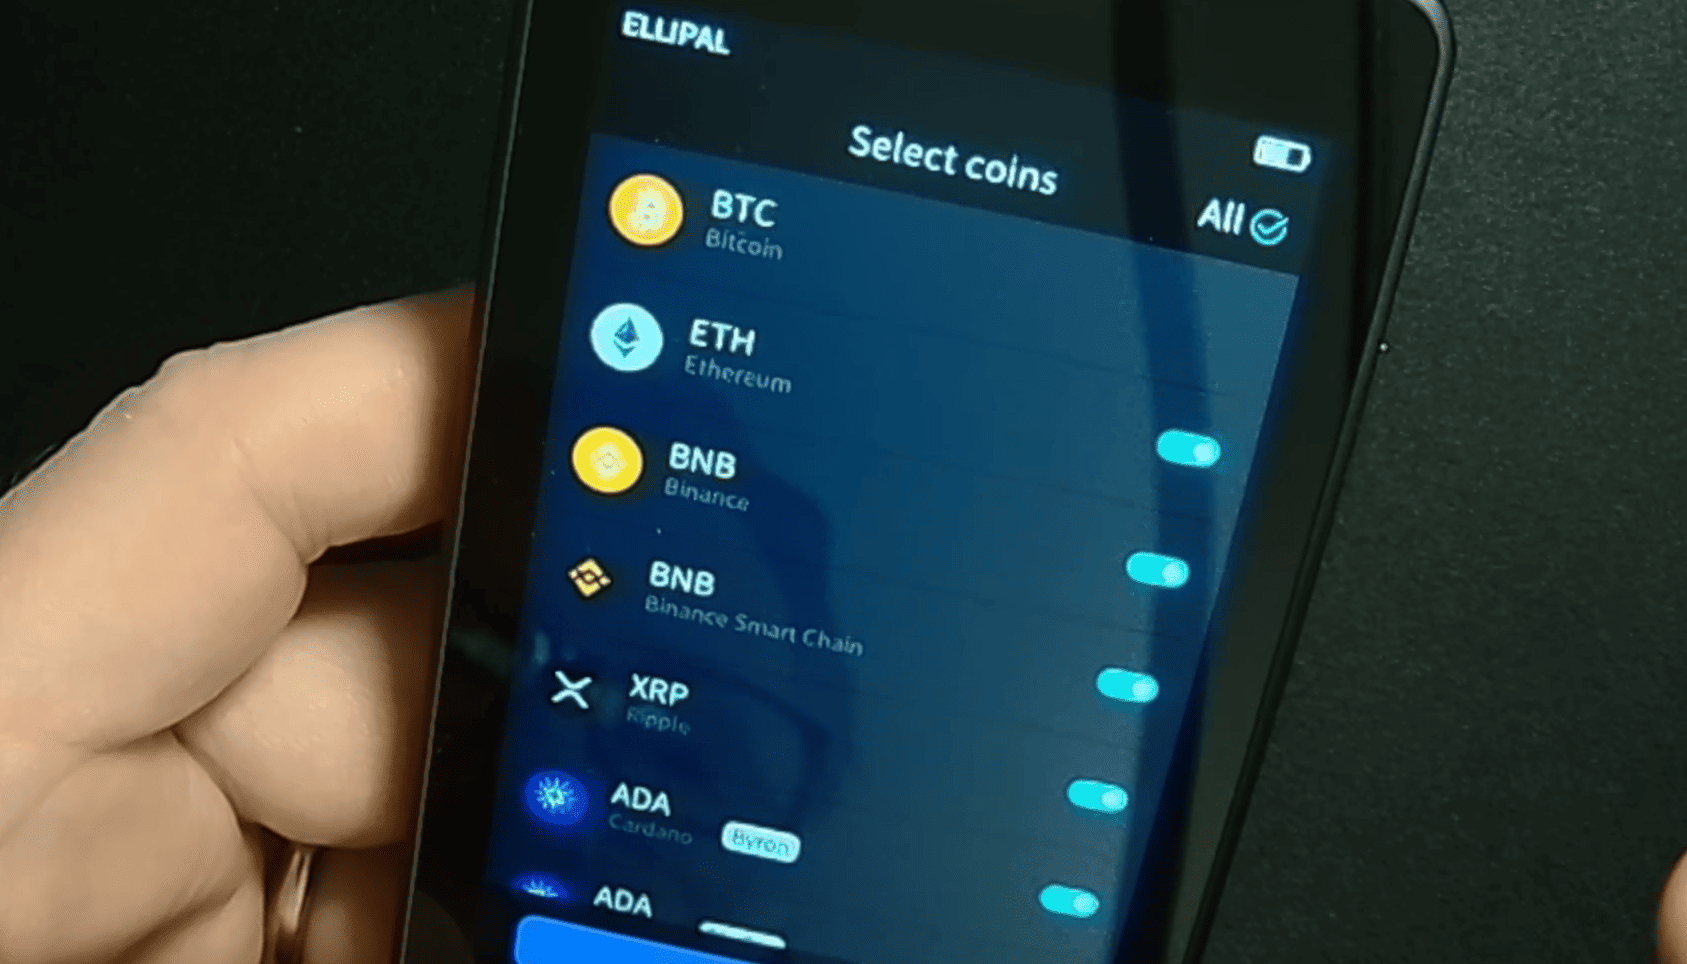
Once verification is complete, the app will display the tokens and networks supported by your wallet. You can enable assets like BTC, ETH, BNB, Solana, and many others.
Select the tokens you want or tap All to activate everything at once. At any time, you can return to the settings to add or remove coins.
To continue setup, you need to install the Ellipal app. This is required to manage the completely air-gapped hardware via QR codes.
Linking to the App
Install and open the app on your phone—enable notifications if you wish, so you don’t miss important updates (you can disable them later).
Here is a guide to the app with installation and hidden features.
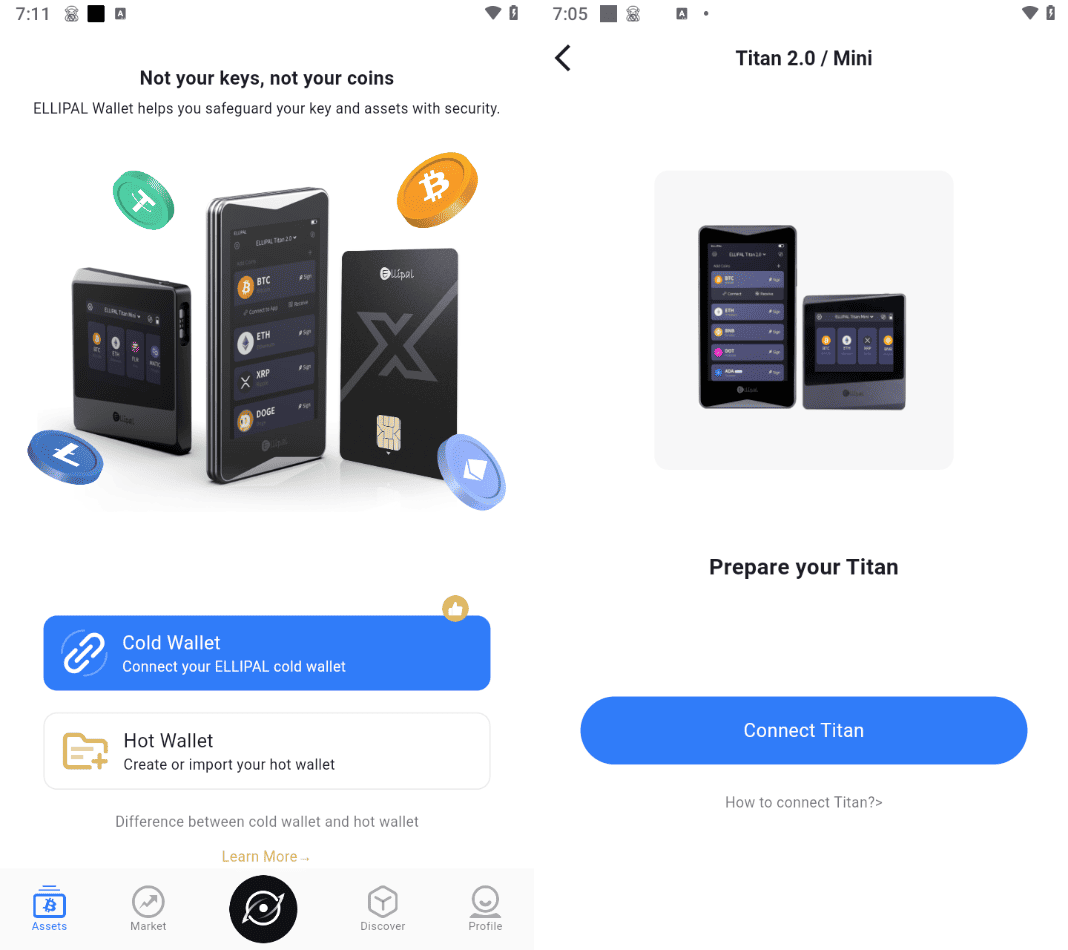
The app will prompt you to choose between Cold Wallet (hardware) and Hot Wallet (software).
Tap Cold Wallet.
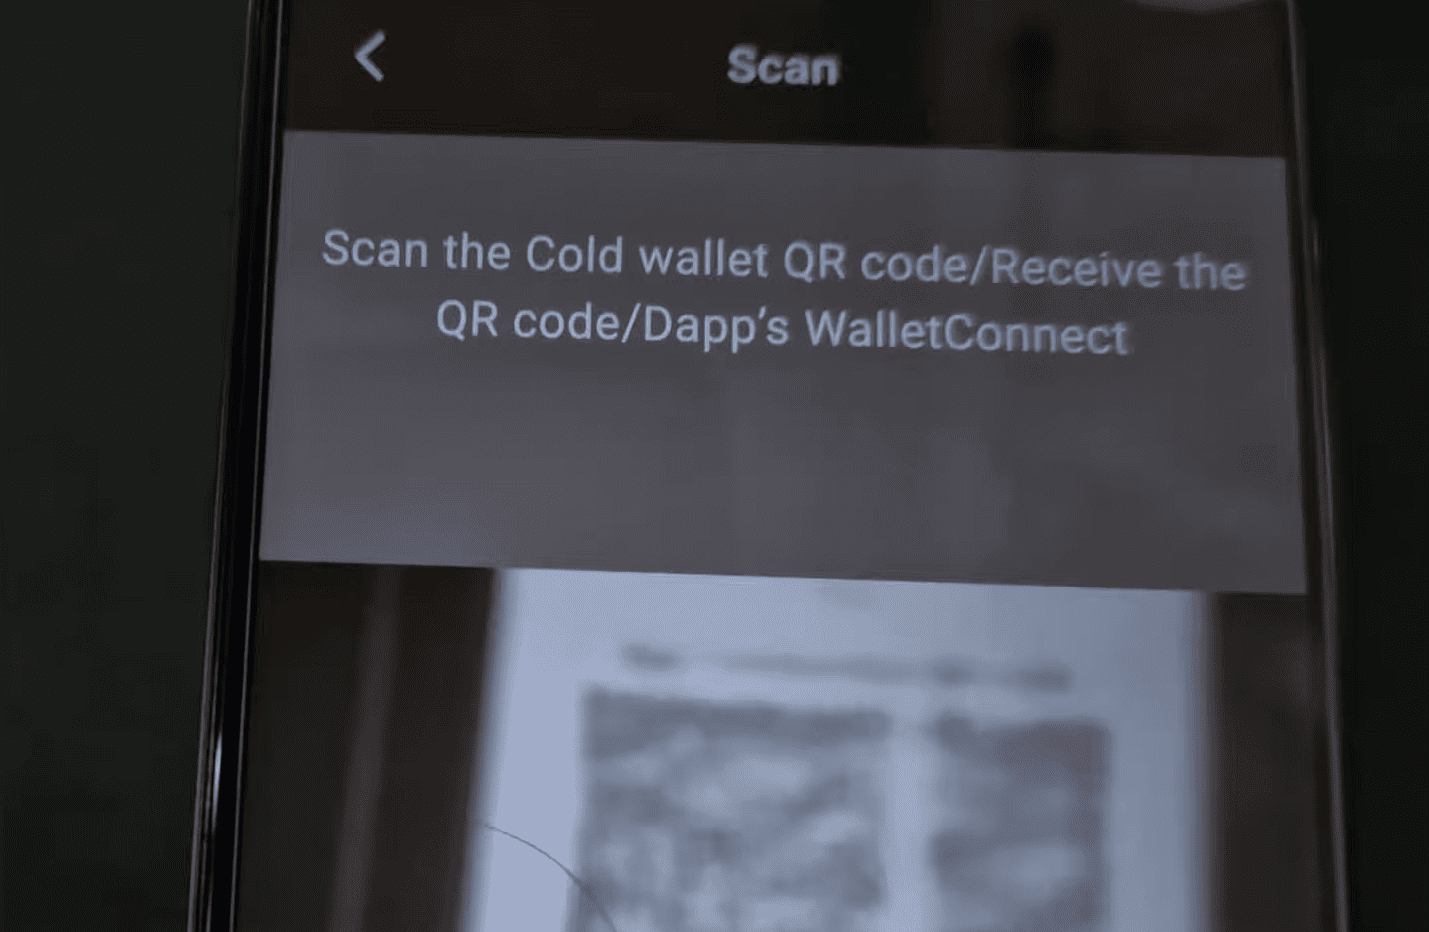
Grant the app camera access, then scan the QR codes displayed on your Titan 2.0 by tapping the corresponding icon below the battery indicator.
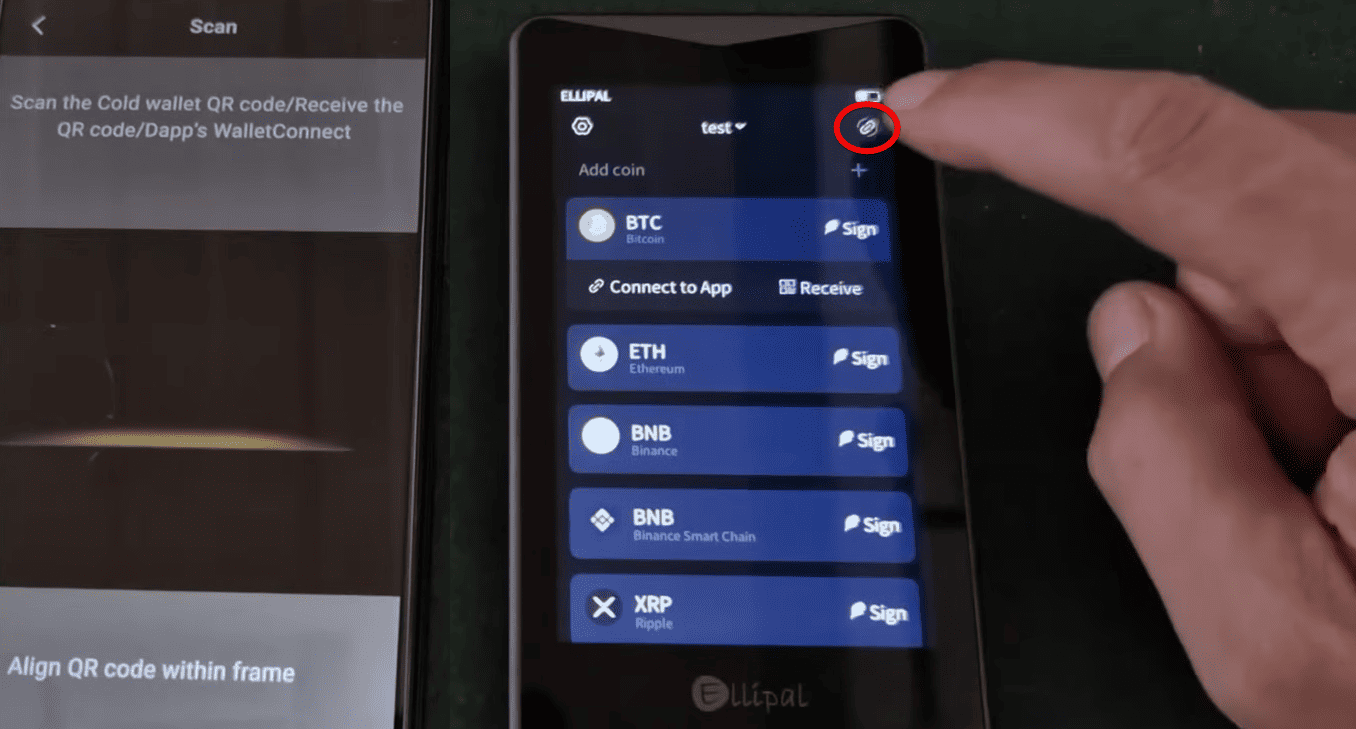
The number of QR codes will correspond to the number of tokens you previously enabled. Yes, it’s not quick—just scan each code in sequence. If prompted to update the app, confirm and continue scanning until the process is complete.
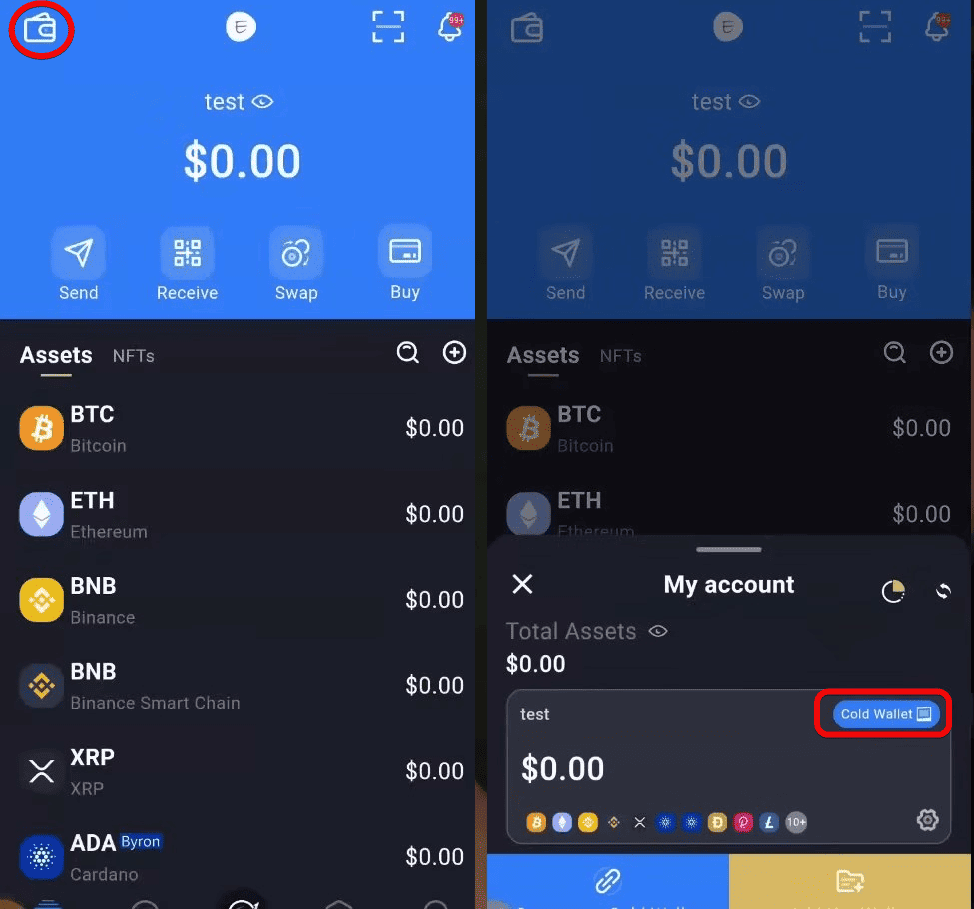
After connecting the device, you can manage and swap all supported currencies directly in the app.
You will see your portfolio—BTC, ETH, BNB, SOL, XRP, and others—with options to send, receive, swap, and buy.
In the top right corner, there is a wallet icon that leads to viewing and adding accounts.
How to Use
Let’s briefly cover creating addresses, depositing, and sending cryptocurrency using the app + hardware wallet. Almost everything is done in the app. We’ll go over the main steps and then return to all the hidden settings of the Ellipal Titan hardware device.
How to Generate an Address
To receive an address, tap on the coin in the hardware wallet and you will see its address and QR code.
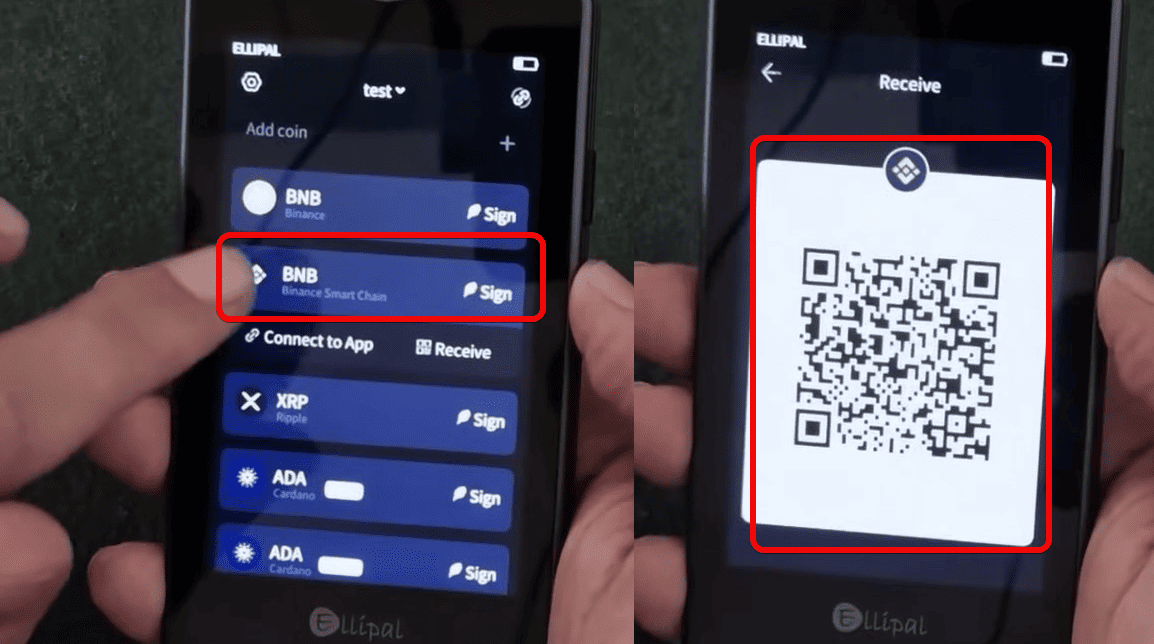
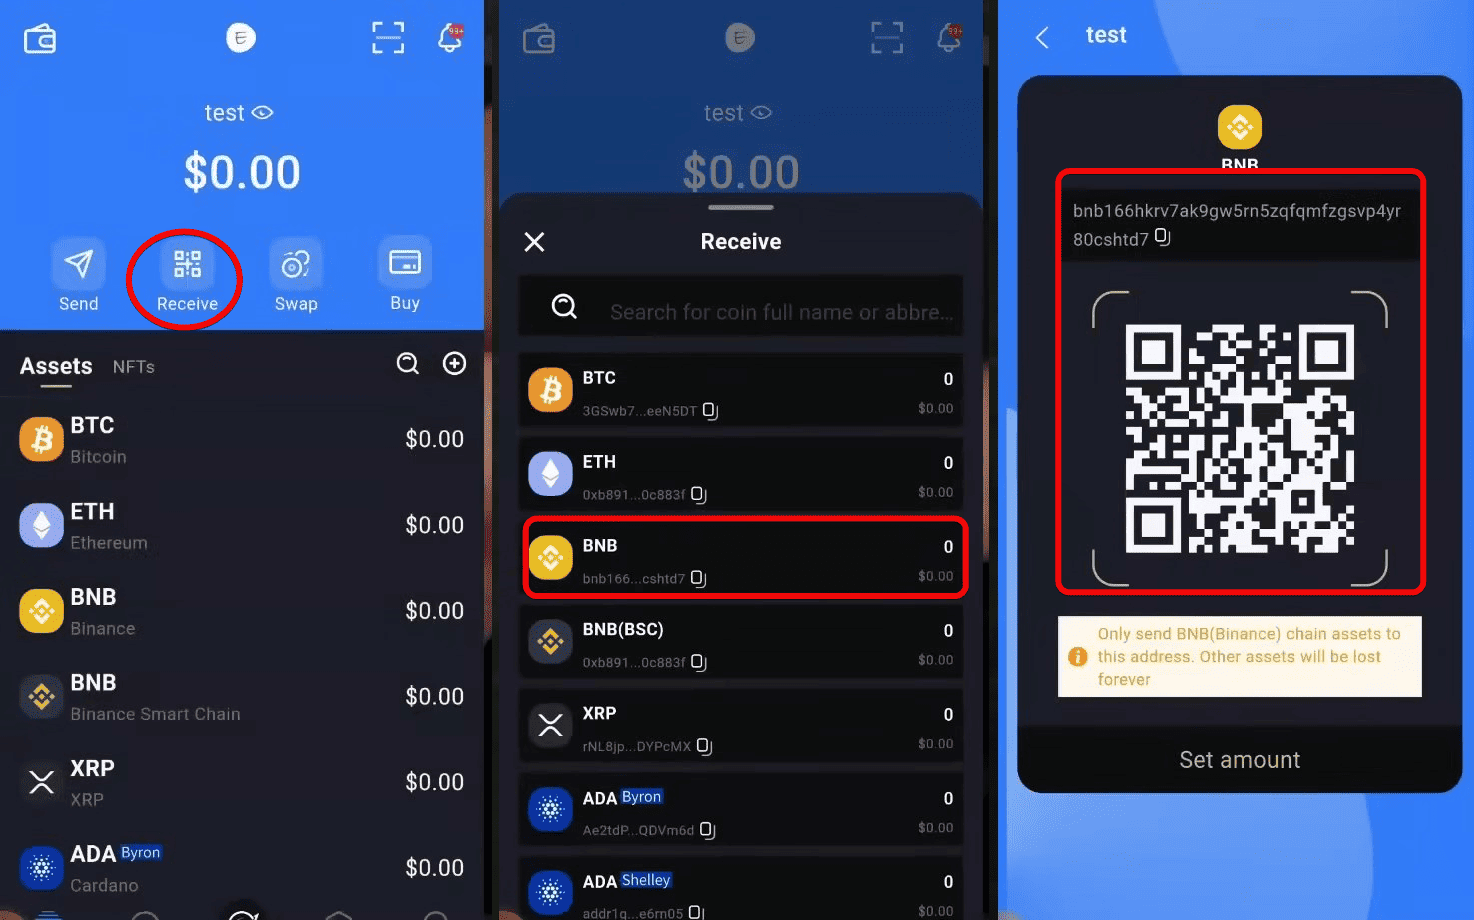
Another way: tap the Receive button in the app, select the coin (for example, BNB), and generate a wallet address and QR code.
The addresses in the app and on the device are identical. Therefore, to save the Titan’s battery, you can generate receiving addresses on your phone.
How to Deposit
Now let’s deposit funds into the wallet. To receive funds, select the desired cryptocurrency—for example, Binance Coin on the BSC network—and send it to the displayed address or QR code.
Always ensure you select the correct network and send funds on the same network that the coin operates on.
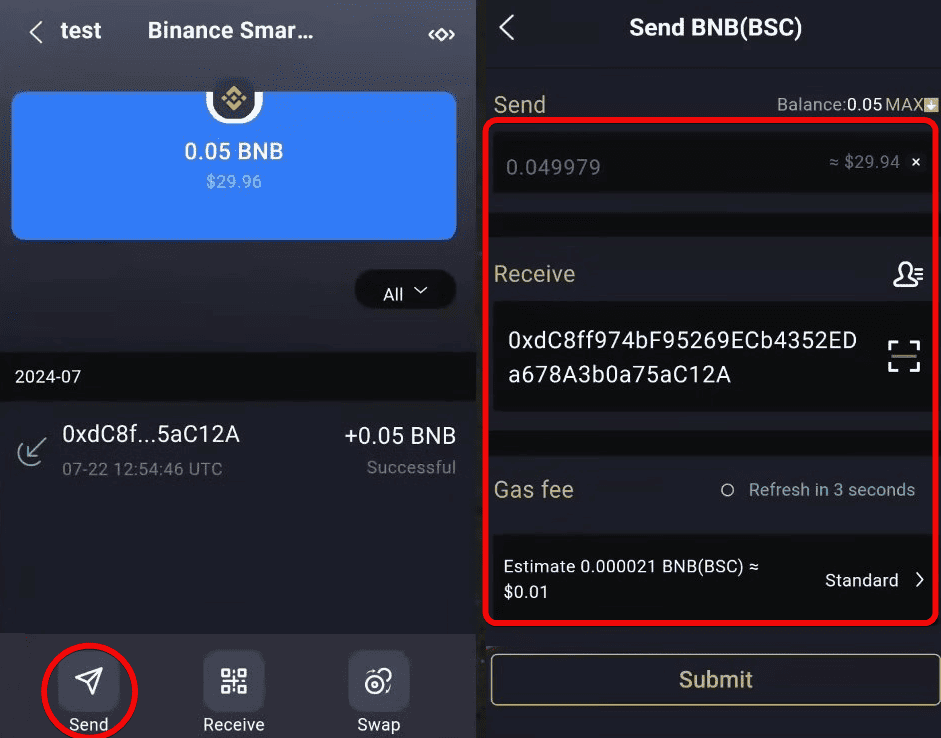
For example, we will transfer 0.05 BNB from another wallet—Trust Wallet—to the Titan 2.0.
In Trust Wallet, tap Send, paste the Ellipal address, enter the amount, and confirm the transaction.

How to Withdraw
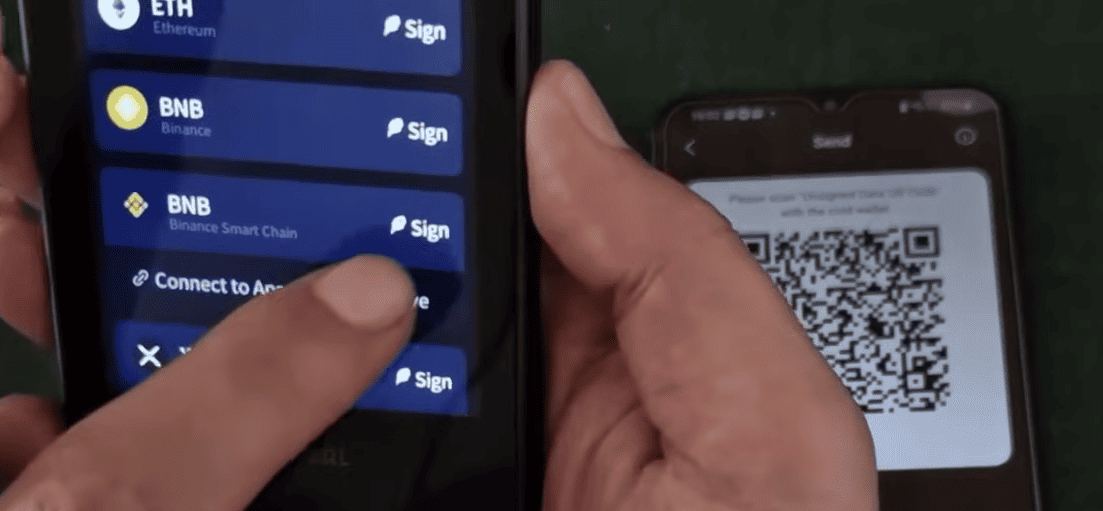
Now let’s move on to sending assets—a key function for a hardware wallet. In the app, tap Send, paste the recipient’s address (for example, your receiving address in another wallet), enter the amount and fee, then tap Submit. The app will generate a QR code for you to scan with the hardware wallet.
On the device, tap Sign next to the chosen coin, enter your password, and scan the QR code displayed on your phone.
Verify the transaction details and tap OK.
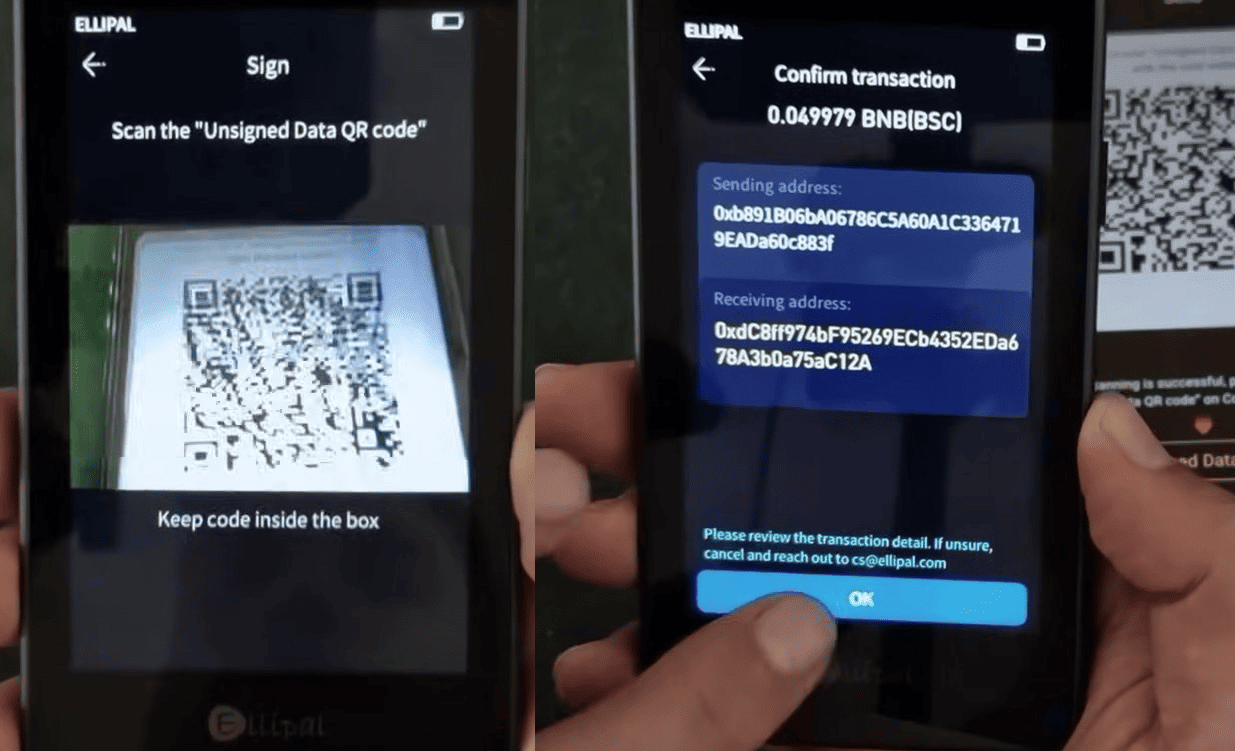
The device will generate a signature QR code—scan it in the app, and the transaction will be broadcast to the network.
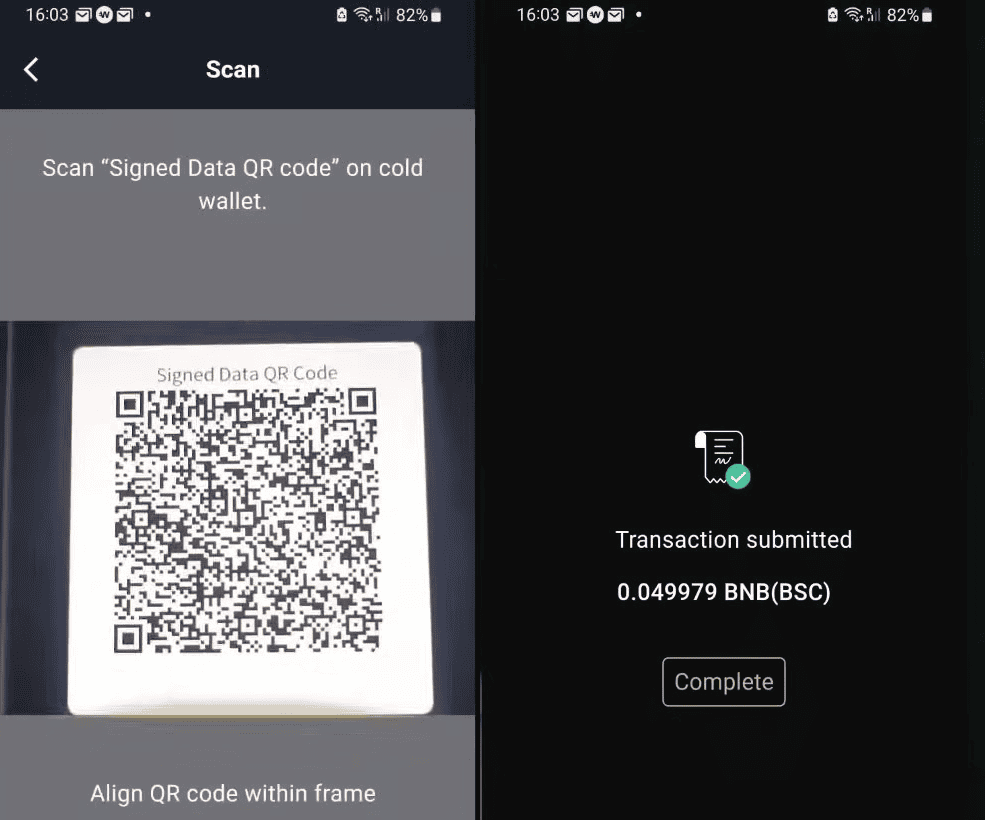
Although scanning QR codes may seem cumbersome at first, after a few attempts it becomes easy and natural. The fully air-gapped design provides assurance that your keys never leave the device, even though Bluetooth and Wi-Fi remain active on your phone.
Adding Tokens
To add tokens and networks on the device:
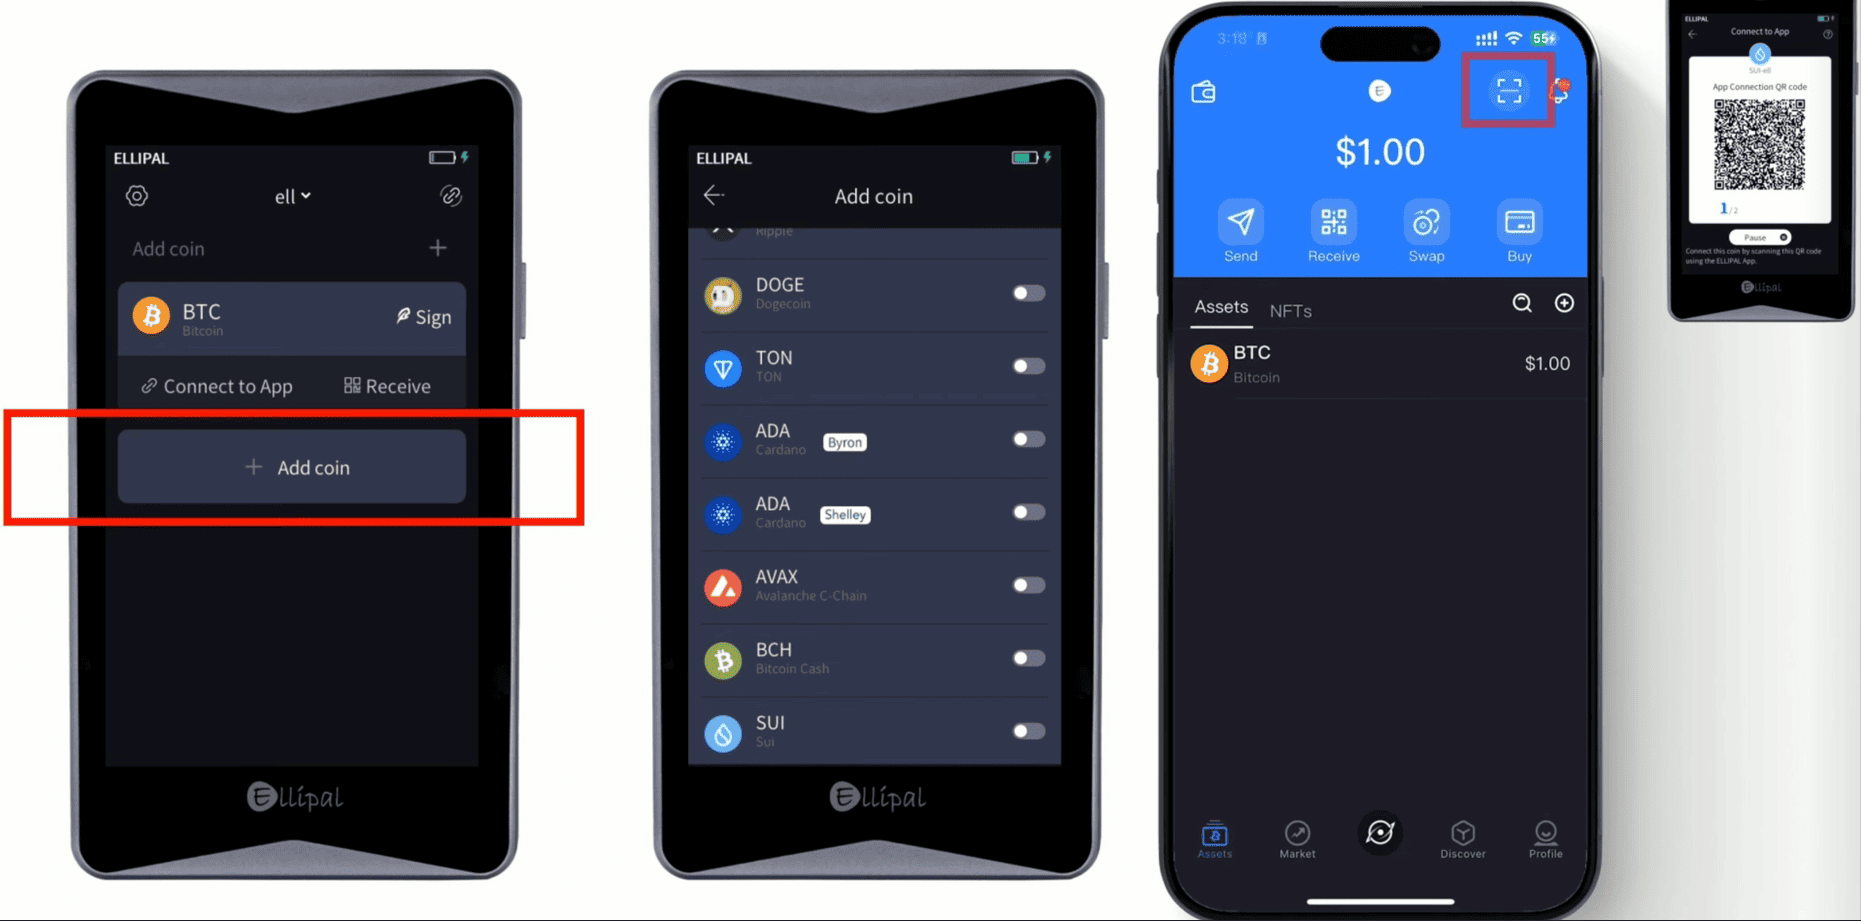
- Scroll down and tap
Add Coin. - In the list of available networks, find and select, for example,
SUI Network.
Then add the token on your smartphone:
- Tap the
Scanbutton in the top right corner of the screen. - On Titan 2.0, open the section with the QR code for network integration.
- Point the smartphone camera at the QR code displayed on Titan 2.0 to automatically add the network.
Advanced Settings
Now let’s return to the hardware device itself and review what else can be configured.
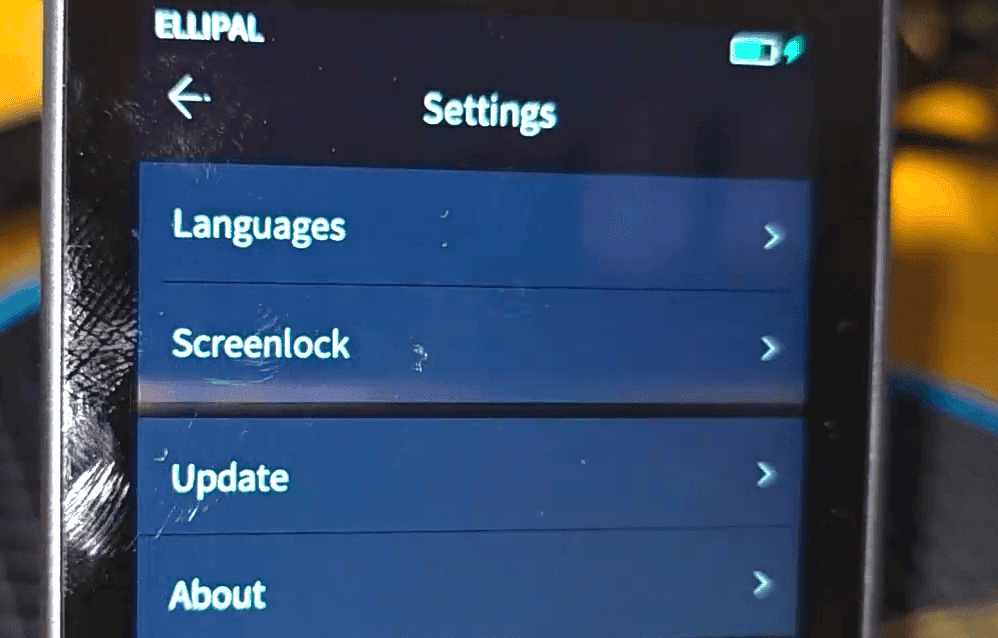
In the settings menu of the hardware wallet, you’ll find options such as:
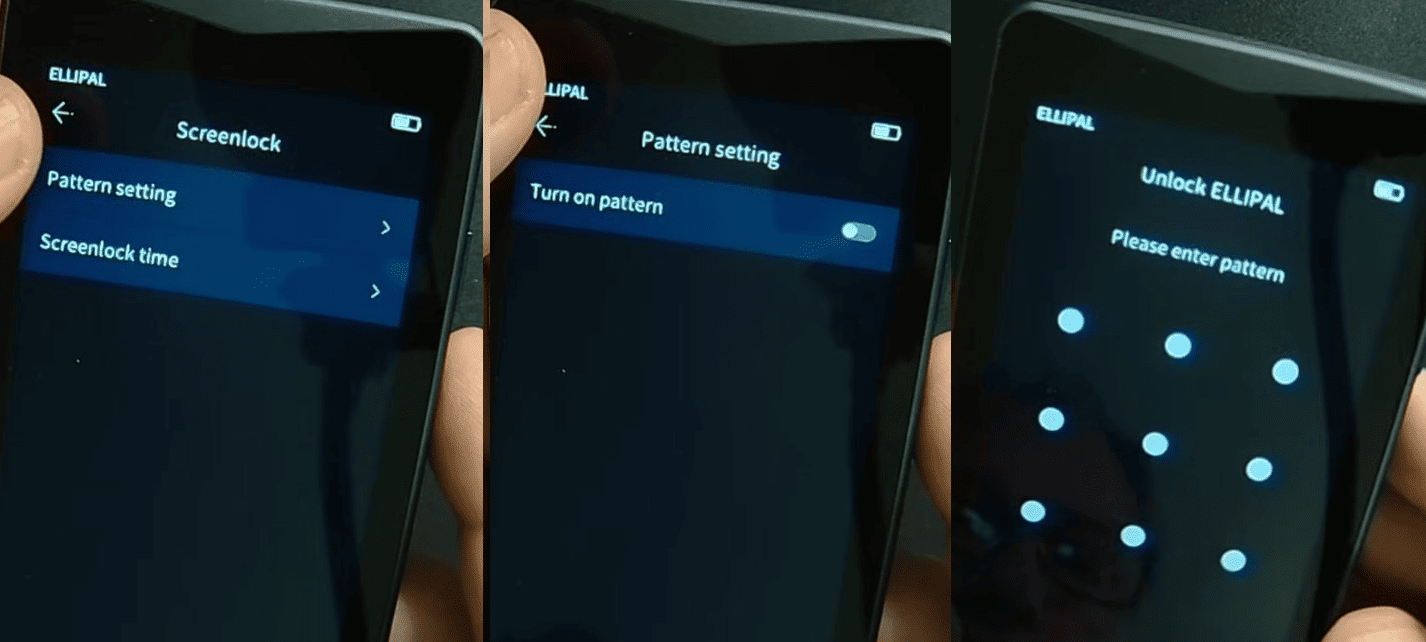
Languages– select the language (English, Russian, Spanish, etc.)Screenlock– set a pattern lock and screen timeoutUpdate– proceed to firmware updatesAbout– view wallet information (firmware version, system data, etc.)
In the Screenlock menu, you can set a pattern password and screen lock timeout. You can also set an alternative pattern lock so that, upon powering on, a “watch-only” wallet (empty balance) is displayed first (see the Watch-Only section).
Import and Recovery
If you lose or damage your Ellipal Titan, you can always recover the wallet and your funds using the seed phrase. By following the recovery process on a new or replacement Titan device, you regain access to your crypto assets and can continue managing your portfolio without interruption.
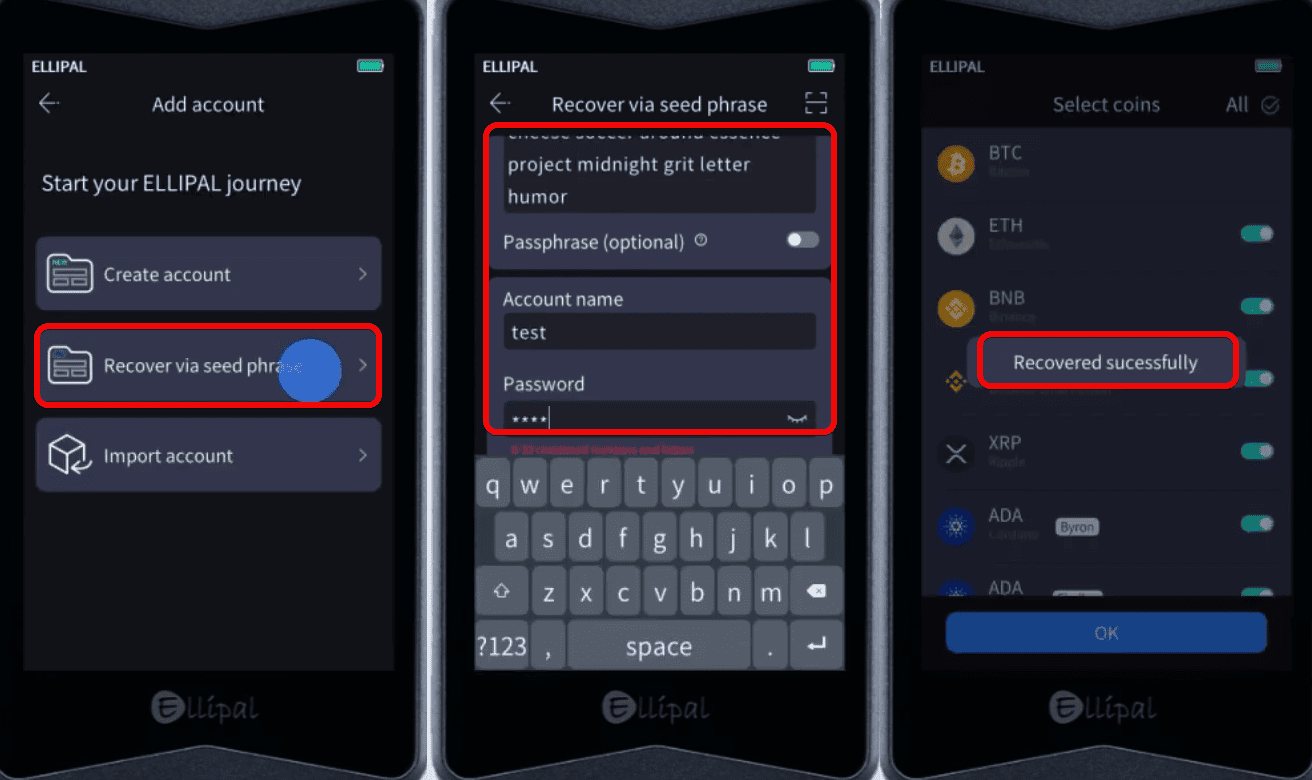
To recover a wallet or reset the password:
- Tap the dropdown menu at the top of the screen.
- Select
Add Account. - Select
Recover via Seed Phrase. - Enter:
- The seed phrase (in the correct order, with no extra spaces),
- If needed, the previously set
passphrase, - An account name,
- A new password.
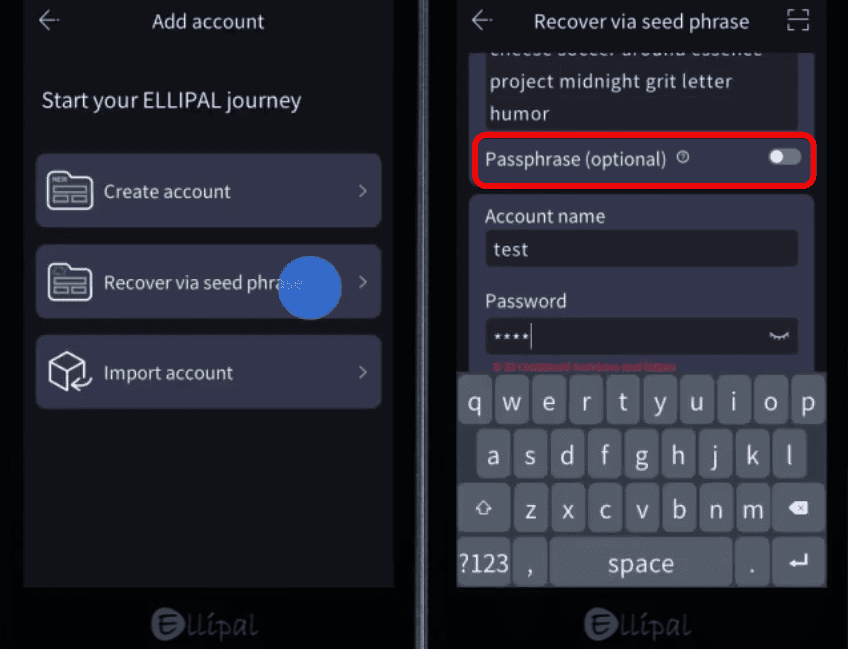
Passphrase – A Wallet with a Double Bottom
A passphrase (passphrase) creates a hidden wallet: without it, only an empty balance is visible; with it, the real wallet appears.
This phrase extends the standard seed phrase, attaching itself to it and making the wallet more secure.
How to set it up? When creating or recovering an account, come up with a passphrase and a name for the hidden account. Be sure to record it securely.
This way, if someone obtains your 24-word recovery phrase, without the passphrase they will only see an empty wallet. The real wallet remains hidden behind the extra words.
Watch-Only
The watch-only wallet option allows you to create an additional wallet for balance monitoring separately from the main one.
For the watch-only wallet, you can set an alternative password or unlock pattern so that, when powering on, only the watch-only wallet appears, keeping the main wallet hidden.
This is useful for security: if an attacker forces you to show your wallet, you can display the Watch-Only wallet with a small balance without revealing your main funds. For more details, see the article about the app.
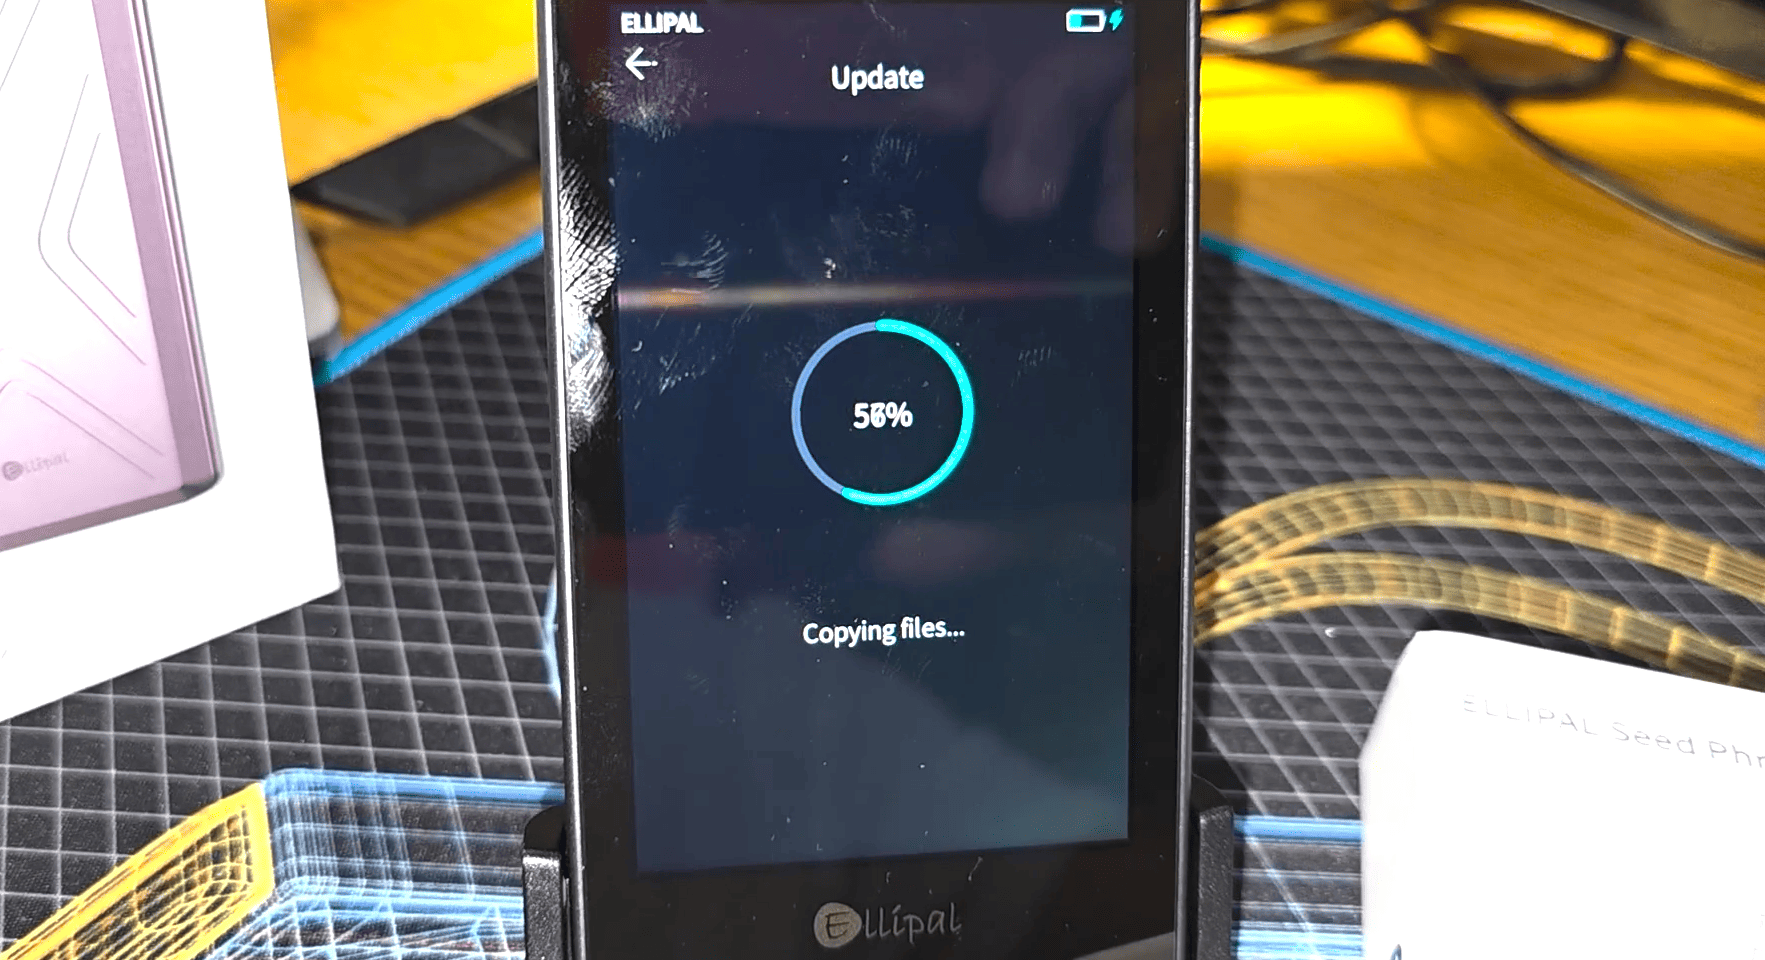
Firmware Updates
Firmware updates add new blockchains and patch security vulnerabilities. To perform an update, you will need an SD card formatted as FAT32—the one included in the package works perfectly.
Refer to the dedicated guide on updating Ellipal firmware.
Conclusion, Critique, and Is It Worth Using?
In conclusion, the ELLIPAL Titan hardware wallet offers very high security on one hand, but also presents some drawbacks that may impact usability.
The Downsides:
- Battery capacity is 1400 mAh. Although it claims 259 hours of standby time, in active use it lasts only about 4 hours. This limits session length for frequent operations.
- Touchscreen, while large, is less responsive than modern smartphones. Touches sometimes require multiple attempts to register, which slows down interaction.
- Firmware updates are done offline via microSD card, involving extra complexity—such as needing adapters to connect the card to a PC.
- Dependence on QR codes for transaction signing can slow down the process, especially if multiple scans are required.
And the partially open-source code raises trust concerns for those who require full transparency.
On the other hand, the advantages include:
- Large touchscreen that clearly displays all transaction details (one of the most critical aspects of a hardware wallet is being able to see exactly what you’re signing).
- Offline security – no USB, Wi-Fi, Bluetooth, or NFC. Everything is done via QR codes.
- Rugged, sealed metal casing.
- Support for over 10,000 coins and tokens, including NFTs.
- Multiple accounts – capability to add up to 10 accounts.
- Automatic self-destruction of data upon tampering.
All of this makes the wallet reliable, but not always ideal for those who value speed and simplicity.
Whether to use this wallet or choose one from a comparison ranking is ultimately up to you.
Support:
- User support page.
- Contact email: cs@ellipal.com.
- Contact page.


