1inch Wallet: How to Use, Review of Features, Fees, and Scam Criticism
The quest for centralization
Blocking US traders
Find the best exchange rates
1inch Wallet is a mobile multi-currency wallet from the eponymous aggregator of decentralized exchanges (DEX). It allows you to store, send, receive and exchange crypto assets in various blockchains, such as Ethereum, BNB, Polygon and others.
The wallet allows you to exchange cryptocurrency with minimal fees, as this is a project from the aggregator of DEX exchanges. The point of 1inch is to analyze offers from many DEXs and find the most favorable exchange conditions for users.
- Ethereum (ETH) and all ERC-20 tokens.
- Binance Coin (BNB) and BEP-20 tokens.
- Polygon (POLY) and ERC-20 tokens on the Polygon network.
- Stablecoins (USDT, USDC, DAI, etc.) on supported blockchains.
- DeFi protocol tokens (e.g. UNI, AAVE, SUSHI, etc.).
- NFTs on supported blockchains (Ethereum, Polygon, etc.).
- L2 networks: Arbitrum, Optimistic, Avalanche, Aurora, Base, Fantom, Gnosis, Klaytn, zkSync Era.
Let's see what's "under hood" of this app and let's start with security.
Security and Features
With a multi-layered security system, 1inch detects and warns users about unsafe transactions, fraudulent activities and phishing dApps. It checks domains, analyzes transactions and recognizes known fraudulent schemes. Let's look at the functions in the following blocks.
Security:
- Fraud protection – protect your funds with Scam Protection: the wallet analyzes transactions and addresses, warns about suspicious transactions and possible threats.
- Restore access via a seed phrase, private key or cloud copies in iCloud and Google Drive. Data is loaded with your consent and encrypted with AES256 technology.
Savings:
- Built-in DEX rate aggregator — exchange tokens at the best available prices on several DEXs.
- No fees — use the application without fees for deposits and withdrawals, paying only the blockchain network fee.
- Slippage Tolerance — set the acceptable range of price changes so that the transaction is executed only within these limits to avoid unfavorable conditions.
All in one: staking and NFTs in the DApp browser:
- Staking and Governance — participate in governance and earn rewards by freezing your 1INCH tokens.
- NFT — store and manage NFTs via dApp.
- DApp Browser — use the Web3 browser to interact with DeFi applications.
The wallet also offers features to speed up or cancel stuck transactions. Let's see how it all works in practice. To do this, install the wallet.
Download and install
The wallet is available for Android and iOS. To install it, go to the app store on your phone and download 1inch. After downloading and installing, open it.
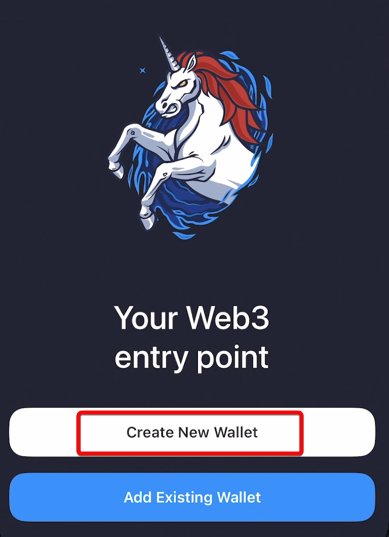
Creating a new wallet
The application will offer to create a new wallet or add an existing one. Select Create New Wallet.
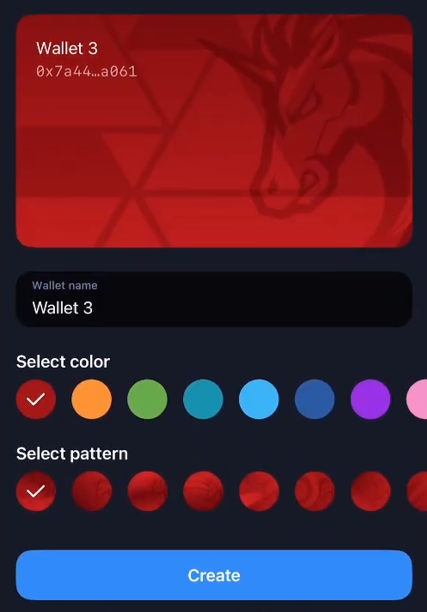
Set a name, select the wallet card design and click Create.
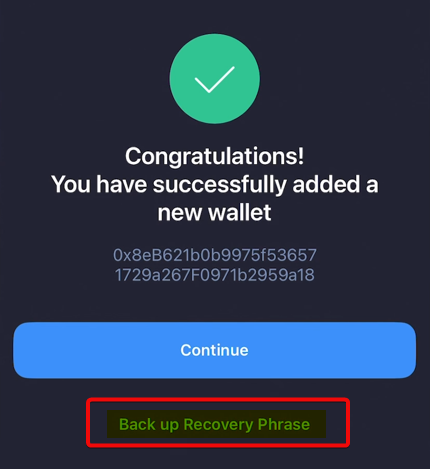
The next step is extremely important - do not skip it! Select Backup Recovery Phrase.
Backup
The wallet will generate a 12-word recovery phrase, also known as a seed phrase.
Make sure, that you are in a private place where only you can see the screen, then click Ready to display the phrase.

Write down the words in the order they appear and keep them in a safe place.
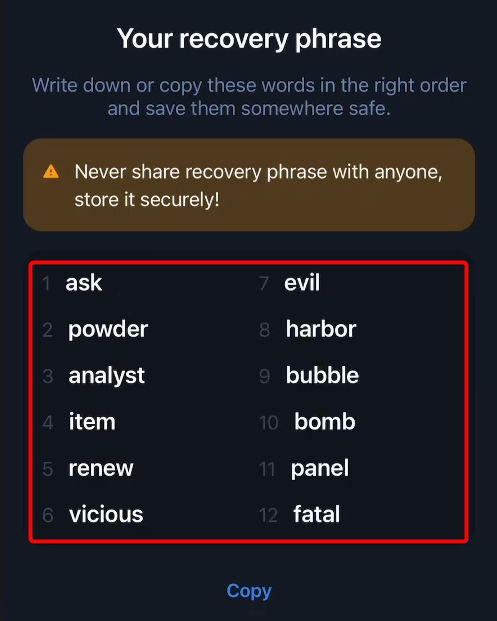
Note: We have shown the seed phrase for guidance purposes only. Never share this information with anyone - it threatens the security of your funds.
Tick the box that you understand: losing these words means losing access to your wallet and assets forever. Then click Continue and confirm the phrase by selecting the words in the correct order.
Congratulations, your wallet has been successfully created and protected!
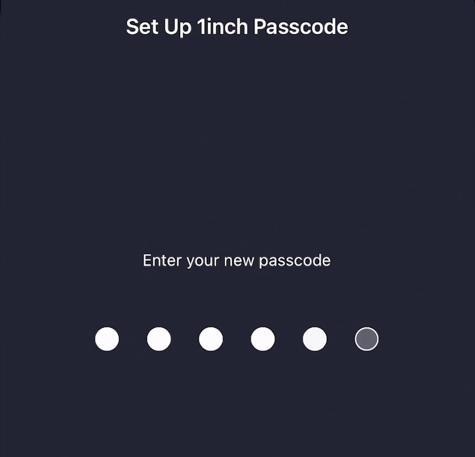
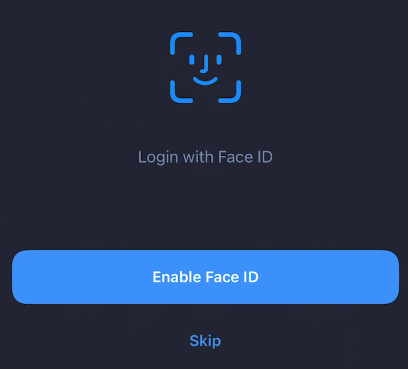
Set a PIN code and optionally enable biometrics for additional security.
Wallet setup complete. Let's now explore its capabilities and how to use it.
How to use
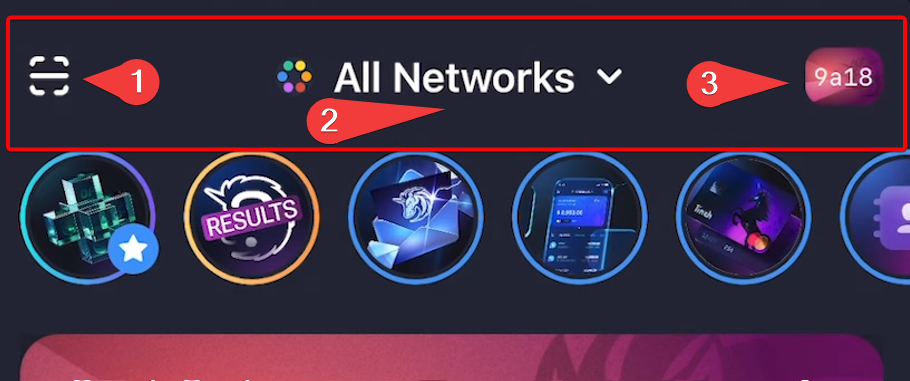
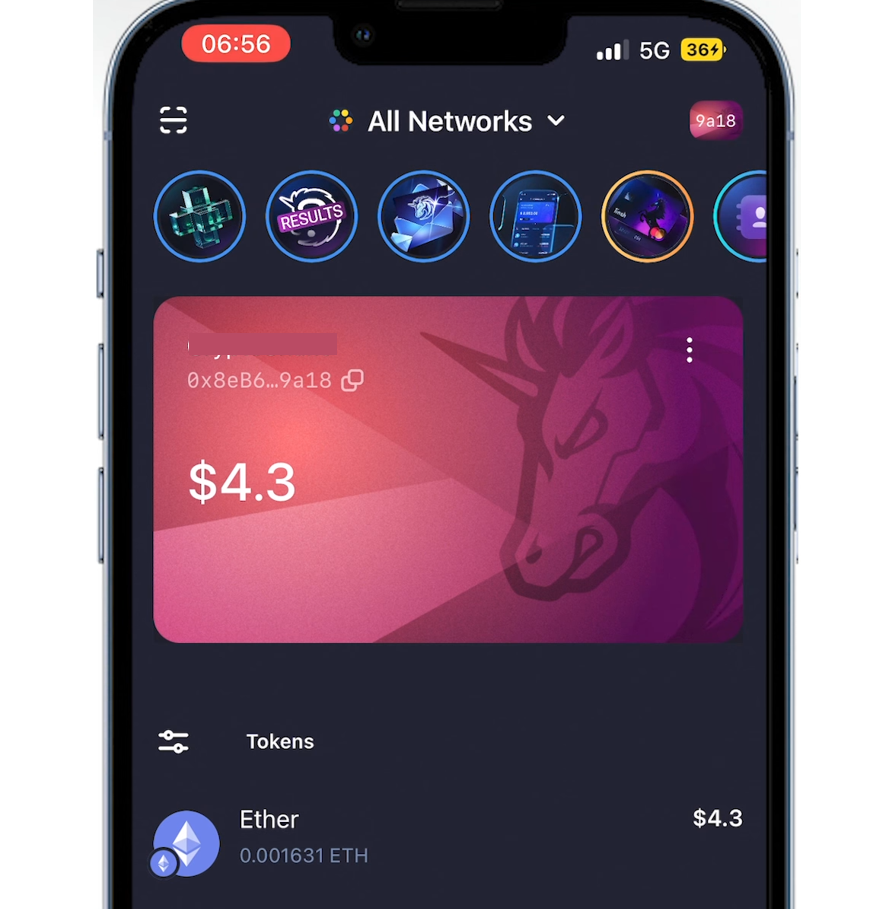
- In the upper left corner there is a QR scanner for connecting to dApps or sending cryptocurrency.
- In the middle, you can switch between the
All Networksmode (all networks) and a specific network. - By clicking on the icon in the upper right corner, you can switch between wallets, create new ones, import existing ones, connect hardware devices or add
Watch-only. But more on that later.
To start using it, let's create an address and top up the wallet.
How to create an address
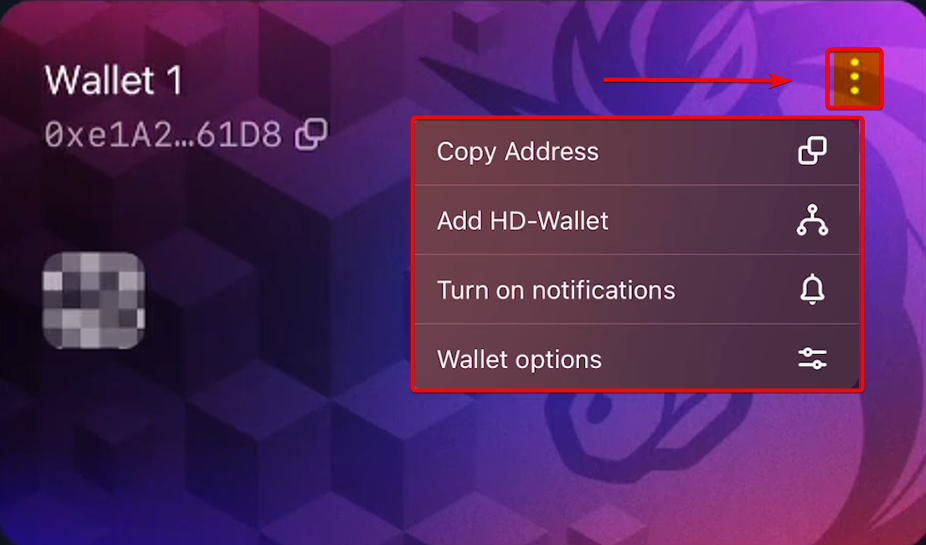
On the main wallet screen, click on the address on the map to copy it.
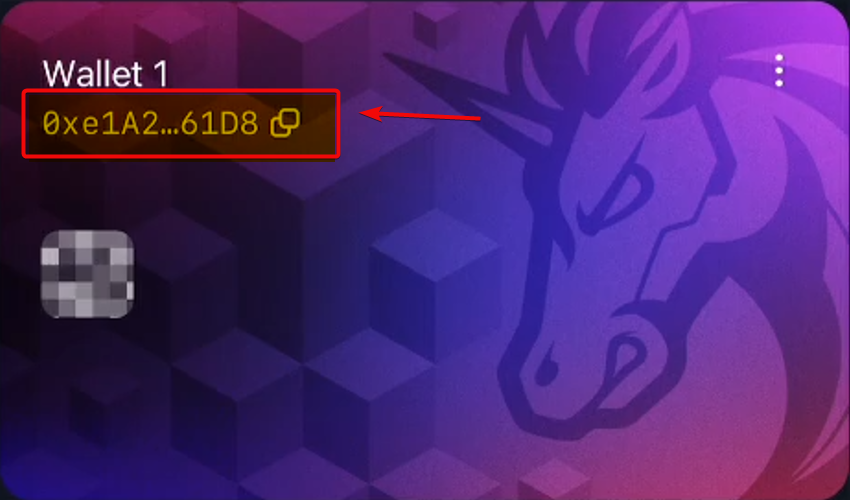
There is also a special settings menu here. Click on the three dots to see options such as changing the wallet design, viewing the recovery phrase and displaying the private key.
You can also copy the address here.
We will touch on advanced settings later. But now it's time to top up the wallet.
How to top up
To top up your balance, you can buy cryptocurrency or transfer it from the exchange. First, let's look at the method of purchasing via bank cards.
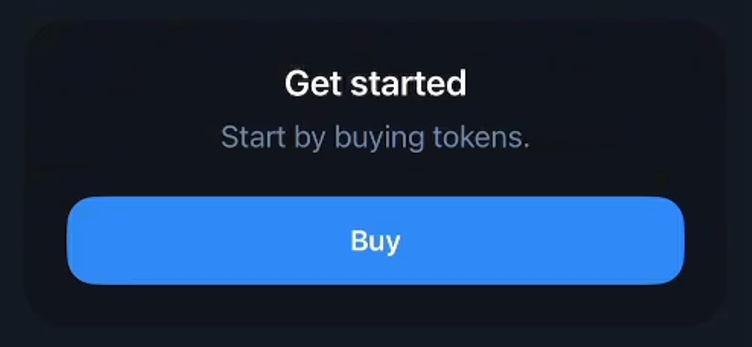
Click Buy, select a wallet and network, for example Ethereum. Enter the amount in your preferred local currency and you will see the calculation of the amount of coins you will receive.
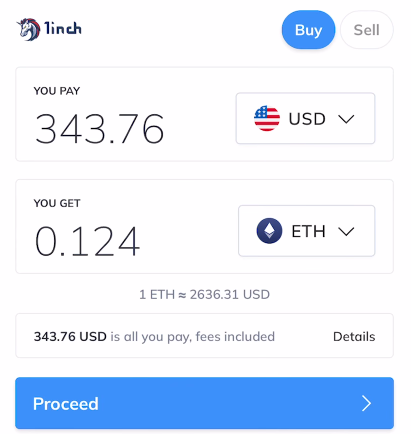
Click Proceed, enter your email and follow the provider's instructions.
Tip: most often, purchasing via bank cards is useless because the commission is high. Use exchanges or exchangers to find the best rates.
Another way to top up your balance is the Receive button.
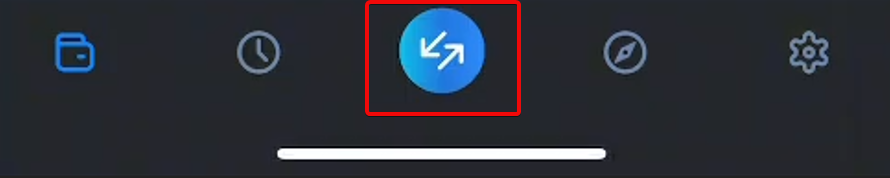
Click the round quick access button in the center and select Receive.
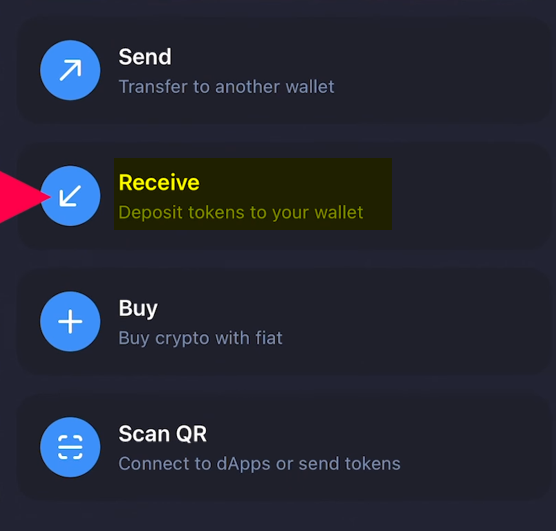
You can copy the address and send it to the sender or show the QR code.
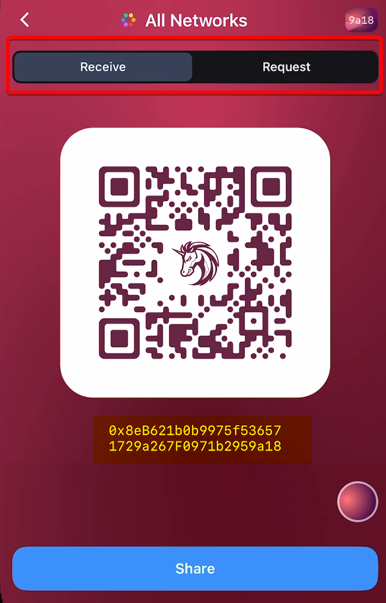
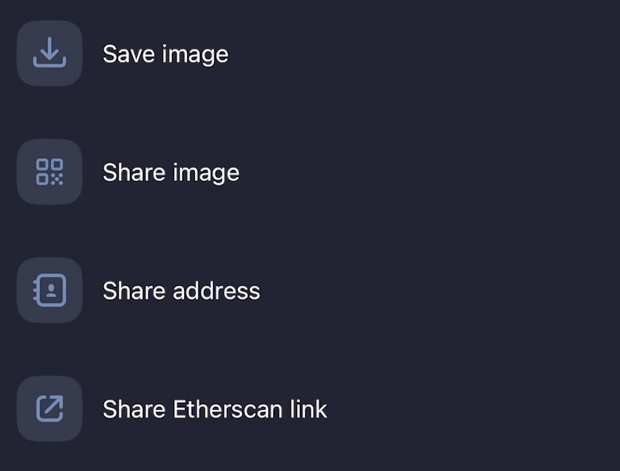
You can also save and send the QR code image along with the address and link to Etherscan.
If you want to request a specific amount, click Request at the top, select the coin and amount, then create a QR request.
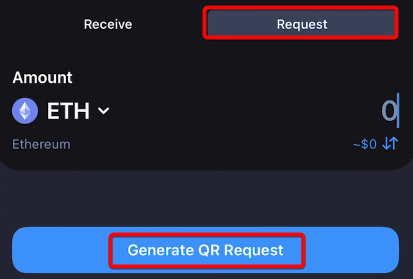
You can even customize the background of the QR code image, but this is only a cosmetic feature. Once the transaction is processed and confirmed, the funds will appear in your wallet.
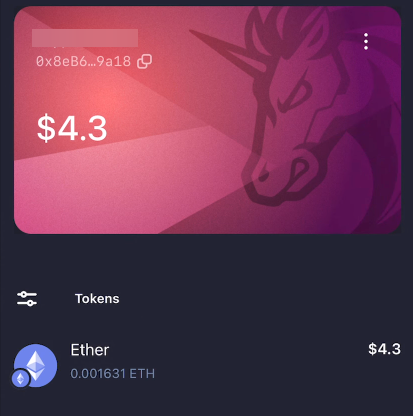
The overall balance will be displayed on the 1inch map, and the individual token balances will be in the asset list below. By clicking on a token, you can view its current statistics, useful links, and perform additional actions such as exchanging and withdrawing funds.
How to withdraw
To send, select a coin, specify the amount, insert the recipient's address, and select the network fee (the higher the fee, the faster the transaction).
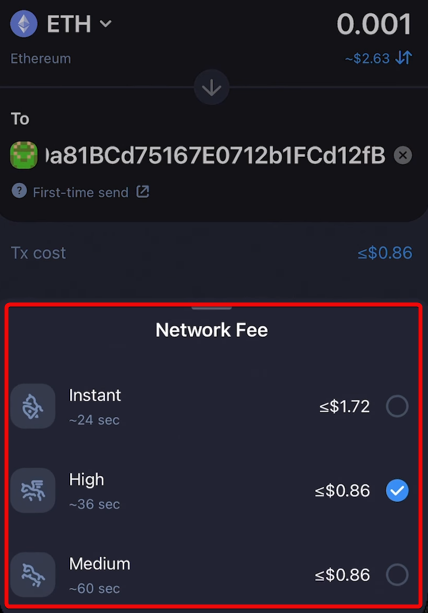
There are 3 preset fee options:
- Instant
- High
- Medium
The first transfer to a new address will require confirmation.
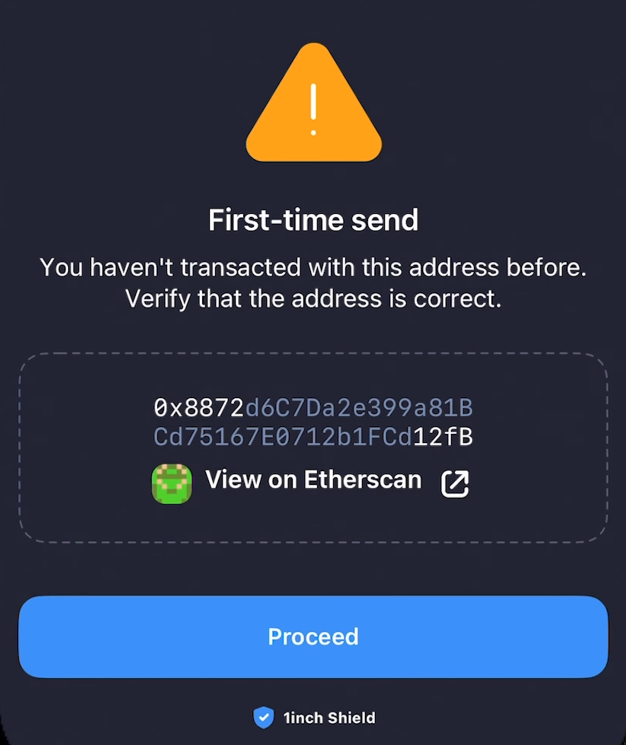
Check the details, click Proceed, enter your PIN, and the transaction will be sent to the network. It may take some time to confirm. The status can be tracked via the View on Etherscan link.
The status and balance can also be checked in a separate tab.
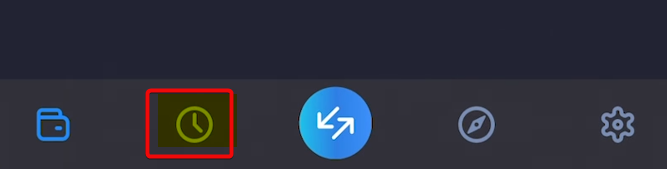
Checking balances
On the History tab, you can view the history of transactions.
Here you can see all your activity in the application.
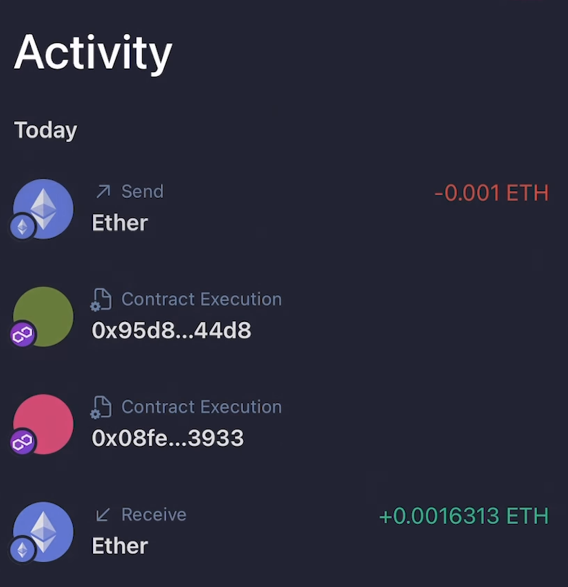
Here you can also:
- track transaction details and exchange history
- speed up or cancel the transaction, if necessary.
To cancel or speed up a transaction, click Edit Transaction, specify a new fee and select Speed up or Cancel Transaction to cancellations.

Now let's look at the advanced settings of the application because they allow you to configure fees and additionally protect the wallet.
Advanced settings
In the Settings section, you can configure preferences: local currency, custom tokens and appearance. You can also change the password, biometric settings and recovery phrases. It is possible to change the application language and dark theme.
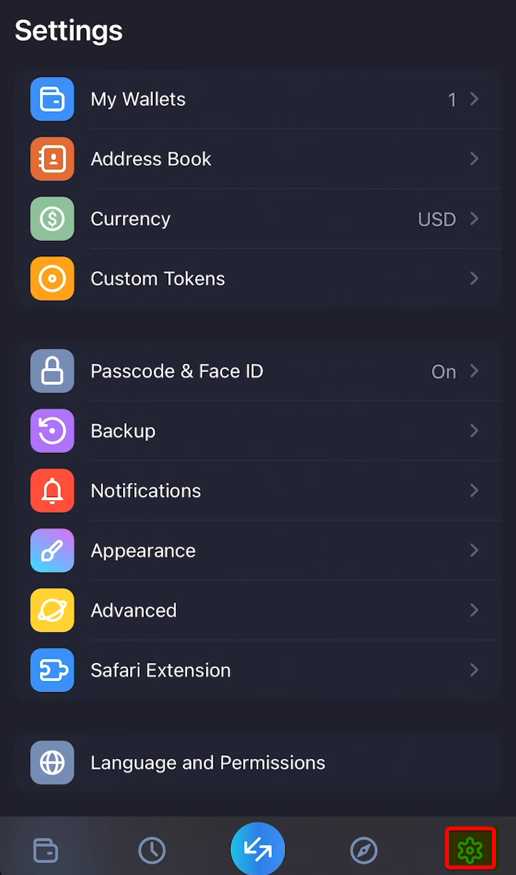
We see the following settings blocks:
Wallets, addresses and currencies:
- My Wallets – get a private key and seed phrase, manage wallets via export/import.
- Address Book – manage contacts and addresses for easy operations.
- Currency – change the display the desired currency for the wallet balance.
- Custom Tokens – add/remove tokens on supported networks (Aurora, Arbitrum, Avalanche, Base, BNB Chain, Ethereum, Fantom, Gnosis, Klaytn, Optimism, Polygon, zkSync Era).
Security and notifications:
- Passcode & Face ID – change your password, enable/disable biometric authentication.
- Backup – enable/disable iCloud (iOS) backup or save your recovery phrase manually.
- Notifications – enable/disable notifications about transactions and WalletConnect connections.
Fees, Web3, and Appearance:
- Appearance – customize your wallet skin/theme, enable the balance hiding feature (Flip to Hide).
- Advanced – set up fees, enable Legacy transaction type, manage WalletConnect connections.
- Safari Extension – enable Web3 extension to connect your wallet to dApps in Safari.
- Language and Permissions – change the language of the application, set up access to the camera, Siri, background update and mobile Internet.
Let's consider the most important functions of the wallet in more detail. This is primarily to obtain private keys and a seed phrase.
Seed phrase and private key
To obtain a seed phrase, go to the My Wallets section and select the wallet whose keys you want to view.
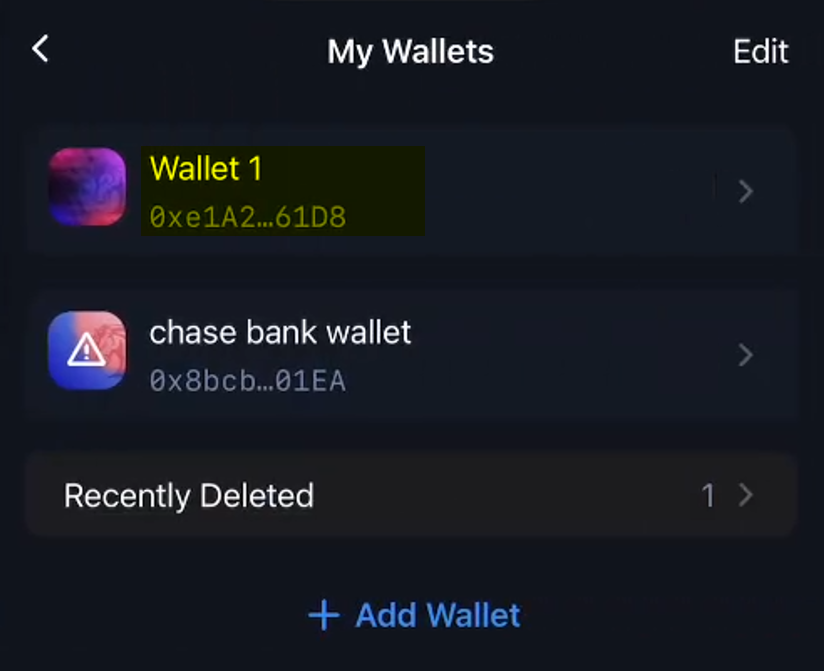
After you select a wallet, the View Recovery Phrase and View Private options will appear Key.
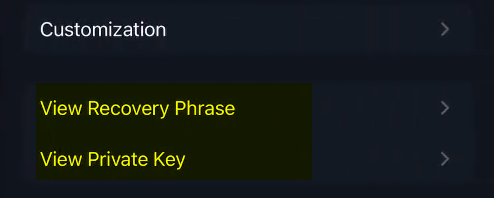
Click on the seed phrase and enter the PIN code. Your seed phrase and private key will be displayed on the screen.
Setting up fees
The fee is regulated in Gas Price - gas prices. This is the way the fee is calculated in the Ethereum network. It is divided into Basic and Advanced modes.

- Basic simplifies the choice of fees, offering three options:
High,Medium(default) andLow. They are calculated as the current gas price * 1.5 to account for network fluctuations. - Advanced allows you to manually configure the commission via
Max tip(priority commission) andMax price(maximum commission amount).
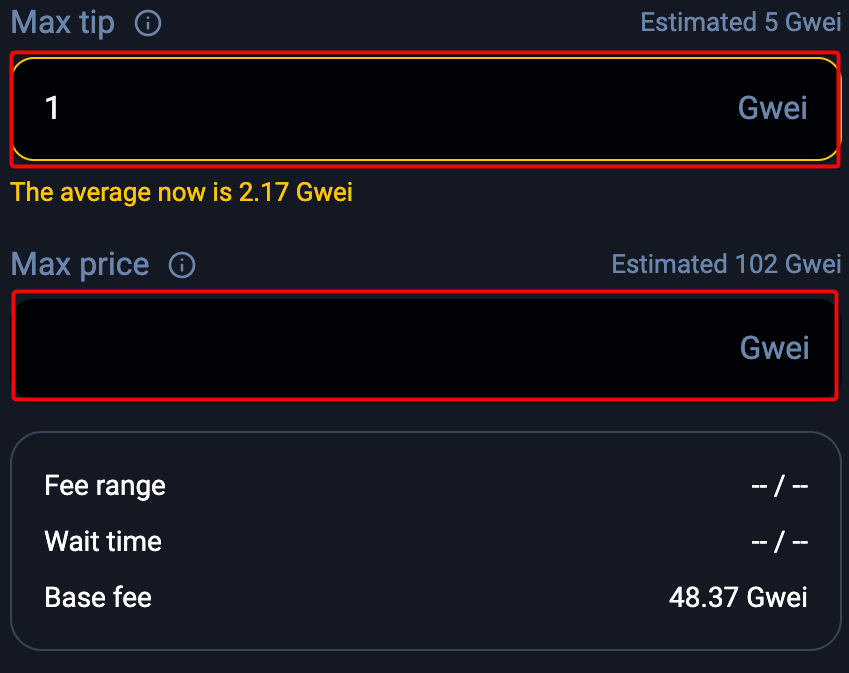
Max price must exceed Base fee (48.37 Gwei in the example), otherwise the transaction will not go through.
Although it is not recommended, but if you want to use the old transaction format, activate Use legacy transaction type in the settings.
Import and restore
To restore, click Import or the + button on the main wallet screen. A menu will open with a choice of recovery:
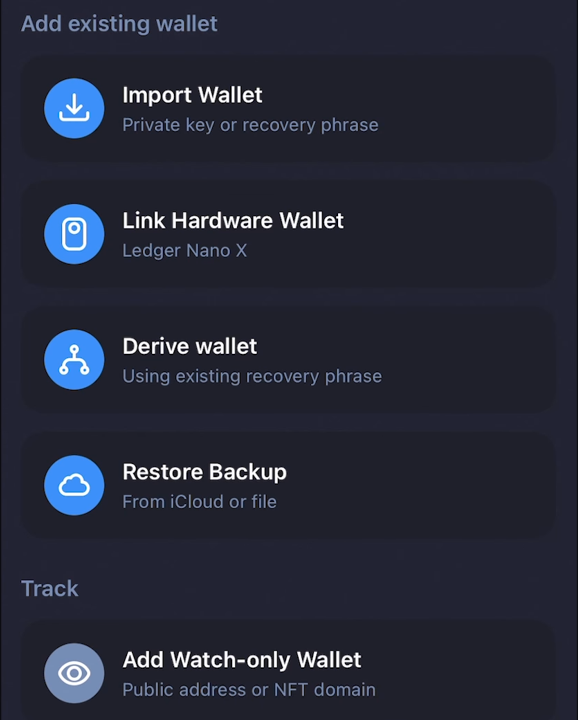
- Import Wallet – use a private key or seed phrase
- Link Hardware Wallet – connect Ledger Nano X
- Derive wallet – create child wallets from one seed phrase using HD paths such as BIP44.
- Restore Backup – use an iCloud backup or file.
- Add Watch-only Wallet – add your or someone else's address for watching.
To restore, use the Import Wallet option.
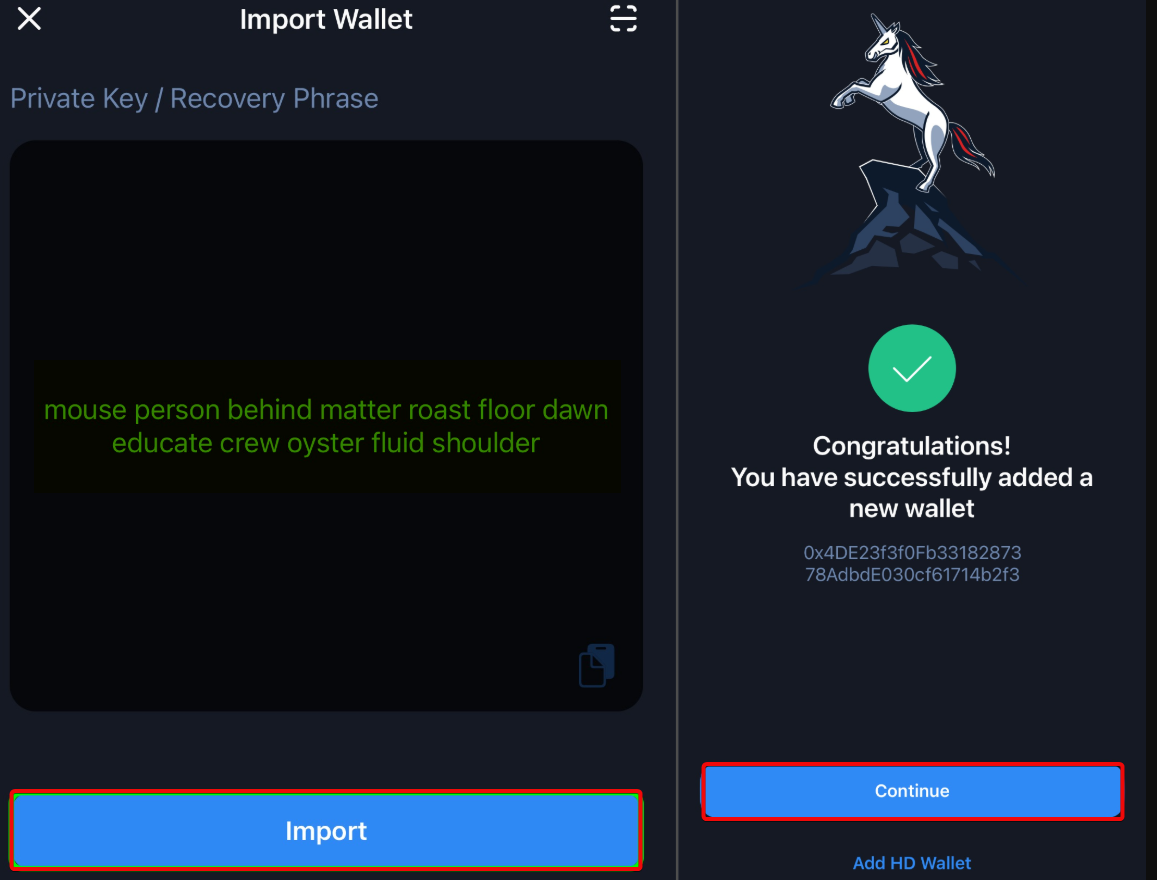
Just enter your seed phrase or private key and click Import. You can also import other people's public addresses using the Add Watch-only Wallet option.
Watch-Only
Watch-only wallets (watch-only) allow you to monitor balances and transactions without access to private keys, making them a safe monitoring tool. 1inch Wallet makes this feature easy to use by allowing you to easily add and manage watch-only wallets. wallets.
The main advantage is increased security. For example, you can track the balance of a hardware wallet without connecting it to the Internet.
Watch wallets are also useful for monitoring large wallets ("whales"), which helps analyze activity without risking your personal funds.
For example, you can add the ENS domain of Ethereum creator Vitalik Buterin to monitor his transactions.
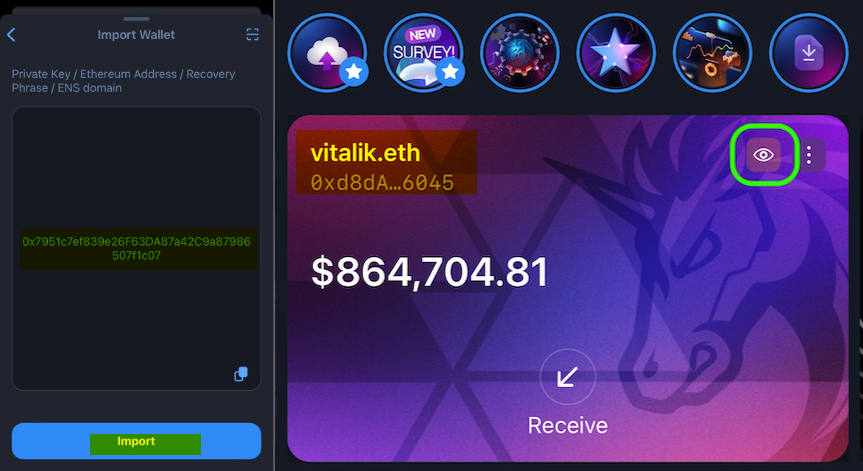
To add a watch wallet, you need to enter a public address or ENS domain, and all transactions will be displayed in the Activity section and on the main screen.
However, it is important to remember that such wallets do not allow transfers.
Exchange
The application allows you to exchange cryptocurrency with maximum efficiency in a few clicks. By aggregating liquidity from various decentralized exchanges (DEX), 1inch provides access to the best token exchange rates and maximum liquidity.
To exchange cryptocurrency, click on the menu in the middle and go to the Swap section. Select a wallet and specify the currency you want to exchange. For example, if you want to exchange ETH for 1INCH, simply select ETH as the source currency and 1INCH as the target currency.
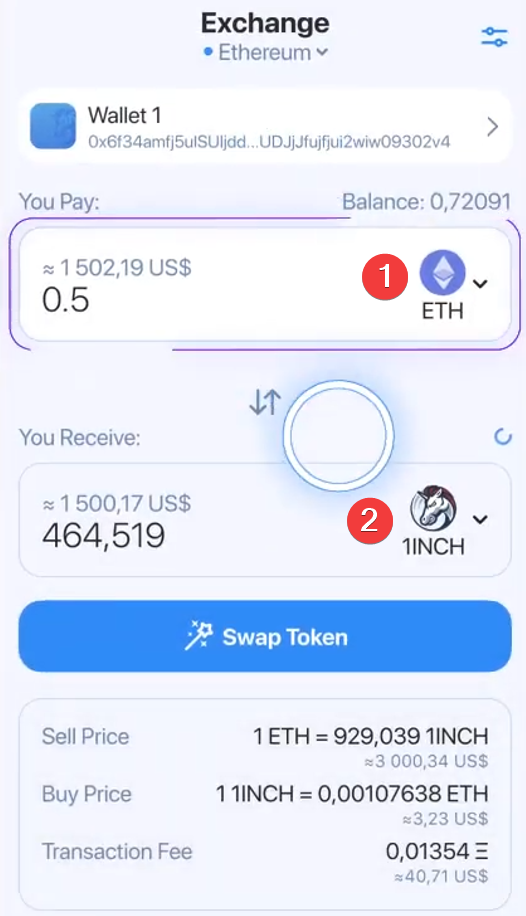
To optimize the transaction, click on the icon in the upper right corner and select the exchange options: gas price, allowed slippage, liquidity sources.
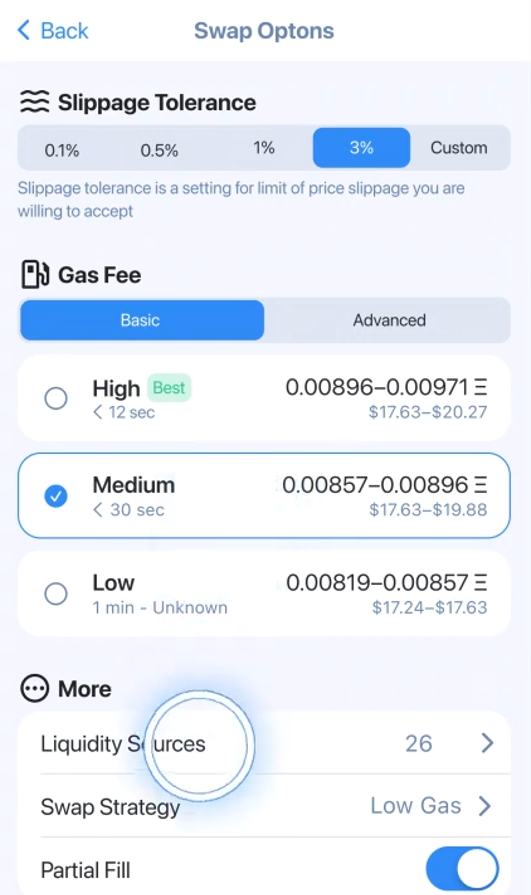
Slippage Tolerancedetermines how much the price can fluctuate during an exchange before the trade is canceled.Gas Feeallows you to choose the fee. We'll cover this in the section on setting up fees.Liquidity Sourcesshows the number of liquidity sources used for the swap, which affects the price and speed of the trade.
When you're done, click Swap, review the transaction details, and confirm it. Once confirmed, the swap will be processed.
Adding Tokens
To add a custom token, go to the Custom Tokens menu and look for the plus icon in the upper right corner of the screen. The wallet will prompt you to paste the contract address of the custom token.
Note: Make sure the token is running on a blockchain supported by 1inch. In our example, this is the Ethereum network.

After you paste the contract address, the application will display the corresponding token - Grok.
Click on it to add it to your list of assets.
1inch Mastercard
The platform has two types of cards: physical and virtual.
The physical card is available for free, but only for residents of the EU and EEA countries. It allows you to withdraw cash from ATMs and pay for purchases in regular stores. There is integration with Apple Pay and Google Pay and it gives up to 2% cashback for purchases in cryptocurrency (1INCH, USDT, BTC, BXX).
The virtual card becomes available instantly after passing KYC. For security purposes, you will need to set up two-factor authentication via Google Authenticator.
The main menu of the card is displayed at the bottom and contains four tabs: Card, Accounts, Services and Settings.
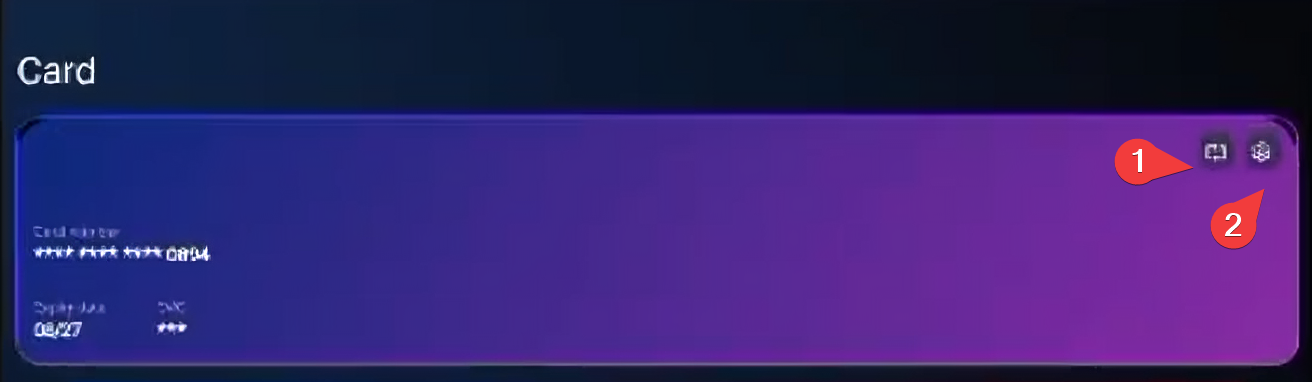
On the Card tab, you can manage the card - top up the balance, use cryptocurrency as collateral for loans and connect it to Google Pay or Apple Pay. There are two icons in the upper right corner:
- the first one opens the card details (number, expiration date, CVC code),
- and the second one – card management settings, where you can block it, change the PIN code, view the statement and terms of use.
How to use the card?
The wallet and the card are not linked, but you can only top up the card with funds from the Ethereum Mainnet. BSC or BNB tokens will appear in the wallet, but will not be suitable for topping up.
- Top up the card with funds from the Ethereum network. To add a new account, select one of the supported networks: Ethereum, Litecoin, Solana, Bitcoin, XRP.

- Use cryptocurrency as collateral to obtain loans in stablecoins (USDC, USDT, EUR). When borrowing up to 10% of the collateral value, the interest rate is 0%, which makes the offer quite competitive. The maximum loan amount is 60% of the collateral value, but if 10% is exceeded, interest is charged. Crypto loans are convenient because they do not require documents and are issued instantly.
- Connect the loyalty program with cashback up to 2%. Choose a cryptocurrency for rewards: 1INCH, BTC, BXS or USDT. Cashback 2% is available when choosing BXS, other options give 1%. Withdraw your accumulated cashback at any time.

Staking, NFT and dApps
To access tools such as NFT, staking and other dApps, you need to connect your wallet via WalletConnect.
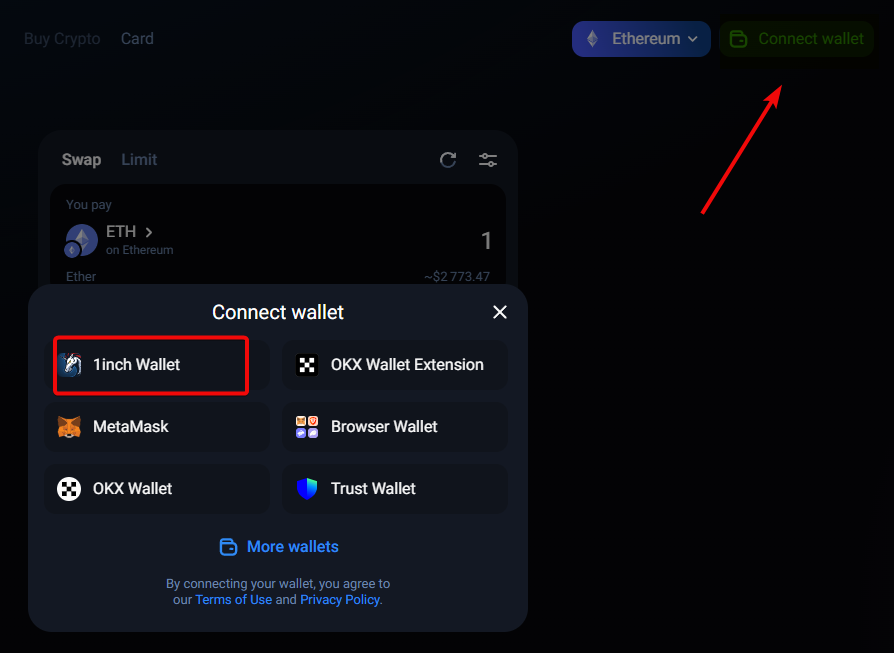
- Open app.1inch.io and click
Connect Wallet. - Select a wallet to connect to and get a QR code.
- In the wallet, click the scanner icon in the upper corner and scan this QR code.
- Confirm the connection.
After connecting the wallet, you can dive into the world of Web 3, studying the applications, conditions and risks.
You can connect to the platform Ledger and Trezor, but 1inch is going to release its hardware wallet.
About the 1inch hardware wallet
The hardware wallet was announced back in 2023, but the release was postponed due to revision. The following is known: it is completely isolated from the network (air-gapped), transmits data via QR codes and NFC, analyzes offline transactions, and prevents attacks.
The compact device, the size of a bank card, is equipped with a durable case, wireless charging, and a 2.7-inch E-Ink display. The development is carried out by an independent 1inch team, and the first users can sign up for a waiting list.
We have reviewed all the features of the wallet and now it's time for a fly in the ointment.
Criticism
The criticism is due to 1inch's approach to its customers.
Initially, they said that access to the platform should be open and without restrictions. However, over time, they introduced centralized restrictions, such as IP blocking. This affected US citizens, but it is a contender that it may affect others.
This makes the platform similar to traditional financial services that regulate user access.
In general, the trend of deceiving users in the crypto environment is disappointing. For example, the monopolist Binance has complete power over users. The exchange suddenly changes the rules, freezes accounts and restricts access without warning. And there are hundreds of comments like this.
Lack of transparency in decision-making and blocking of users undermines trust in platforms that started out as decentralized.
Centralized platforms like 1inch and Binance betray the principles of cryptocurrency by putting control and regulation above user freedom.
Summary: Is it worth using?
On the one hand, it is a secure wallet that gives you full control over your assets and private keys. On the other hand, there is a tendency towards a harmful desire to regulate users.
The wallet interface is quite simple and convenient. If you have used MetaMask, you will notice that 1inch works in much the same way and even has a similar interface.
It has a decent Web3 browser that is useful for working with decentralized applications (dApps). With its intuitive interface, the wallet is suitable for both beginners and experienced DeFi users.
Our wallet comparison will help you use this app or choose another one.
Technical support
- Write to support@1inch.io
- Help Center and Chat
- Contacts
- Discord
- Telegram
Ask questions in the comments.


