Coin Wallet: Download and How to Use a Multi-Currency Crypto Wallet
Non-obvious calculation of fees.
Simple multi-currency crypto wallet.
Coin Wallet is a multi-currency wallet that supports popular cryptocurrencies - Bitcoin, Ethereum, Solana, Toncoin, Binance Smart Chain and others. It works with any tokens of the ERC20 / BEP20 / ARC20 / TRC20 networks.
Supported currencies
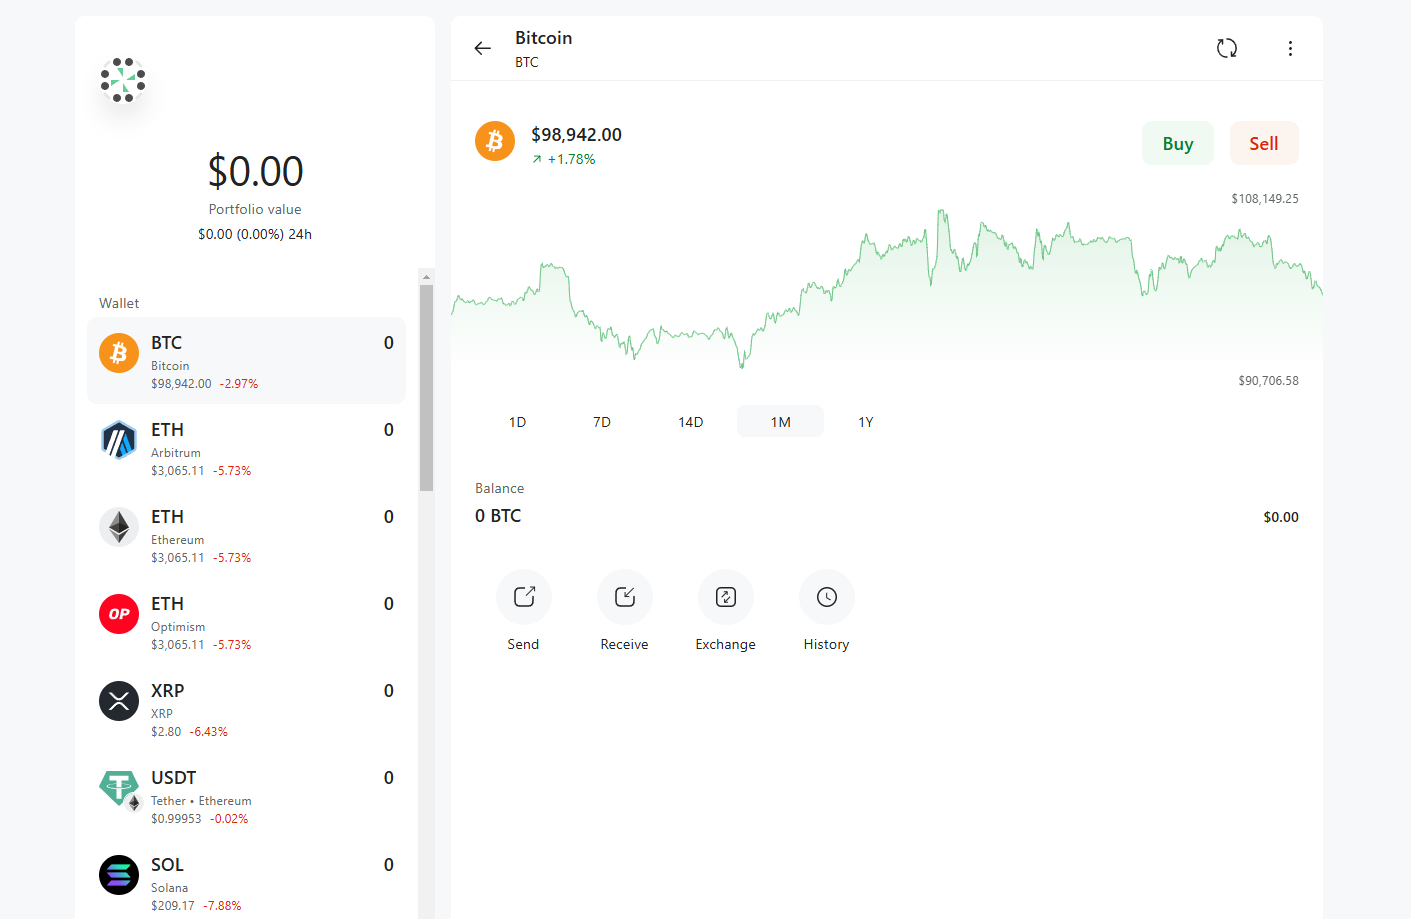
Why are there multiple ETHs in the screenshot? These are the Arbitrum and Optimism networks for lower fees and faster transactions than the main Ethereum network. These networks allow you to stay in the Ethereum ecosystem and are called Rollups.
Support for 27 languages makes the wallet accessible to users around the world.
What else? It is available on both desktop and mobile devices. The web version is compatible with Windows, Linux and macOS.
Before we get started with the guide, let's take a quick look at the main features and security.
Security and Features
The wallet has robust security features including client encryption, BIP 39 passphrase, PIN, two-factor authentication and secure storage of private keys.
Security:
- Keep your private keys on your device only, without transferring them to servers.
- Create a wallet with BIP39 support to securely store your seed phrase.
- Configure PINcode for quick access to your coins.
Data protection:
- AES-256 encryption is used to protect data on the device.
- Connection certificates are checked to protect against cyber threats.
What about two-factor authentication? Here, instead of the usual codes from an application or mail, it is implemented through physical USB keys to confirm transactions. This ensures maximum security, but adds complexity and cost - not everyone has hardware devices.
Let's look at all these features in practice.
Download and installation
Go to the Coin Wallet website and select your preferred platform for download. We will look at the web version.

On the web wallet page you will see an offer to create a new wallet, or import an existing one.
Creating a new wallet
Since we are starting from scratch, click Create New Wallet.

The wallet will warn you about the importance of the recovery phrase and that it must be written down and hidden in a safe place.
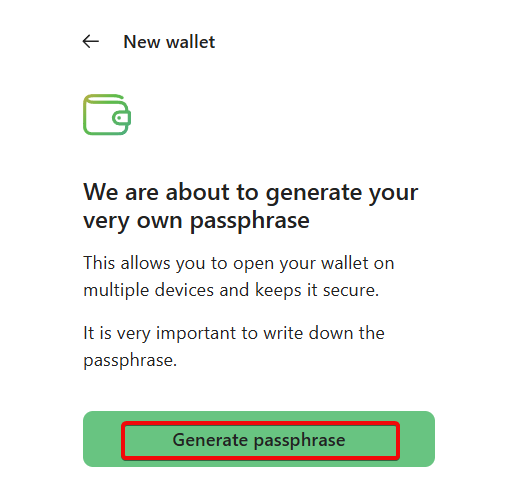
After clicking Generate passphrase, the wallet will generate a 12-word code, which plays a key role in recovery in case of loss of password or access. Make sure that the screen is visible only to you and no one else can see these words.
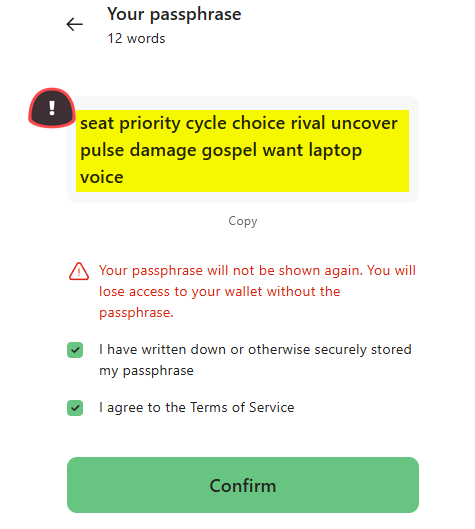
It is important to write down the words in the exact order, since losing the passphrase will lead to irrevocable loss of access to the wallet and crypto assets. Never share your passphrase with anyone, as this may compromise the security of your wallet.
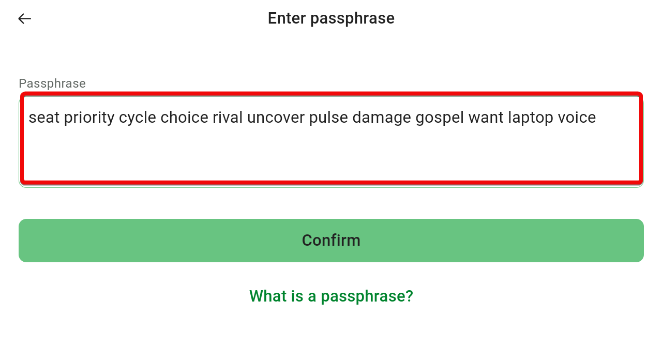
Once you have securely saved your passphrase, click Confirm. The next step is to confirm your passphrase.
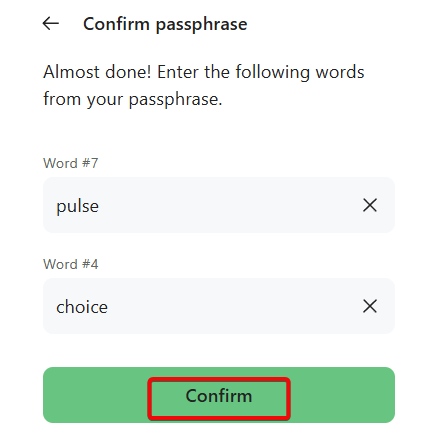
The platform prompts you to enter word #7 and #4. Let's do this and click Confirm.
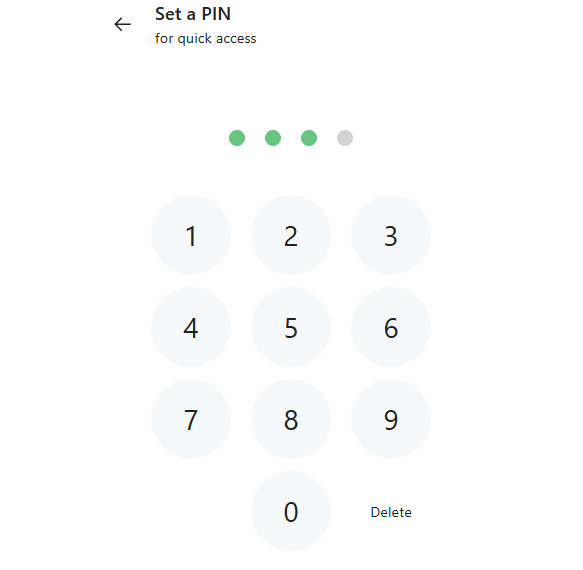
Then set a PIN code for quick access and confirmation of future transactions.
We have successfully created wallet and now we can use it.
How to use
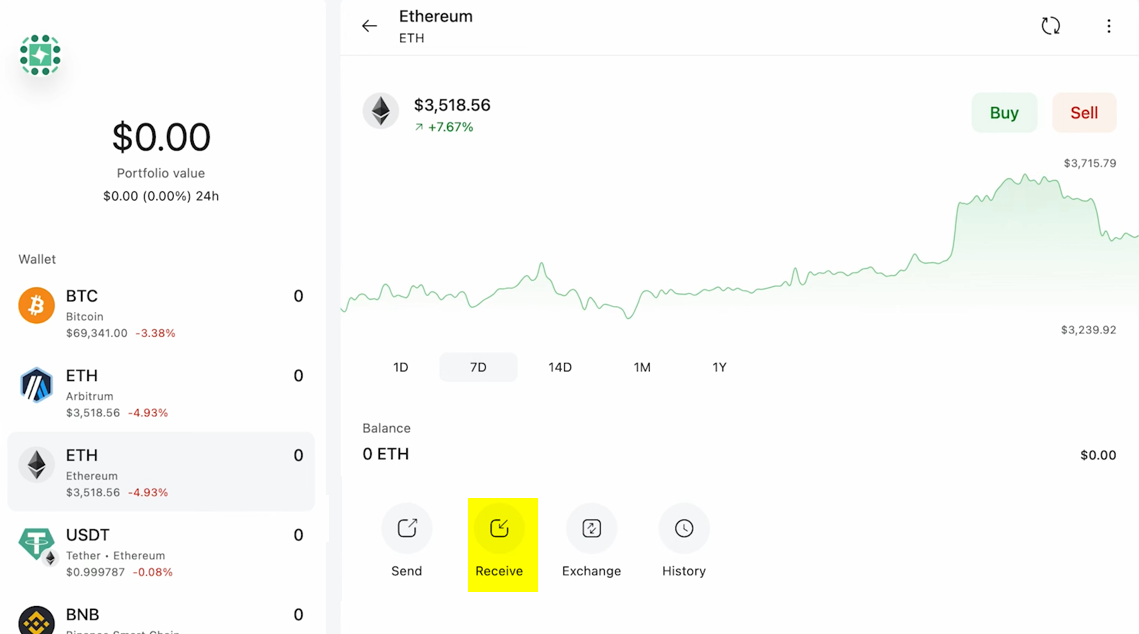
The interface is intuitive. The main page displays your avatar, portfolio value, balance and a list of available cryptocurrencies.
Before you start using the wallet, it is recommended to configure some parameters. Click on the avatar and select the local currency for displaying balances and the interface language.

You can also change the settings here PIN and set up your account details. And for extra security, add a hardware key following the recommendations.
Once set up, return to the wallet to explore its features.
The list of supported cryptocurrencies is displayed on the left panel. To select other tokens, scroll down and click Add Crypto. You can also search for a specific token or add your own.
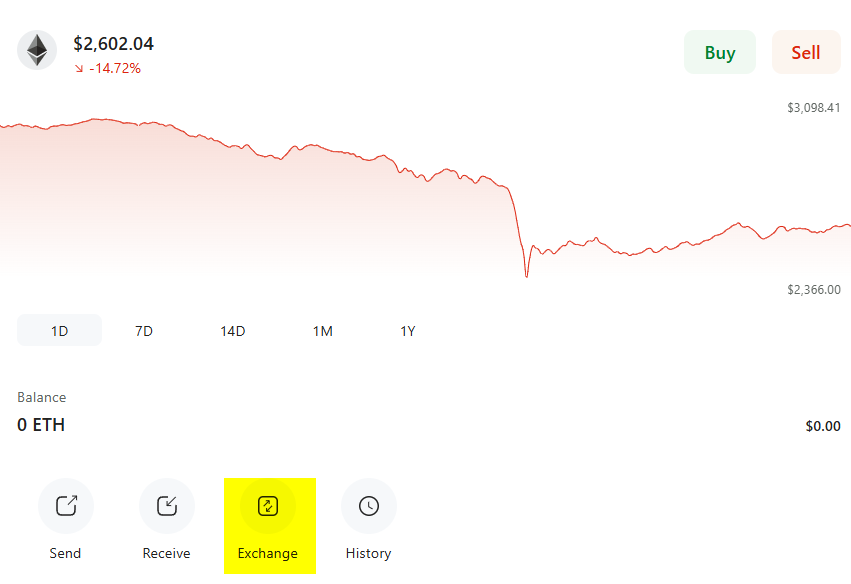
Using Ethereum as an example, let's go over the main features.
On the right is a price chart with different time ranges. At the bottom is the current ETH balance and its equivalent in the selected currency. Here you will also find the Send, Receive, Exchange and History buttons, as well as the current rate of the coin and the ability to buy or sell it using a credit card. To continue using the wallet, you need to top it up and get an address.
Create an address
To get an address, click the Receive button.
A window will open with a QR code and an address consisting of characters. It's up to you to decide what's more convenient: using a QR code or replenishing your wallet via an address.
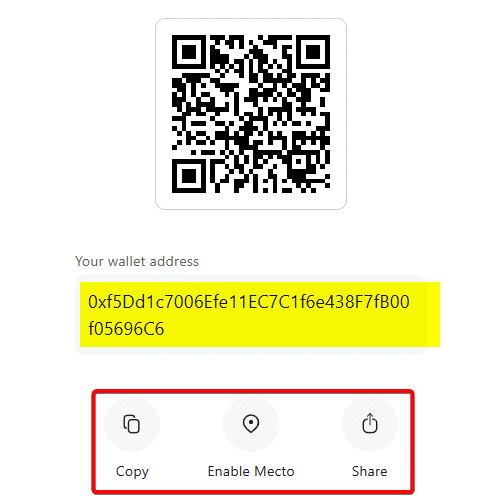
There are also 3 functions here:
- Copy address.
- Enable geolocation function to search for wallet addresses within a small radius.
- Send address to other people to receive tokens.
How to top up
You can top up your wallet either by transferring from the exchange or by purchasing directly in the wallet.
To transfer from the exchange, use the address you received. Once the transaction is complete, the funds will appear in your wallet. You may need to refresh the page to see the updated balance.

The current balance is now displayed in the Ethereum tab, as well as in the total portfolio value.
Buy with a card
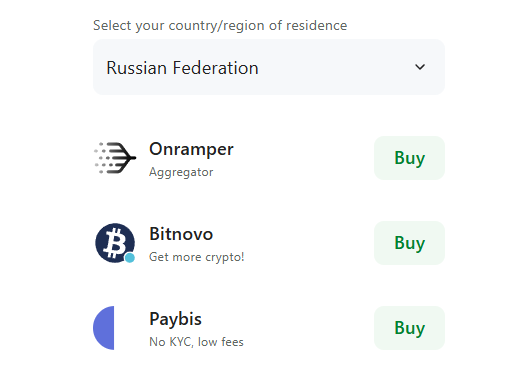
To buy coins, click Buy, select your country of residence and a platform from options such as MoonPay, OnRamper, Guardarian, Bitnovo and Paybis.
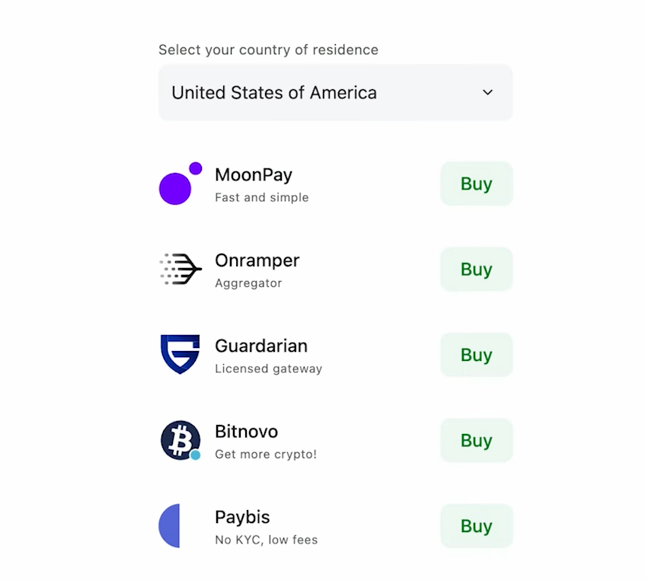
Depending on the region, payment platforms may vary.
Let's continue with MoonPay. Choose a currency, enter the amount you want to spend, and you'll get a quote.
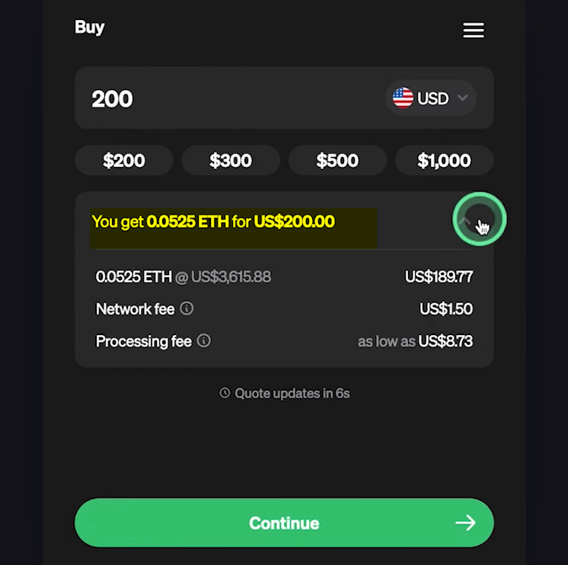
Rates are updated every 10 seconds. Click the arrow on the right to see the network fees in detail.
Click Continue, enter email, confirm the code, and follow the further instructions of MoonPay.
Sale via card
Sale is carried out in the same way as purchase.
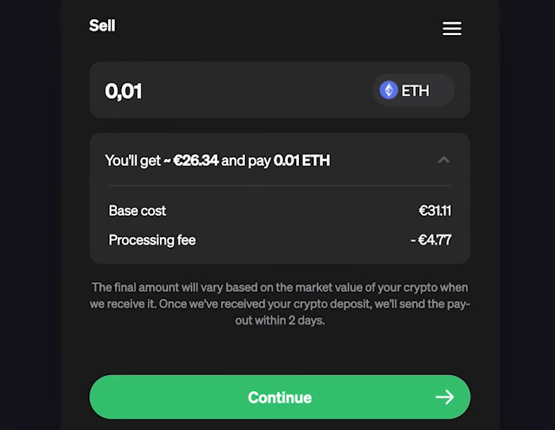
To sell cryptocurrency, click Sell, select your country of residence and click Sell with MoonPay.
Enter the number of coins you want to sell and you will receive a calculation of the amount to be credited.
You can also click on the arrow to see the cost of the commission. Click Continue and repeat the same steps we did in the purchase section.
Due to high fees, buying/selling via card is usually less profitable than using exchanges or exchangers.
Exchange
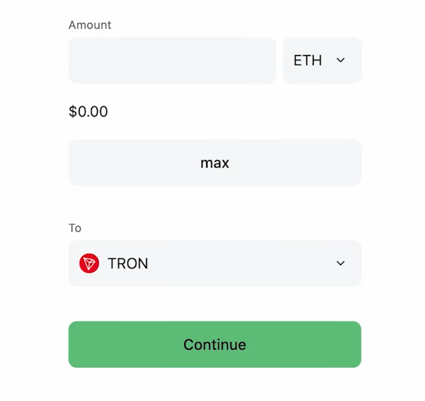
To exchange cryptocurrencies, click Exchange.
Select whether to display the amount in your currency or in ETH, enter the amount or click Max to exchange all coins.
Select the token to exchange, for example TRON and click Continue.
How to withdraw
To send cryptocurrency, click Send.
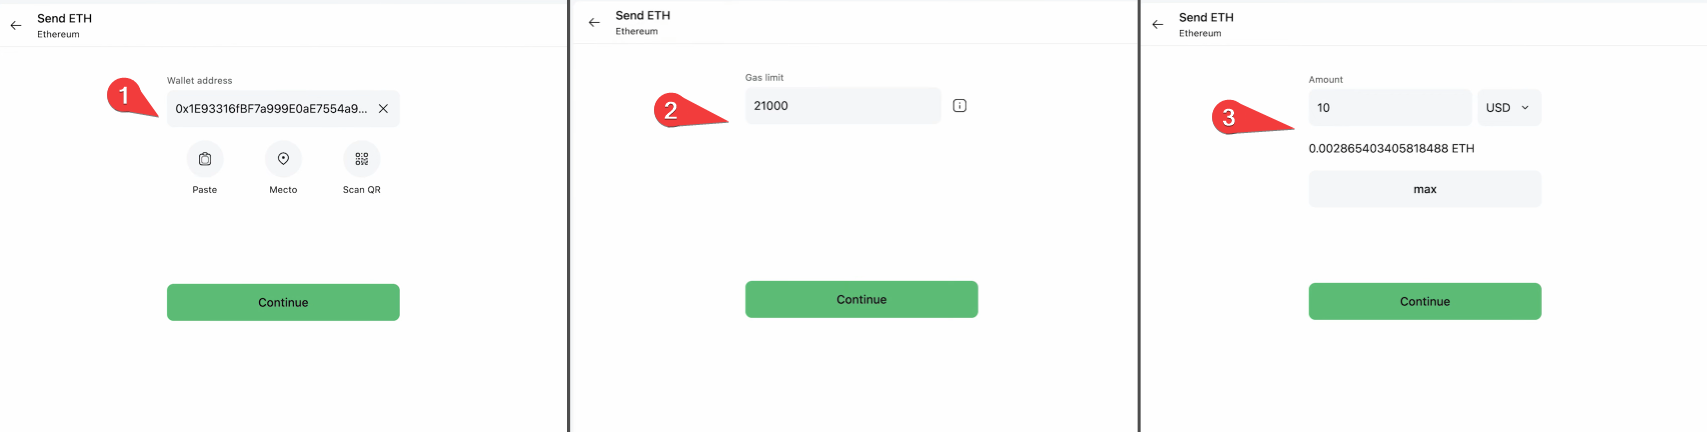
- Enter the recipient's address (or scan the QR code).
- Set the transaction fee.
- Enter the amount (in crypto or fiat), then confirm the transaction by entering the PIN code.
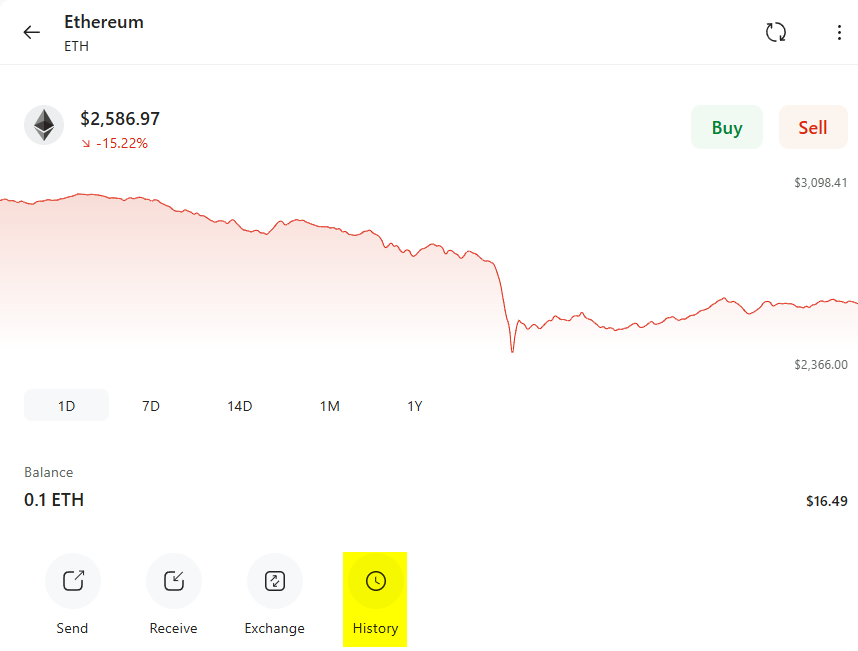
The transaction will be sent, and the balance will appear after refreshing the page.
Checking the balance
Go to the History tab to view the transaction history. Click on the transaction for more details. You can also see how many network confirmations you currently have.
If necessary, you can speed up the transaction by increasing the fee. This is done via the Accelerate button and is quite convenient if you don't want to wait.
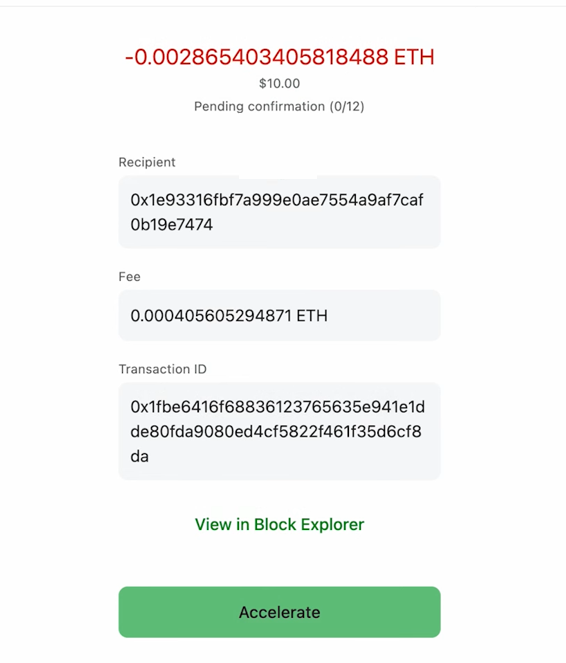
Click View in Block Explorer to get more information about the transaction.
How to add custom tokens
To add tokens, scroll down the list of coins until you see the Add crypto button. Click on it. An expanded list and a token search window will open. If the token you are interested in is not in the list, click Add custom token.

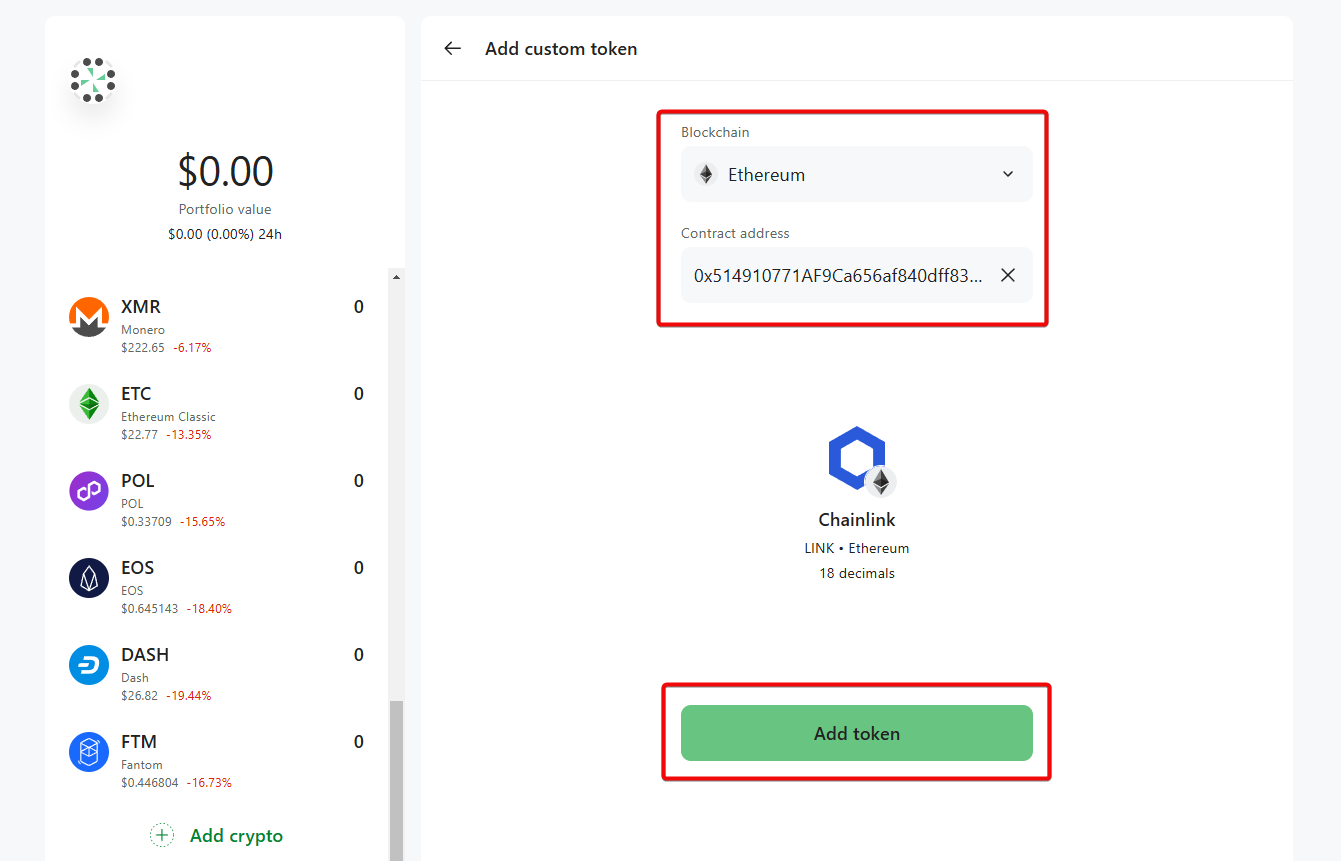
To add new tokens, select a blockchain and enter the contract address. You can find contract addresses in the blockchain explorers. For example, let's add the ChainLink token with Etherscan.
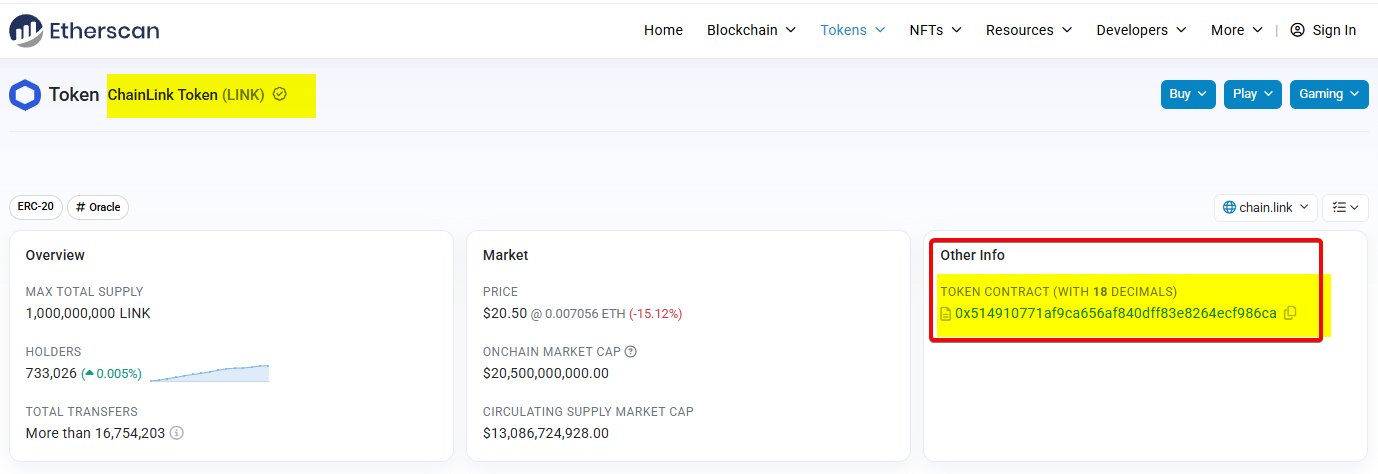
The wallet will recognize the token and you can add it by clicking the Add Token button.
Private key
A private key, along with a recovery phrase, is the heart of any wallet. It will allow you to restore the balance of the selected blockchain and use other wallets if this one does not suit you.
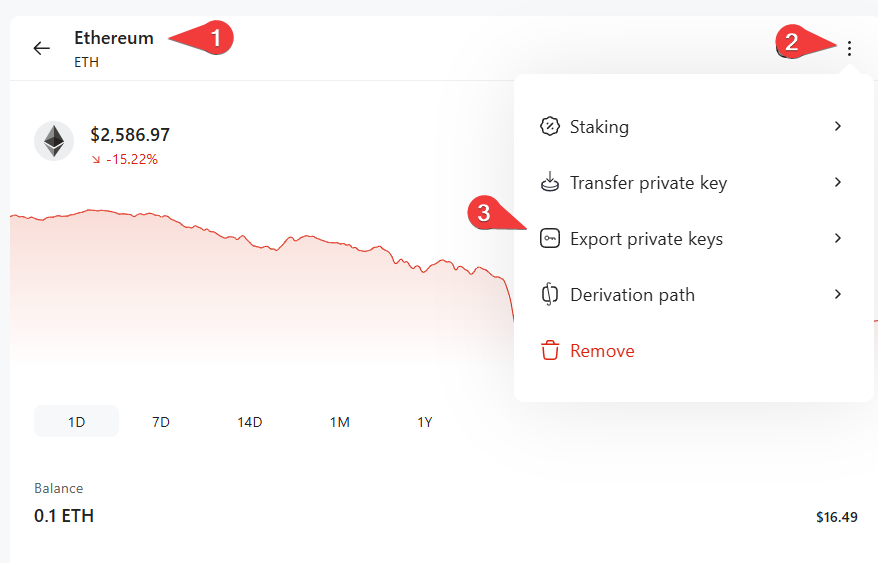
To get a private key:
- Select a coin
- Click on the menu (three dots)
- Select
Export private keys.
A warning will appear that this key cannot be shared with anyone.
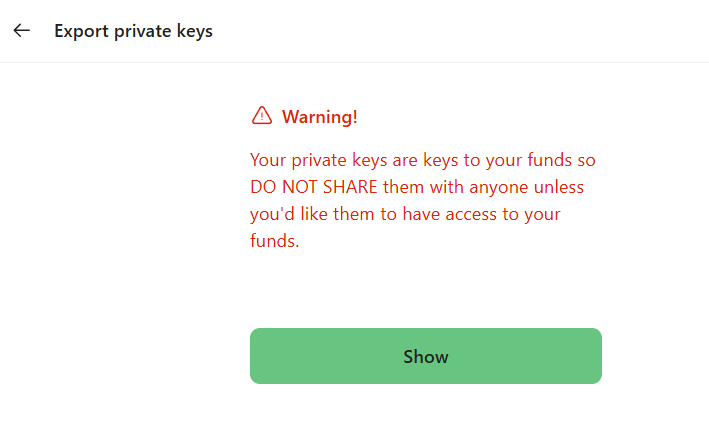
Click the Show button and you will see your private key for the selected blockchain.

Note: We have shown our private key for guidance purposes only. You should protect your keys like the keys to a safe.
WalletConnect
If you want to participate in DApps (such as decentralized finance (DeFi), blockchain games, NFT platforms, or other applications), then connect your wallet using the WalletConnect function.
This open protocol allows you to securely link your crypto wallet to supported DApps without having to share your private keys.
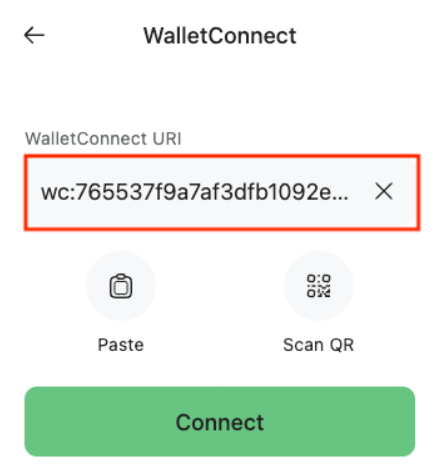
WalletConnect connect via QR code or URI link.
How to use:
- Open the dApp (e.g. Uniswap, PancakeSwap) and click
Connect. - Select
WalletConnect. - Click the QR code icon.
- In Coin Wallet, go to
Settings→WalletConnect. - Scan the QR code or paste the URI link, then click
Connect.
Now you can interact with the DApp: make transactions, manage assets, participate in staking and much more.
Attention: always check the reliability of the DApp and do not provide access to your wallet to untrustworthy sources. Be careful of phishing sites and fakes.
We have covered all the features of the web application, but Coin Wallet is also available in the mobile version. Let's take a closer look.
Mobile App
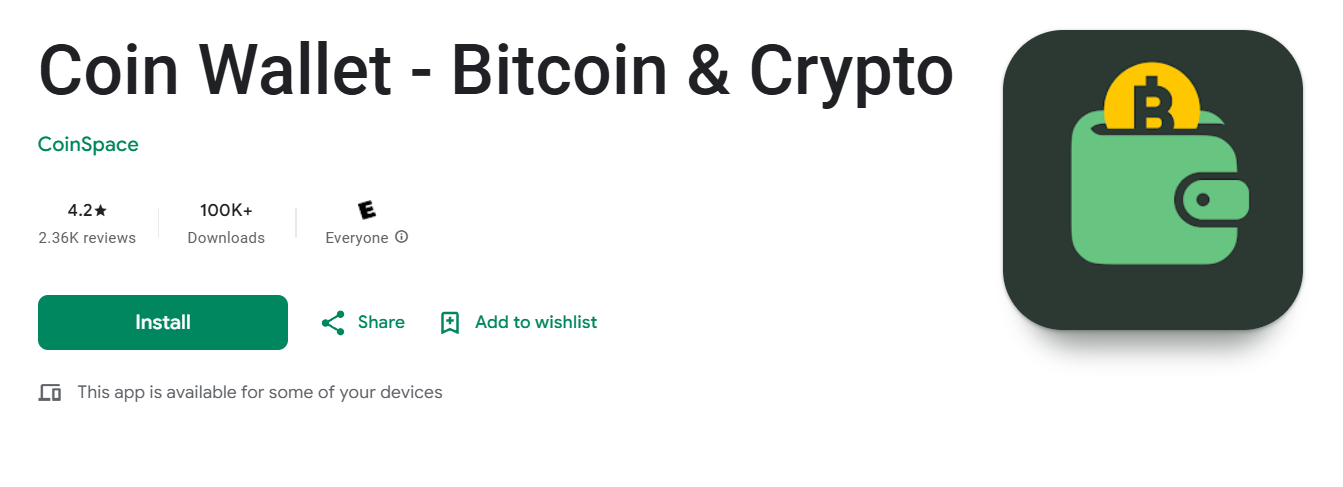
Go to your device's app store and download it.
Recovery
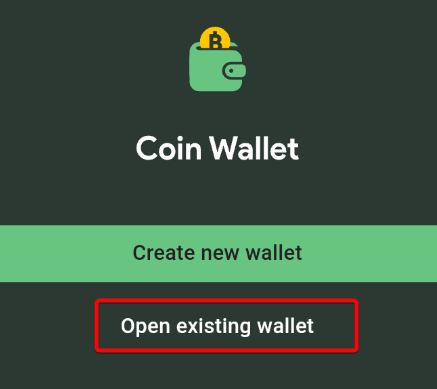
Once downloaded, open the app. Since we already have a wallet, select Open Existing Wallett.
Enter the passphrase in the correct order and click Confirm.
Set a PIN for quick access.
Done! Now you have access to your wallet on your phone.

The mobile version replicates the web interface, including an avatar, portfolio balance, and list of coins.
To receive Bitcoin, select it and click Receive,
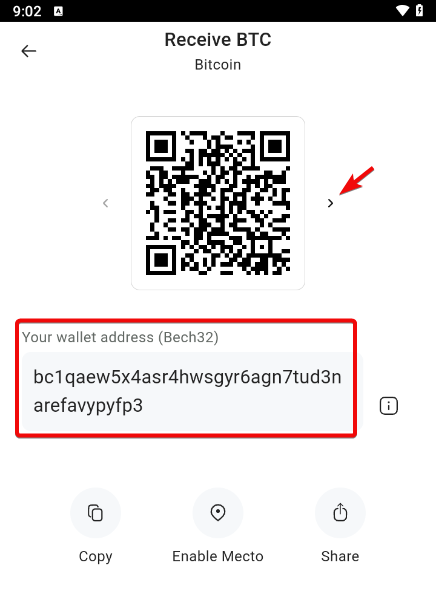
Use the arrows to select the address type (Bech32, P2SH or Legacy). The default type is Bech32, which allows for lower fees and faster confirmation.
Top up your wallet using your address. Return to the previous tab and refresh the page to see the updated balance. You can also click on History to see the transaction and its status.
If you go back to the main menu, you will see the total value of the portfolio at the top, as well as the balance of each coin individually.
The web and mobile versions are synchronized, ensuring that the data is up to date.
Note: If you are not using a personal computer or device, we strongly recommend logging out of the wallet, as only a PIN code is required for access.
Summary, Cons, and Recommendations
Weak branding is immediately noticeable. The wallet is literally called a wallet for coins. It's easy to confuse with another wallet, and Google sometimes suggests correcting your search for Coinbase wallet. But that's not the biggest downside.
The main downside is the refund policy and handling of failed transactions. One Trustpilot user encountered an issue when the USDT transfer fee changed, causing his multiple attempts to send funds to fail. However, the wallet charged fees for each attempt, and these transactions were not reflected in the transaction history.
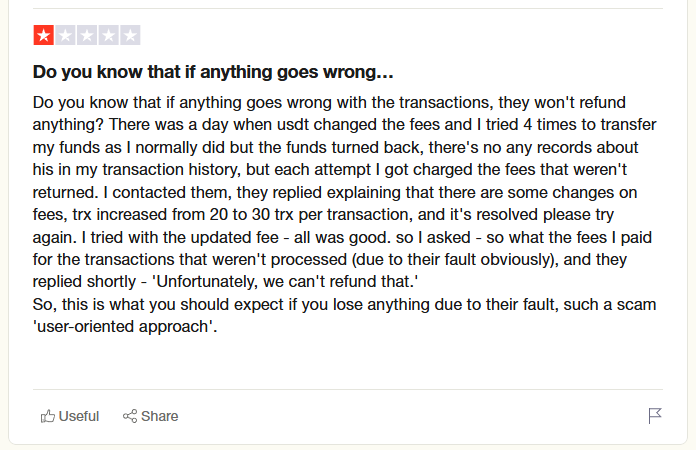
Support acknowledged the change in fees, but refused to return the lost funds, citing the impossibility of return. This suggests that the platform may not compensate for losses even if the problem was not the user's fault, which casts doubt on its customer focus.
While most reviews praise the support service, there are hints of possible delays. This can be critical for those who need prompt resolution of issues, especially when working with finances.
Anonymity is one of the advantages. The wallet does not collect or store user data. You don't need to provide email or personal data to use it.
In addition, it supports work through anonymizers (though only in the mobile version), which further increases the level of anonymity.
Since Coin Wallet is an open source project, anyone can view it, which promotes transparency and trust.
An open wallet rating also promotes transparency, where you can vote yourself or choose a wallet based on other people's ratings.
Technical support
You can contact support in the wallet settings section.
- Mail: support@coin.space
- Help Center: https://support.coin.space/hc/en-us
If you have any questions, please write in the comments.


